
When you submit soil samples for laboratory analysis, you need and expect reliable results. Because the test report is used in making decisions about liming and fertilization, its accuracy can affect your costs and yields. In other words, getting accurate results can make a difference in dollars and cents.
The reliability of the soil test, however, can be no better than the sample you submit. For results you can depend on, it is vitally important that you take samples in a way that accurately represents the soil on your farm.
This publication tells how to obtain representative soil samples and to submit them for analysis.
Where to Take Samples
You can obtain an aerial photograph of your farm from the county Farm Service Agency (FSA). Outline your farm or field boundaries directly on the photo or make a larger and more detailed map using the photo as a guide. Then assign a permanent code to each field or management area. Coding the areas will enable you to keep records of the soil treatments applied and the crop yields obtained from each area. For your convenience in submitting soil samples, assign each area a code consisting of no more than three characters—numbers, letters, or both.
Every soil sample you submit for testing should consist of about 15 to 20 cores taken at random locations throughout one field or area. A sample should include cores from no more than about 20 acres even if the soil appears to be uniform over a larger area.
Keep in mind that each sample should represent only one general soil type or condition. If the field you are sampling contains areas that are obviously different in slope, color, drainage, and texture and if those areas can be fertilized separately, submit a separate sample (consisting of 15 to 20 cores) for each area (Figure 1).
When collecting samples, avoid small areas where the soil conditions are obviously different from those in the rest of the field—for example, wet spots, old manure and urine spots, places where wood piles have been burned, severely eroded areas, old building sites, fencerows, spoil banks, and burn-row areas. Also avoid the fertilizer bands in fields where row crops have been grown. Because samples taken from these locations would not be typical of the soil in the rest of the field, including them could produce misleading results.
Areas within a field where different crops have been grown in the past should be sampled separately, even if you now plan to grow the same crop in the whole field.
Areas that have been limed and fertilized differently from the rest of the field should also be sampled separately.
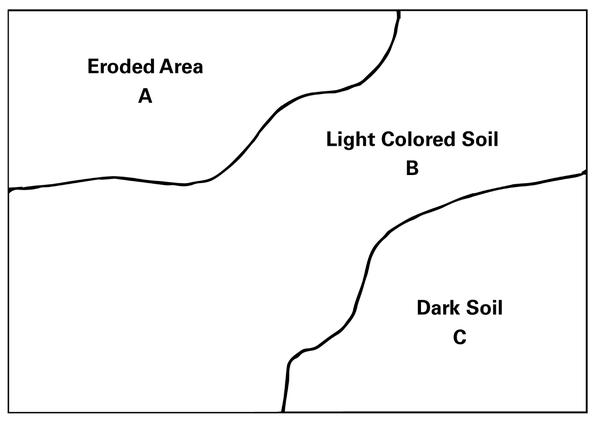
Figure 1. Within each field, collect a separate sample from each area that has a different type of soil.
Sampling Problem Areas
In fields or areas where fertility problems appear to be the cause of abnormal crop growth, samples should be collected in a somewhat different way from samples used for routine testing. At the same time you collect topsoil samples, collect subsoil samples at a depth from 8 to 16 inches, but keep the two types of samples separate. Follow the guidelines for collecting a good, representative sample, taking cores at random locations throughout the problem area even though it may be relatively small. At the same time, collect a representative sample from normal areas of the same field.
More detailed information on collecting samples from problem areas is given in form AD-2, "Diagnostic Soil Sample Information." Copies can be obtained from your local Cooperative Extension center, North Carolina Department of Agriculture & Consumer Services (NCDA&CS) regional agronomists, local agribusinesses, or the NCDA&CS Agronomic Division, 4300 Reedy Creek Road Raleigh, NC 27607-6465.
When to Take Samples
Collect samples three to six months before planting time. You will then have the test report in time to plan your liming and fertilization program before the busy planting season. If you submit samples immediately after harvest in the fall, you are likely to receive the results promptly because the laboratory work load is lighter at that time than in the spring. If possible, try to collect your samples at the same time every year.
Do not collect samples when the soil is too wet because it will be difficult to mix the cores. As a rule, if the soil is too wet to plow, it is too wet to sample.
Sample the soil from perennial or sod-crop areas three to four months before establishing the crop or applying lime or fertilizer.
How Often to Sample
If your farm is in the coastal plain region, it is best to test the soil every two to three years. The sandy soils in that region do not hold nutrients as long as soils in the other parts of the state and are more apt to become acid through the addition of nitrogen. The nutrient levels in the silt and clay loam soils of the piedmont and mountain regions change less rapidly with lime and fertilizer applications. In these areas, soil testing once every four years is usually sufficient.
A good plan is to sample onethird to one-half of your fields each year if your farm is in the coastal plains and one-fourth of your fields each year if you are in the piedmont or mountains.
How to Collect a Good Sample
Tools. Collect your samples with stainless steel or chrome-plated sampling tools and plastic buckets to avoid contaminating the samples with traces of chemical elements (micronutrients) from the sampling tools. Avoid brass, bronze, or galvanized tools. A suitable soil probe is shown in Figure 2.
Make sure that the buckets and sampling tools are clean and free of lime and fertilizer residues. Even a small amount of lime or fertilizer transferred from the sampling tools to the soil can seriously contaminate the sample and produce inaccurate results.
Sampling Depth. For areas in which field crops are grown, collect samples to the same depth that the field is plowed (usually about 8 inches) because this is the zone in which lime and fertilizer have been incorporated (Figure 3).
For fields when perennial crops such as fescue, alfalfa, and turf are being maintained, samples taken to a depth of 4 inches will best represent the crop's lime and fertilizer needs. Where these perennial crops are to be established, however, sample to the regular plow depth.
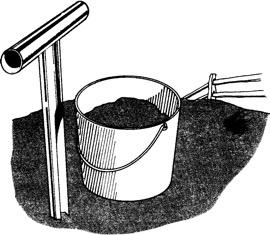
Figure 2. Use proper tools to collect the soil sample.

Figure 3. Sample to a depth of 8 inches in fields plowed for row crops, 4 inches where perennial pasture or turf crops are grown.
Submitting the Sample
Soil samples are analyzed by the Agronomic Division of the NCDA&CS. Each sample must be submitted in a standard soil sample box and accompanied by a completed copy of form AD-1, "Soil Sample Information." The boxes and forms are available from your county Extension Center, NCDA&CS regional agronomists, local agribusinesses, or the NCDA&CS Agronomic Division, 4300 Reedy Creek Road, Raleigh, NC 27607-6465.
Submit your samples only in the standard boxes provided, as shown in Figure 4. Samples sent in bags or other containers will not be compatible with the processing system used in the laboratory. Do not put a plastic bag inside the sample box. Seal the shipping box if the soil samples are from a quarantined area.
The 15- to 20-core sample you have collected will most likely be more soil than the box will hold. Before filling the box, therefore, pulverize the cores and mix them thoroughly in the bucket. Then fill the sample box about two-thirds full with this mixture.
Label the box with the code you have assigned to the area sample.
Remember that the identification can consist of no more than five numbers, letters, or a combination of the two.
Directions for filling out form AD-1, the soil information sheet, are printed on the back of the form. To get the most value from your soil test, take the time to fill in the blanks completely and be sure to list the crop or crops to be grown. Also check to make sure that the code you put on the form corresponds to the code on the sample box and the farm map. Mail the completed form with the sample box, keeping a copy for your future reference.
If you need assistance in interpreting the soil test results or developing a soil treatment plan, consult your local agricultural advisors.
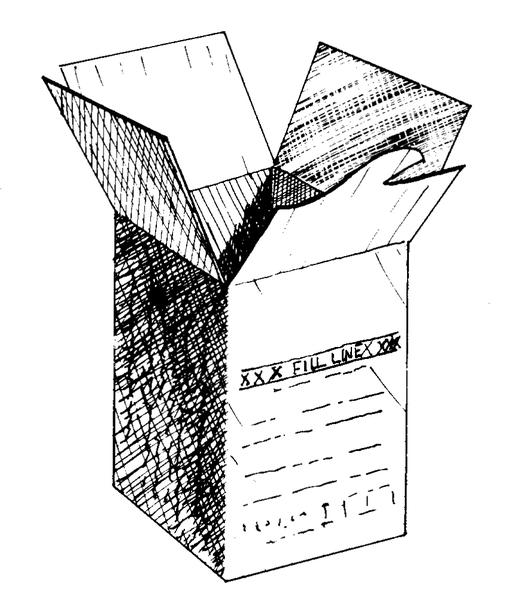
Figure 4. Thoroughly mix the soil sample and fill the standard NCDA&CS sample box two-thirds full.
Acknowledgments
This publication is a revision of an earlier version. The authors would like to thank Carl Crozier, Jack V. Baird, Steven C. Hodges, and M. Ray Tucker for their earlier contributions.
Publication date: June 8, 2022
AG-439-30
There is an alternate Spanish language version of this document here: Muestrear el suelo cuidadosamente: la clave para obtener información confiable sobre el análisis de suelo
N.C. Cooperative Extension prohibits discrimination and harassment regardless of age, color, disability, family and marital status, gender identity, national origin, political beliefs, race, religion, sex (including pregnancy), sexual orientation and veteran status.