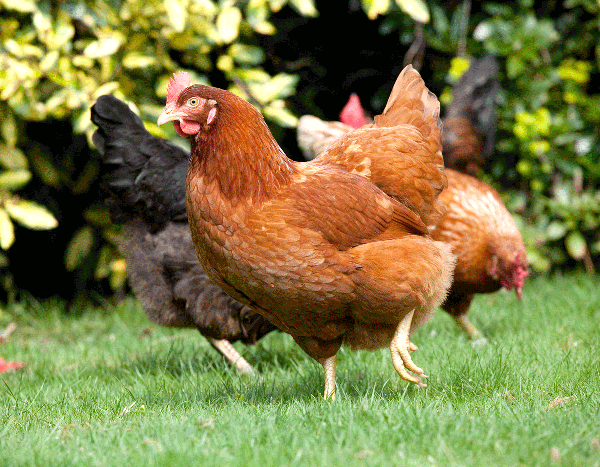
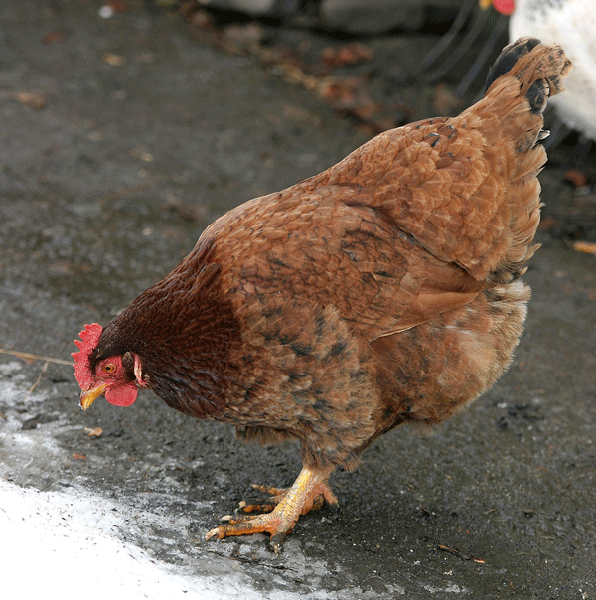
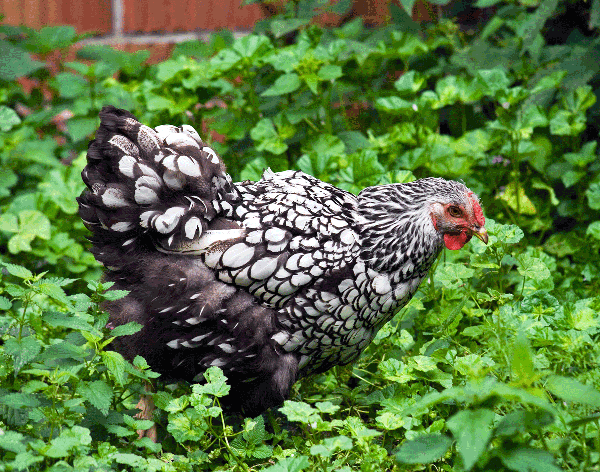
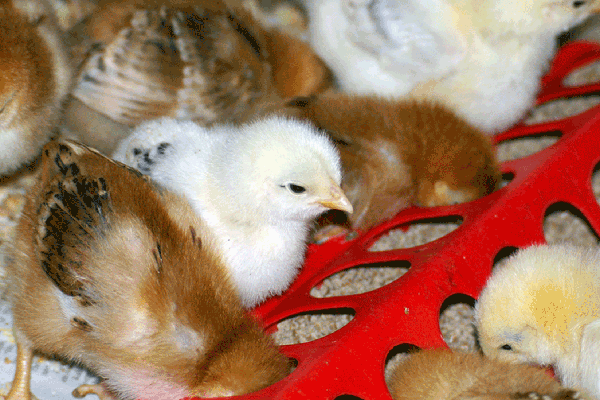
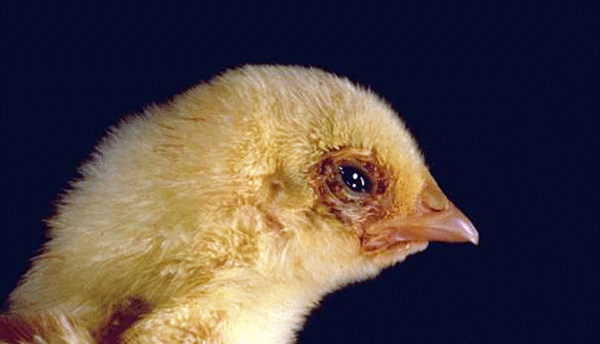
Chickens can be a colorful, beautiful, entertaining addition to your garden, and a few hens in your backyard can supply all the eggs your family needs, along with litter (manure mixed with bedding) that can be used as a source of organic fertilizer. Your hens will supplement their diet with bugs and grubs, and they can turn your garden and kitchen waste into tasty eggs. No wonder you are interested in raising chickens!
Do Your Homework First
Before ordering your chicks, you should consider several issues. First of all, if you live within the city or town limits or in a restricted subdivision, ordinances or covenants may prohibit keeping poultry on your property or limit the types and number of birds you can raise. Even modern ordinances allowing garden hens usually prohibit roosters. A call to your local animal control or zoning office prior to ordering your birds will allow you to make an informed decision on what types and how many birds to order. If there are livestock restrictions that are being applied to pet garden hens, consider gathering a group of like-minded individuals to follow the proper channels to change those regulations so that garden hens are allowed. Use modern ordinances, such as those for Raleigh, as a guide.
Once you’ve determined that it is legal for you to keep poultry, think carefully about your ability to provide the necessary care. A home flock needs fresh food and water every day, you must gather eggs every day, and you must make sure that the flock always has a clean, dry shelter. This means that someone must be available to care for the birds seven days a week, every week. Don’t be surprised, however, if you find a number of your friends are willing to occasionally babysit your flock. Many people are charmed by laying hens and enjoy the chance to visit (hensit) them to provide food and water, knowing they will find a gift of fresh eggs in the nest box.
The Fun Begins: Selecting Your Chickens
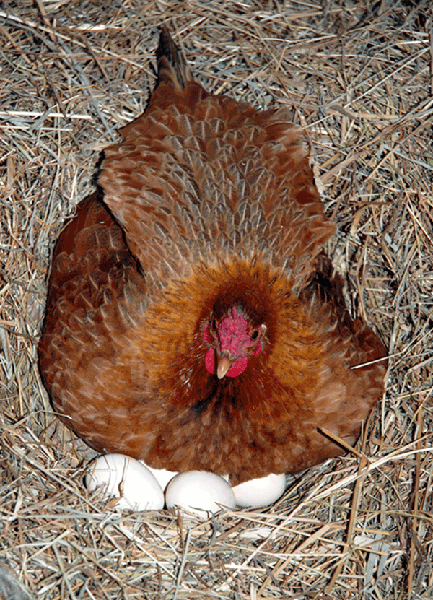
Once you are certain you are ready to raise your own hens, the next decision is how many birds you should keep. Consider the size of the available area for your coop and run, and your individual or family consumption of eggs. Small housing units that may be perfect for an urban or suburban setting may house only two or three birds comfortably. Each hen will produce around two eggs every three days, up to 15 dozen eggs, during her first laying year. The number of eggs produced by each hen then declines yearly. Those same hens will produce about two eggs every four days, or up to 12 dozen eggs in year two. Choose the number of hens that will meet your egg needs (including eggs to give away to friends and neighbors if you plan to share), and that will fit in the housing you have without overcrowding.
Be sure to read the section about housing, and make sure you finalize your coop plans before deciding how many chicks or pullets to order. Keeping space restrictions in mind when making this first, essential decision will ensure that you do not overcrowd your first flock. Think also about your neighbors and about noise: Hens are fairly quiet, and noisy roosters are not necessary to get a full harvest of eggs. Without a rooster, hens will lay unfertilized eggs, which is what most people eat. With a rooster, hens will lay fertile eggs that can be hatched into chicks. For most residential settings, a small flock without a rooster is the best choice. For the safety and health of your hens, flocks of less than ten should not have a rooster.
You can start your flock in one of three ways: with day-old chicks (the least expensive but riskiest, most work-intensive choice); with young female birds, called pullets (slightly more expensive if you buy locally, quite a bit more if you order from a large supplier and must pay shipping, but ready to put into your coop without going through the brooding process); or with mature hens (if you can find a source and can trust that the hens are no more than a year or so old). If you are going with day-old chicks, to make sure you end up with the proper number of healthy laying hens, purchase one or two more sexed (known female) chicks than the final minimum number you hope to have in your flock. This allows for the possible death of a chick or two during brooding.
Unless you know, without question, that you have a good home where you can send unwanted young roosters, do not purchase ”straight run,” mixed male and female chicks, and do not hatch your chicks from eggs for your garden laying flock. It may be difficult to find homes for unwanted roosters, and you do not want to add to the problem of unwanted domestic animals. Tell your day-old chick supplier that you absolutely do not want male chicks added to your order as ”packing peanuts“ to help keep your female chicks warm. Combine orders with others to have enough female chicks so that these extra males are not needed.
If you are purchasing started pullets or already laying hens, purchase a number equal to or only one higher than your final minimum goal. If you start with day-old chicks, consider the time of year. Chicks started in October or November (or pullets from late fall started chicks) will be more productive in their first year than chicks started in March or April, especially if you live in a part of North Carolina with mild winters.
Once you decide how many hens to raise, it’s time to choose a breed. If collecting slightly less than one egg per day, per hen, in that first year is adequate for you, and you would like hardy hens that produce regularly over a longer period of their lives, consider some of the heritage breeds. You can find a list of heritage chickens, broken down into categories based on the current status of the breed, at the Web site for the American Livestock Breeds Conservancy — Conservation Priority List. (Poultry Breed Information, American Livestock Breeds Conservancy Priority List.)
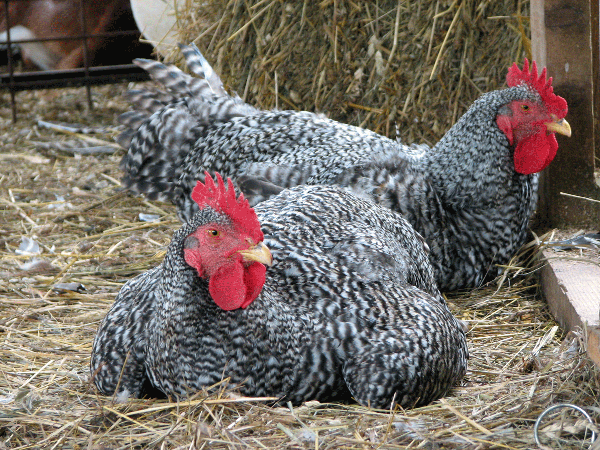
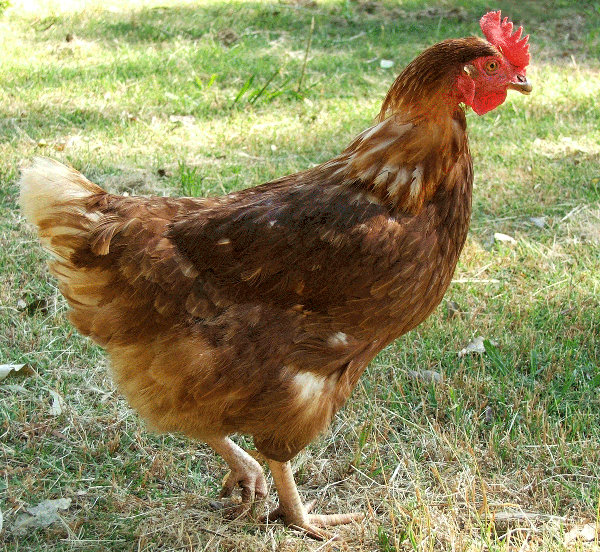
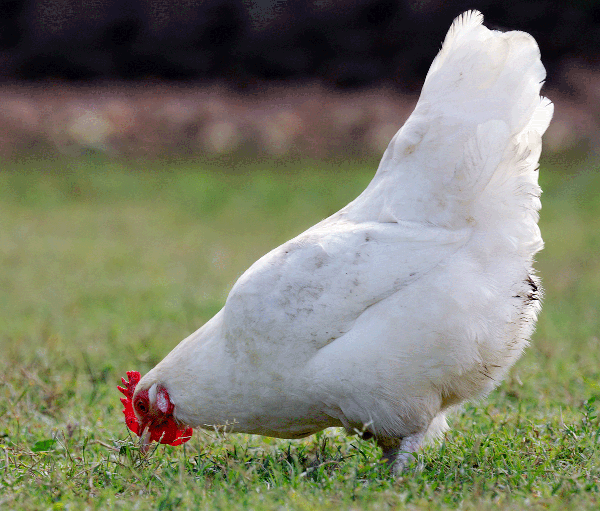
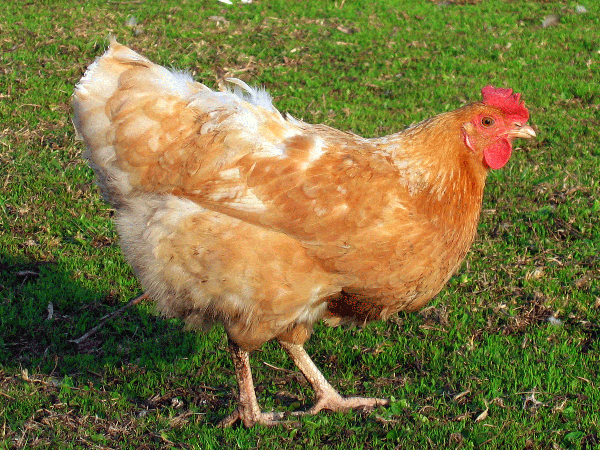
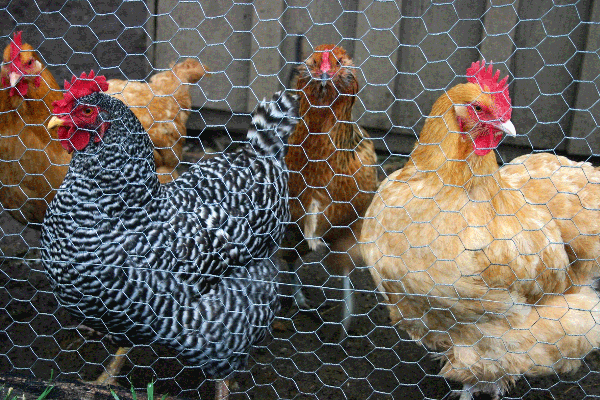
Barred Rocks and Rhode Island Reds are two heritage breeds that perform well in North Carolina, but others will do just as well. Another list of chicken breeds you can review, which describes the color, size, weight, origins, egg color, and egg productivity by breed, can be found online at the ICYouSee Handy-Dandy Chicken Chart: An Alphabetical List of More than 60 Chicken Breeds With Comparative Information. Similar information may also be found in the Purdue University publication Choosing a Chicken Breed: Eggs, Meat, or Exhibition. If your goal is to maximize egg production in the first year, and you don’t mind that your hens may have a shorter productive life, then you may choose a commercial breed designed to produce an egg a day, almost every day, in the first year, such as a Leghorn. Keep in mind, however, that these birds are light and flighty, and that maximum egg production in the first year may come at a price: such breeds are designed for short term, high production, and may not be as hardy, long term, as the heritage breeds. Sex linked hens, which are hens that have a purebred Leghorn parent (the primary breed used for commercial egg production), usually crossed with one of the heritage breeds, are excellent egg layers and are often chosen for home garden flocks.
If you want both high first-year egg production and hens that can be used for stewing meat when production slows after a few years, consider Plymouth Rocks (including Barred Rock), Rhode Island Reds, New Hampshires, Sussex, or Wyandottes. Note, however, that these ”dual purpose“ breeds do not lay as many eggs as the commercial egg-laying breeds and do not produce as much meat as commercial meat breeds do. They are, however, hardy, proven breeds that should do well in a backyard garden flock.
When You Bring Home Your New Chicks, Pullets, or Hens
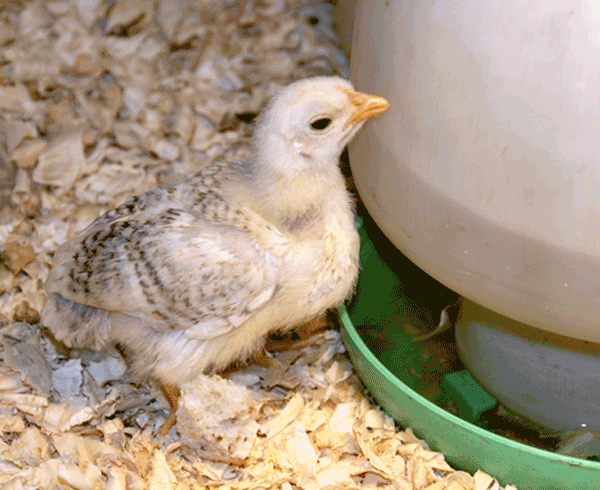
If you decide to start with day-old chicks, you will need special equipment to care for them when they arrive. Day-old chicks must be kept warm in a brooder, which you can construct from a cardboard or plywood box, for the first three weeks or so. A box 2 feet wide by 3 feet long and 18 inches deep will house 25 chicks. Adjust the size based on the number of chicks you are rearing. Place clean, dry wood shavings, dry sand, or other absorbent material in the bottom of the box. You can place a wire floor (½ inch by ½ inch wire) mounted on a frame of small lumber over the absorbent flooring materials, or the chicks can be raised on the absorbent flooring material itself.
Chicks have down rather than feathers for the first few weeks of life and cannot maintain their own body temperature without supplemental heating. Keep the chicks warm by mounting a single light bulb (100 watts should be enough in mild weather) inside a reflective shield (such as a metal can or mechanic’s light) about 8 inches above the floor of the box.
If the chicks huddle under the lamp, a sign that they are cold, the lamp may be lowered slightly, or a higher wattage bulb may be used. If the chicks move away from the light or are panting, a sign that they are too hot, raise the bulb or lower the wattage. Leave the bulb on all day and night during the first three weeks. By then the chicks should be about half feathered, and heat can be reduced. When well feathered, the chicks can be moved out to an unheated poultry house, but do not mix new pullets with older hens. They may not be able to compete for food and may be seriously injured by the hens.
If you start with fully feathered young hens (pullets), or mature laying hens, you will not need supplemental heat. These birds can be placed directly into your enclosed, dry hen house. Place 2 to 3 inches of pine shavings (can be purchased in bales as animal/pet bedding) on the floor of the enclosed coop space to help absorb moisture from the chicken manure. Stir the bedding daily, and remove it when it no longer is absorbing moisture, or when you begin to notice a strong odor. The bedding/manure mixture can be composted to use as fertilizer.
Feeding
When they arrive, your chickens will need to be fed. Fresh feed and water are critical for raising healthy chickens. Feed can be purchased from your local hardware, feed, or farmer’s supply store; specialty feeds can be purchased online. Chickens of different ages will need different feed formulations. Chicks raised for egg production will eat starter feed from hatching until 8 weeks old, grower feed from 8 to 12 weeks old, developer feed from 12 to 21 weeks old, then layer feed from that time on. Place feed for new chicks in shallow troughs. Allow one linear inch of feed trough per chick initially, and increase to two inches per chick after two weeks. A hen will eat about five pounds of feed per dozen eggs produced. Each hen therefore needs about 1⁄3 pound of feed a day while laying.
The best feed to support an egg-laying hen will consist of about 18 percent protein. This is the level you will find in most commercial laying feed pellets or crumbles, or you can mix your own feed to achieve the proper balance. Although hens love mixed scratch grains (cracked corn mixed with other grains), too much will make them fat. Feed no more than 1⁄4 pound of grain per five hens per day. Hens also may be fed table scraps and garden products. To avoid spoilage and rodents, feed only as many scraps as the hens can consume in 20 minutes or so. You also can supplement your layer feed with range (pasture), or other materials. All hens over one year of age should get a calcium supplement, such as crushed oyster shells, and grit should be made available to all hens.
Keep your chicken feed in a metal can with a tight-fitting lid. Mice and rats will seek out chicken feed and can chew through even the strongest plastic or wood containers. Make sure that there is fresh feed available to your garden hens daily, especially in the early morning and early evening. Birds that are range fed (allowed to forage in the lawn or other areas of the yard) will need supplemental feeding.
Fresh water must always be available for all chickens, of all ages.
Housing
In deciding how many chicks or hens to purchase, you must consider the available space. Chickens should be kept in a confined space for their safety. This space is generally called a coop. The coop is composed of an enclosed, dry shelter and a surrounding fenced, outdoor area. Coops can be simple or elaborate in their design and construction. The following detailed specifications will help you design the actual housing for your backyard flock.
You can keep your hens in something as simple as an old but watertight doghouse, or as fancy as a custom-made hen-house that blends with the architecture of your home, as long as the housing provides sufficient floor space, protection from the weather and predators, ventilation without drafts, a place to roost, and nest boxes for laying eggs.
Housing should provide free air movement during hot months, while keeping the hens warm in the winter. It is crucial to ensure that the coop is predator-proof. Predation is the most common cause of mortality in small poultry flocks. Make sure you use a strong wire for your run and that you secure it well to the outside of your upright posts. Wire secured on the inside of the support posts may be pushed in by a persistent predator who wants to gain access to your hens.
A truly predator-proof coop area will include wire buried at least 6 inches deep around the perimeter of the run. Alternatively, you can bend the wire outward from the spot where the fencing meets the ground and extend it for at least 12 inches across the soil surface, going away from the coop. Secure the wire to the ground with deep landscape staples to keep predators from pushing under the edges.
Finally, for a fully secure run, you will need a wire or solid roof over the entire run area. Designing your coop and run to be long and narrow, like the example, makes it easier to fully enclose the area. For practical reasons, you may want to consider building your hen house so that the size and shape will allow the building to be used for storage or some other purpose if you decide to stop keeping poultry after a few years.
In designing your housing, remember that low-density housing (more space per bird) results in less stress for the birds. Less stress means less pecking and fewer health issues. Consider providing considerably more than the minimum recommended living space per bird, with the opportunity to free range in a grassy area on occasion as well. Allow a minimum of 2.5 to 3.5 square feet per bird inside the weather-tight coop and an additional minimum of 4 to 5 square feet per bird in the fenced, outside area. Cover the floor of the inside, watertight area with about 4 inches of moisture-absorbent litter, such as wood shavings. Stir the litter often to keep it dry and to prevent caking. Dry sand is a perfect ground cover for the outside run area of the coop.
You may find recommendations for as little as only 1.5 to 2 square feet of total coop space for light breeds such as Leghorns or Buttercups, and 2 to 2.5 or 3 square feet of total coop space for larger, brown-egg laying breeds such as Rhode Island Reds. These recommendations are for large-scale, commercial egg production facilities. Keep in mind that these are the minimum spaces in which the hens can survive and produce eggs. The smaller the space, the more likely it is that your hens will experience stress.
When designing your chicken coop and run, you must consider these species-specific needs: social housing (a chicken should never be left alone, but should be caged with other chickens), laying nests, elevated perches, natural light, and areas for pecking, scratching, and sand or dust bathing. Chickens naturally spend 35 percent to 50 percent of their day scratching and pecking for food. If they do not have an adequate area in which to forage, they tend to peck, pull, and tear at objects or at each other. Be sure that you give your chickens enough space to thrive.
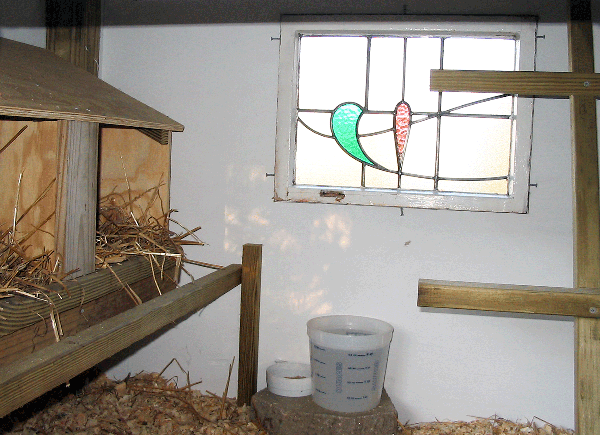
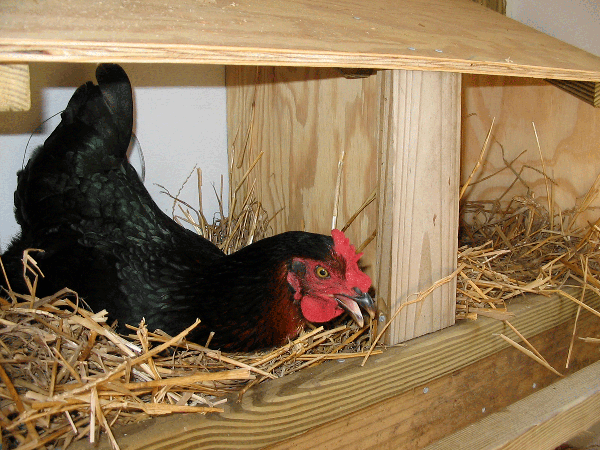
You will need at least one nest box for every four or five hens. The nest box should be located off the floor, inside your weatherproof, enclosed coop area. A nest 12 inches by 14 inches should be large enough for any breed. Nests should be located at the rear of the hen house away from windows, as the hens prefer darker areas for nesting. Each nest should have a board on the front of adequate height to hold in a 6-inch deep layer of shavings or straw. Design your coop so that you can easily reach into the nesting box (a hinged door accessible from the outside of the coop works well) to gather eggs and clean the nests.
In addition to the nest space, each bird should have a minimum of 9 or 10 inches of perch, or roosting space, within the weatherproof, enclosed housing unit. Make the roosts out of 2-inch by 2-inch lumber with the upper edge slightly rounded, and place them below the entrance level of the nests, preferably in an area of the enclosed housing that is separate and distinct from the nests. Allow about 14 inches of horizontal distance between perches. For feeding, allow 3 linear inches of feeder space per bird, and make sure clean fresh water is available at all times.
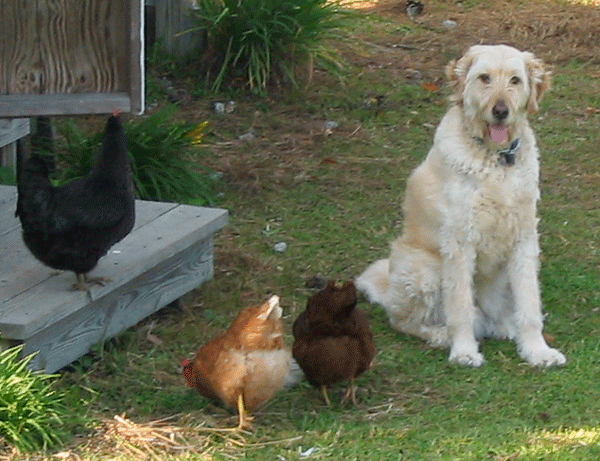
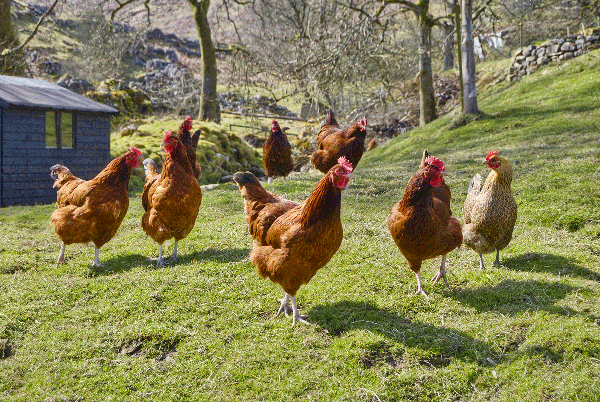
Many small home flocks are allowed at least some time out of the coop or run to range more freely in grassy areas. If the hens are to be allowed outside of their own fenced, outside run, the ranging area should be fenced, especially if your yard is small and there is any chance the hens will wander off your property. If you plan to allow your hens some time to free range within your fenced yard, consider letting them out within the hour before sunset, as they will naturally return to their coop on their own when the sun goes down. You can just close the door behind them. This is much less stressful for the hens (and for you) than trying to herd them back to their coop after time out in the yard. Hens don’t herd well.
Sample Coop Designs
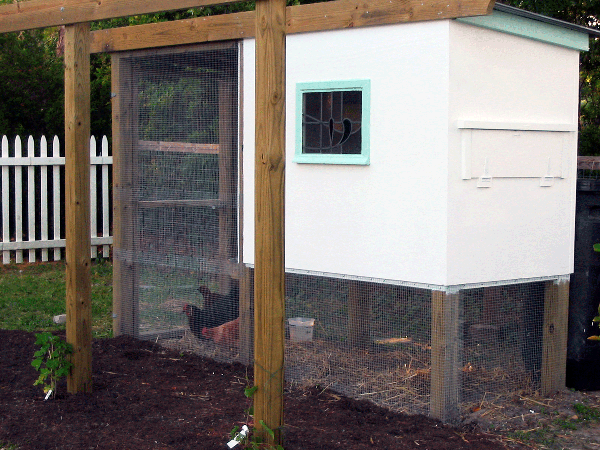
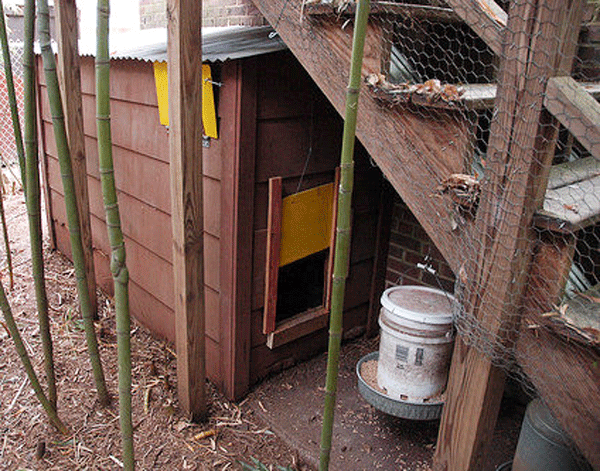
Coops can be small or large, simple or extremely intricate. It’s up to you! These plans show a simple, medium-sized coop which, when coupled with an attached run, can readily hold four or five hens and give them plenty of space to nest, roost, and scratch. Note that the coop is elevated to allow a dry, shady spot under the house for the hens to take dust baths. The elevation also allows you to gather eggs and clean out litter without stooping or bending.
To make the attached run, sink posts into the ground at the end of the coop where you find the small entry door for the hens, spacing them just wide enough apart to continue the lines of the coop itself and leaving enough post so that the roof of the coop is high enough that you can easily enter the run while standing upright. Extend the run out at least 6 feet from the coop. Dig a trench at least 10 inches deep along the outside of the new run outline. Your outside wire can then be attached to the posts and buried below ground. This gives you a long, narrow run that is attached to the coop and that protects the hens from ground predators.
The plan includes a full-sized door at the end of the fenced area so you can access the entire pen. The enclosure is just wide enough that you can cover it with a strip of metal roofing or more wire mesh. One of the long sides of the enclosed coop has a hinged, clean-out door, opening flush with the floor, which can be opened to add fresh wood shavings or to clean out spent litter. The other side has a fixed window. Try to position the coop so that the window faces the morning sun to provide lots of light, but not as much heat in the summer.
You can add a small window to the clean-out door as well. One of the short sides has a fixed opening that the hens use to hop in and out of the coop. Attach a roost in the outside run, about 12 inches in front of and just slightly below this door, to ease entry and exit from the coop. The best part of the coop is the long, narrow egg door at the other short side of the coop. This hinges down to reveal two openings, one going into each of the two nesting boxes. You can gather eggs without stepping into the coop or run. In this photo the coop has an attached arbor, which can be used for grapes, kiwi, or flowering vines.
Tiny coops with an attached run, designed for two hens, can be purchased ready made. An opening in the side allows for egg collection, and the whole top pops off so that the inside can be hosed clean. These are expensive, but may be just right for some situations.
For something similar but less expensive, an old dog house can be attached to a small covered run, and a PVC and wire day pen can be used to move the hens around the yard for free time.
Coop and run options are unlimited. Design yours to fit your needs and your space.
Egg Production
Young hens (pullets) begin to lay at 16 to 24 weeks of age, depending on breed and environmental conditions.
Commercial egg-laying operations regulate the number of hours of light their chickens receive each day as a way to ensure an even, steady production of the maximum number of eggs. Small backyard garden flocks usually are not placed under this light regulation regime, with the understanding that egg laying will slow or even stop during the darker months of the year. Go ahead and let your hens rest during the shorter daylight months of the year; egg production will begin again when the days lengthen in the spring.
If you wish to regulate lighting to maximize short-term egg production, you will need 14 to 16 hours of daylight each day in the fall and winter months. Naturally decreasing day length in the fall or early winter frequently causes hens to molt (natural process by which a hen replaces its feathers) and stop laying for about two months. This is normal and not a cause for concern.
Whatever the breed, good laying hens will have large, soft, red combs and wattles and bright, prominent eyes. Remember, however, that hens of different breeds may well have combs of different sizes and shapes. As good layers mature, the yellow pigmentation of the vent, eye ring, ear lobe, beak, and shank (ankles) will fade from yellow to almost white. The yellow color comes back when the hen stops laying for any period of time. Twelve hens will produce an average of 9 or 10 eggs per day for several months, with the peak production at 32 to 34 weeks of age, and then may slow down until you are averaging only 6 eggs a day by the 12th month after laying begins. Most eggs will be laid in the morning and should be gathered as soon as possible, and twice a day if possible.
Dirty eggs should be cleaned with a dry cloth. Really dirty eggs may be cleaned with a warm damp cloth or with warm egg-washing compound. Clean, dry eggs should be placed in cartons, with the small end down in the carton and the large end facing up, and refrigerated as soon as possible. Unless you are a very careful manager and find a niche market, you will not make a profit or even recoup your costs through egg sales with a small home flock. Some home flock ordinances prohibit the sale of eggs, and each state may further regulate such sales. Think carefully before you plan to use your eggs as a source of income.
Commercial operations cull (sell) hens that are no longer producing eggs at a high rate. This may or may not occur in your home flock. If you do want to cull nonproductive hens, look for those with pale, hard combs and wattles, small body size, and yellow pigmentation in the vent, earlobes, beak, and shank.
Flock Health
(Growers of organic poultry should refer to the USDA List of Allowed and Prohibited Substances before using any recommended products. All herbal remedies mentioned are believed to be effective, but there are no data to support their effectiveness in treating poultry diseases.)
”An ounce of prevention is worth a pound of cure” may sound old fashioned, but it is especially true for poultry. There are very few veterinarians who treat chickens and other poultry. This means that when a disease occurs in your flock, you have few options to treat it and prevent its spread to the rest of your flock. Most poultry diseases can be prevented by providing good management and excellent sanitation in the hen house and yard. Make sure you have dry litter; fresh dry food; clean, fresh water; good ventilation; and a healthy diet. Understanding causes of disease will help you prevent problems in your flock.
Diseases are generally divided into two groups: infectious and non-infectious. The term infectious refers to diseases that can be spread from one bird to another. Contagious is another term for spreading disease from one bird to another. Non-infectious diseases are not transmitted from one bird to another but are a result of environmental conditions such as inadequate nutrition, physical or traumatic injury, chemical poisons, or stress. The flock is generally subject to the same environmental conditions, so multiple birds are likely to exhibit the same symptoms of non-infectious conditions. It is important to identify the cause(s) of non-infectious diseases and remove them from the birds’ environment.
Infectious Diseases
Infectious diseases are caused by organisms generally too small to see without a microscope. These organisms invade the bird’s body and attack healthy cells, resulting in disease. Disease-causing organisms can generally be divided into four groups: bacteria, viruses, parasites, and protozoa. Although these groups vary in size and other characteristics, they all like moisture, shade, and rather cool conditions and can be introduced to your flock in manure or other body secretions from an infected flock or from free-living birds.
Manure tends to be transported by people, borrowed equipment, or during bird shows or auctions. Infected flocks pose a risk only if you visit those flocks and return with the organisms on your boots or clothing. Free-living birds generally pose the greatest risk to flocks near ponds or other water sources, but spilled feed will attract birds of all types, as well as rodents.
Even when taking many precautions, there may come a time when an organism lands on your property and infects your birds, despite the uncrowded, dry, well-ventilated area you have created. It can be days to weeks before you realize that your birds’ health has been compromised. This incubation period occurs from the time the birds become infected until they exhibit clinical signs. Unless the birds are sneezing or limping, you may not notice more subtle signs. Birds tend to mask signs of illness until they are quite sick.
Parasites
Of the four types of organisms that routinely infect birds, parasites are the only ones that you may be able to see with the naked eye. Parasites can live inside the bird or outside on the skin, shanks, and feathers.
Internal parasites: What you might see. Although you cannot see the parasites inside the bird, sometimes parasites are visible in fecal droppings. A visible worm is an adult worm, so your birds have been infected for at least several weeks if you see one. There might be loose stools with or without evidence of blood. Internal parasites require either oral treatment or injection. Visit your farm supply store and ask for help in finding the appropriate product for treating intestinal parasites. Birds should generally be treated at least two times to break the developmental cycle.
Conventional parasite treatments generally kill adult worms but not eggs, which means that a second treatment is needed to kill any leftover eggs that hatch out after the initial treatment. The interval between treatments should be 2 to 3 weeks. Follow label directions and always adhere to withdrawal times for eating eggs or meat from treated birds.
For those growing organic birds, some essential oils from plants have been shown to kill some parasites in a laboratory setting. These studies have not been validated in live poultry. Conventional dewormers are very safe and are a good choice if permissible. To prevent reinfestation, clean the coop and the run thoroughly, allow plenty of sunlight and air movement throughout and, if possible, move birds to a new location for a time.
External parasites: What you might see. Infestations with mites and lice can be irritating to your birds. You might see areas of skin irritation on your birds, and they may try to scratch themselves by rubbing against objects within their reach. You may notice feather loss, red irritated skin, or small scabs on the skin. You may see mites on the shanks, which appear white and powdery. Medicated dust baths using either an insecticide powder or diatomaceous earth should rid the birds of their parasites. These products change over time, and the ones currently approved for use often can be found at the same store where you purchase your feed. Note that some products will require that you discard any eggs produced for a period of time after use.
If a medicated dust does not work, an injectable insecticide might be needed. Again, herbs such as fleabane, pyrethrum, and garlic are believed to be effective against external parasites in dogs, but there are no data to support those claims in poultry. Whatever treatment you consider, it is important that birds be treated. Birds with parasites will, at a minimum, not produce eggs or meat as efficiently and if the infestation is severe, they could die.
Bacteria, Viruses, and Other Bugs
If your birds become infected with bacteria, viruses, or protozoa, you cannot see the microorganisms, but you will see the effects of these organisms on your birds. Bacteria are able to grow on their own either inside the bird or outside in the environment. Although bacterial infections can be treated with antibiotics, signs of a bacterial infection are generally the same as signs of infection with viruses. The organisms target a certain organ system (such as lungs, intestine, or heart) and the signs of disease reflect damge to that organ system.
Respiratory disease: What you might see. When the lungs, upper airway, or sinuses are infected with disease-causing organisms, you might notice watery eyes, discharge from the nasal passages, swelling around the eyes, changes in the sounds made by the bird, or open-mouth breathing. Birds with a respiratory infection exhibit the same general signs as you do when you have a cold or bronchitis. Respiratory infections are most commonly viral or bacterial but can also be caused by mycoplasmas and protozoa.
Respiratory diseases tend to spread through a flock if not caught early. Isolating birds with symptoms might slow or stop the spread. When working with groups of healthy and unhealthy birds, always tend the healthy birds first to help prevent disease spread. Treatment with antibiotics is appropriate if your birds have a bacterial disease or secondary bacterial infection brought on by a viral infection. Antibiotics do not affect viruses. Organic producers can administer vitamins and electrolytes to support the immune system and promote adequate hydration. Herbal remedies such as echinacea, ginkgo, and lemon balm have been studied in humans and in the laboratory but not in poultry.
Intestinal disease: What you might see. Conditions affecting the intestinal tract generally result in a change in the amount, consistency, or look of the bird’s normal fecal droppings. A decrease in the frequency or amount of feces produced is generally related to how much feed is going into the bird. Birds with disease problems will often not eat well or drink as much as usual so will not defecate as often or as much as normal. During hot weather, it is normal to see loose stools, as birds drink water to cool themselves and the excess water exits the body via the feces. If disease is present, your birds can become dehydrated from fluid loss in the feces. Birds can be given electrolytes and vitamins in their drinking water to support hydration.
Because intestinal diseases can be caused by bacteria, viruses, or protozoa, it is generally difficult to determine the exact cause of the problem. Supportive care, such as providing electrolytes and vitamins, goes a long way in helping your birds recover. If antibiotics are used, the normal bacteria present in the intestine may be affected. If so, the gut is susceptible to colonization with bacteria that may not be beneficial.
Probiotics (products that contain ”good“ bacteria) can be purchased and used in these birds, though if you are treating with an antibiotic, the probiotics should be given after the antibiotic is stopped so that it will not destroy the beneficial organisms in the probiotic formula. Treatment of diarrhea often includes some type of astringent such as vinegar or copper sulfate (not on the National Organic list of allowed substances). Pay close attention to the fecal droppings to determine when the birds are recovered.
Coccidia: What you might see. Evidence of blood in the fecal droppings could indicate a viral, bacterial, or protozoal infection. Protozoa can be particularly detrimental to your birds. Coccidia (a protozoal organism) is common in poultry and is almost impossible to eradicate from your property once it gains entrance.
Once coccidia are introduced onto your property, your goal should be to reduce the numbers of organisms present in your flock’s environment. Coccidial infection results in blood in the stool and failure to absorb nutrients. To avoid risks related to coccidia, keep your coop clean and dry, and place it in an area that has good daily exposure to sun, or rotate your hens from one area of your yard to another. You also may choose to select feed that contains coccidiostats to prevent severe infections.
If your flock gets a coccidial infection, steam clean as many surfaces as possible and move the birds to an area that has not been infected. A sunny area can recover and be ready for hens again in 6 months. A shady area may need to be left open for a year or more. Hens that survive an infection and are moved to a clean area may develop some resistance, but they may still suffer or die from infection again if weakened for any other reason.
Disease of the brain: What you might see. You may notice that one or more of your birds is unable to stand, walk normally, or even right themselves. Lack of coordination is often a symptom of disease involving the brain. Brain disease is generally life threatening, and there is very little you can do to remedy the problem. Support the bird(s) by providing a safe environment and access to water and feed. Herbal treatments have been used in mammals, but no data exist for their use in poultry. Birds exhibiting signs of brain disease are not likely to recover, so a bird with these symptoms is a good candidate to take to a diagnostic lab.
Knowing what organ system is affected by a disease agent does not tell you the exact cause of the disease, but it does narrow down the list of possibilities. Tender loving care (TLC) can go a long way with all sick birds. Be sure that sick birds are not being pecked by the healthy birds. You may need to isolate the sick birds, and you should offer them food and fresh water. Always keep sick animals well hydrated.
Without a laboratory diagnosis, whether or not to use antibiotics becomes a judgment call. Antibiotics are effective in combating bacteria only and do not affect viruses, protozoa, and parasites. Use antibiotics only if you are fairly certain that you have a bacterial disease. The only sure way to know this is by sacrificing one bird and submitting it to the diagnostic lab. Even then, the antibiotics may reduce the number of the beneficial bacteria in the birds’ intestines, resulting in diarrhea.
Proper care is essential to help the birds fight the disease, and then they will likely become at least partially immune to that particular organism, much like children used to be allowed to ”catch” chickenpox to develop immunity. This approach means that some birds may not survive. The alternative is to take one of the sick birds to a laboratory for a disease diagnosis. Most states have veterinary diagnostic laboratories. The laboratory system in North Carolina is part of the North Carolina Department of Agriculture and Consumer Services (NCDA&CS).
Birds submitted to the diagnostic lab will not be returned to you. Call the lab first for clear instructions on how to submit the bird. The information gained from this laboratory submission will help you deal more effectively with the rest of the flock. The NC Veterinary Diagnostic Laboratory System site shows the location of every lab in North Carolina, as well as contact phone numbers. The laboratory system also provides blood testing services, at your home, to test for many common diseases. Information about this service also can be found on the NCDA Web site.
Environmental effects may also cause birds to exhibit some disease-like symptoms. Open-mouth breathing, as well as watery feces, can be due to hot weather, when birds drink more water than usual as they attempt to cool down. Use common sense when assessing these situations and think about how you feel when you are sick. Although birds are different from humans, they do share some common reactions to their environment and to disease challenges.
Disease prevention remains your most powerful tool. Although keeping your coop area clean, dry, and sunny is the best way to prevent diseases in the first place, other tools can help you as well, such as vaccination. If you purchase day-old chicks and the breeder offers the service, you should have them vaccinated for Mareks disease and may also have them vaccinated for other diseases such as and Newcastle disease. Good sanitation and a dry environment also help prevent and control internal parasites. External parasites, such as mites or lice, may require treatment.
Non-infectious Conditions
Non-infectious diseases are are caused by environmental factors, and they are not contagious. It is not always apparent whether the condition is infectious or non-infectious. Because diseases can be related to environmental factors, and birds in a flock share the same environment, you may see more than one bird exhibiting signs at the same time.
Non-infectious diseases can be caused by nutritional deficiencies or excesses, toxins in the environment or feed, traumatic events, or age-related issues. Many of these conditions are preventable and within your realm of control. Others are not.
Feeding a commercially available food milled by a reputable feed mill almost assures that your birds have a well-balanced diet and will not exhibit clinical signs of any nutritional deficiency. If a bag of feed contains a toxin, multiple birds eating the feed will generally show signs at the same time. If this happens, remove all feed from the coop and submit a feed sample to the NCDA&CS feed lab for analysis.
Birds are curious and can find sources of toxic substances that you may not think are a problem. It is best to keep the bird’s area completely clear of anything other than feed, water, and pasture or grass for grazing. Traumatic events include anything that causes bodily harm to birds, including predators. Broken legs or wings can occur in other ways, and causes of these conditions should be investigated and corrected.
Birds are quite resilient and can generally recover from traumatic events that aren’t too severe. Once again, TLC is important. Injured birds should be isolated from the flock to prevent pecking and ensure adequate feed and water. Age-related events such as osteoporosis, tumors, and reproductive problems are common in older birds, especially hens. Much like humans, older birds are susceptible to diseases related to age and should be observed to be sure that the younger birds are not limiting the older birds’ access to food, water, and a pleasant environment.
A common non-infectious problem in egg layers is egg binding, which occurs when a hen is unable to deposit her egg in the nest. There is no one known cause of egg binding, but it tends to occur in birds that produce a large number of eggs, in old hens, or in birds that have been stressed. Birds that are egg bound tend to act broody or start to make a nest. You may be able to feel the egg through the body wall, or there may be a prolapse of the oviduct through the cloaca.
To be certain that there is an egg stuck in the bird, you can ask a local veterinarian to x-ray the bird. Birds that are egg bound should be kept in a warm environment with plenty of water and vitamins. If the hen cannot pass the egg in several hours, a warm enema containing a small amount of mineral oil can be administered, or the bird can be placed into warm water (up to her neck), which has been reported to be successful in exotic birds.
Mortality Disposal
Mortality in small flocks is more likely to occur from predation than disease. Either way, you need a plan to deal with the remains. Depending on the size of your flock and how often your birds die, you may need to have a mortality disposal system in place. Most growers with fewer than 25 birds bury their mortality on the property. Approved methods for disposal include burial, composting, and incineration. It is best to dispose of birds, particularly birds that died from an infectious disease, on your property rather than removing them, which could result in disease spread. If you have questions about mortality disposal, the NCDA&CS is a good source of information as they regulate mortality disposal in North Carolina.
Litter Management
You will reduce odor risks if you keep bedding dry, and be sure to clean out old manure on days when there is a breeze, preferably blowing away from neighbors’ homes. Never clean out or spread manure when neighbors are using their yard for entertaining or for family recreation. Flies are potentially the most serious nuisance in a home flock, and control requires daily attention. The best way to control flies is to manage the manure so that it is not attractive for fly breeding. Reducing the natural 60 to 80 percent moisture level of the manure to 30 percent or less will virtually eliminate fly breeding. Stir the bedding daily so that manure is more evenly spread throughout and moisture can be absorbed.
Pest Management
Rats and mice like chicken feed, will kill young chickens, and will destroy eggs. Keeping all feed in metal containers and using metal or wire shields around all chicken houses and runs will help keep rats out, and keeping all trash and all sheds clean and organized will eliminate breeding areas.
To minimize disease and pest risks, keep the coop area dry, dispose of excess water from dishes and buckets so that that there are no stagnant pools, and make sure the ground allows for good drainage. Keep the coop area neat and clean. A weedy area with old equipment lying about will all but guarantee complaints by neighbors.
Detailed information on pest management can be found in specialized publications.
Troublesome Habits
Egg eating may become a problem in your home flock. Once a hen starts eating eggs, the habit is difficult to stop. The best way to prevent egg eating is to prevent egg breakage in the nest. Make sure there is adequate nesting material and space and that eggs are gathered frequently. Once you have a problem, darken the nest area, remove broody hens, and place glass eggs or torn pieces of white paper on the floor to frustrate the hens who are pecking at eggs or egg pieces. Artificial eggs painted white, of comparable size, may also be used to deter egg eating, as the hen will get no reward from pecking the artificial egg.
The final and possibly most disturbing problem you may encounter is cannibalism. Chickens may exhibit cannibalism in the form of toe picking, feather picking, or body picking, especially if the birds are confined, housed in too small an area, or otherwise under stress. If you see chickens pecking at each other, try to determine the environmental stressor that may be encouraging the behavior, and modify the environment as best you can to remove that stressor. Immediately remove an injured bird, and do not return her to the flock until fully healed. Some chicken owners beak trim the hens (removing a park of the upper and lower beak with a heated tool) to prevent injury from cannibalism. This should not be necessary in a garden flock that has adequate space to thrive.
Cannibalism is rarely a problem in small backyard flocks with only two or three birds, partly because such flocks are often kept in environments with little stress. Social pecking orders are stable in small flocks. Once social structure is established, aggression is very low. Adequate space allows subordinate hens to keep their distance and still get enough food and water.
Resources
Information from the U.S. Department of Agriculture
“Feed and Animal Management for Poultry.” 2003. Nutrient Management Technical Note No. 4. Available at: www. fass.org/facts/poultry.htm. (Accessed March 10, 2010.)
“Small Poultry Flocks.” 1988. Farmers Bulletin Number 2262. (includes illustrations and plans for brooding equipment and laying houses for larger home flocks.) Available at: www.ces.ncsu.edu/depts/poulsci/tech_manuals/small_flocks.pdf. (Accessed March 10, 2010.)
Information from universities and colleges
Akers, D., P. Akers, and M.A. Latour. Choosing a Chicken Breed: Eggs, Meat, or Exhibition. 2002. AS-518. West LaFayette, IL: Purdue University Cooperative Extension Service.
Arends, J.J. and S.M. Stringham. 1992. Poultry Pest Management. AG-474. Raleigh: North Carolina Cooperative Extension.
“Agricultural Alternatives Small–Scale Egg Production (Organic and Nonorganic).” Pennsylvania State University. Available at: http://agalternatives.aers.psu.edu/Publications/small_scale_egg.pdf. (Accessed March 10, 2010.)
Beyer, S. and R.R. Janke. Production of Eggs and Home- Raised, Home-Butchered Broilers and Turkeys. Kansas State University. Available at: www.ksre.ksu.edu/library/ fntr2/FOODASYST/2poultry.pdf. (Accessed March 10, 2010.)
Carter, T. A. Small Poultry Flocks. 1988. PS&T Guide No. 31- 170927. Raleigh: NC State University.
Cochran, J. Small-Scale Poultry Flocks Resources. 2006. Raleigh: North Carolina Cooperative Extension.
Danko, T. Producing Your Own Eggs. 2000. Durham: New Hampshire Cooperative Extension Service.
Ernst, R.A. and F.A. Bradley. Selecting Chickens for Home Use. 1997. Publication 7232. Davis: University of California.
Folsch, D.W., M. Hofner, M. Staack, and G. Trei. Comfortable Quarters for Chickens in Research Institutions. Witzenhausen, Germany: University of Kassel.
Jacob, J.P., H.R. Wilson, R.D. Miles, G.D. Butcher, and F.B. Mather. Factors Affecting Egg Production in Backyard Chicken Flocks. Publication PS-35. University of Florida, IFAS Extension. Available at: http://edis.ifas.ufl.edu/ PS029. (Accessed March 10, 2010.)
Poultry Disease Diagnosis Based on Symptoms. Mississippi State University. Available at www.poultry.msstate.edu/ extension/pdf/diseases_poultry_diagnosis_symptoms.pdf (Accessed March 10, 2010.)
Purser, J. Home Laying Flock. 2006. Fairbanks: Alaska Cooperative Extension Service.
Sander, J.M. and M.P. Lacey. Management Guide for the Backyard Flock. 1999. Leaflet 429. Athens: Georgia Cooperative Extension Service.
The Home Flock. Mississippi State Extension Service. Available at: www.poultry.msstate.edu/extension/pdf/home_ floks.pdf. (Accessed March 10, 2010.)
The ICYouSee Handy-Dandy Chicken Chart, An Alphabetical List of More than 60 Chicken Breeds With Comparative Information. Ithaca College. Available at www.ithaca.edu/ staff/jhenderson/chooks/chooks.html. (Accessed March 10, 2010.)
Thornberry, F.D. The Small Laying Flock. 1997. PS5.250. Bryan: Texas Agricultural Extension Service.
Zadina, C. and S.E. Scheideler. Proper Light Management for Your Home Laying Flock. 2004. NF609. Lincoln: University of Nebraska.
Veterinary books and journal articles
Griggs, J.P. and J.P. Jacob. Alternatives to Antibiotics for Organic Poultry Production. J. Appl. Poult. Res. 14:750-756, 2005.
Harrison, G.J., R.W. Woerpel, W.J. Rosskopf and L.G. Karpinski. Clinical Avian Medicine and Surgery. 1986. Maryland Heights, MO: W.B. Saunders Company.
Percival, S.S. Use of echinacea in medicine. Biochem Pharmacol. 60:155-158, 2000. Available at www.ncbi.nlm.nih.gov/ pubmed/10825459 (Accessed March 10, 2010.)
Information from non-government, non-university institutions
“Poultry Breed Information.” American Livestock Breeds Conservancy Priority List. Available at www.albc-usa.org/ cpl/wtchlist.html. (Accessed March 10, 2010.)
Schwanz, L. The Family Poultry Flock. 1987.Brookfield, WI: Farmer’s Digest, Inc.
Publication date: April 1, 2008
Reviewed/Revised: May 23, 2024
AG-729
N.C. Cooperative Extension prohibits discrimination and harassment regardless of age, color, disability, family and marital status, gender identity, national origin, political beliefs, race, religion, sex (including pregnancy), sexual orientation and veteran status.

