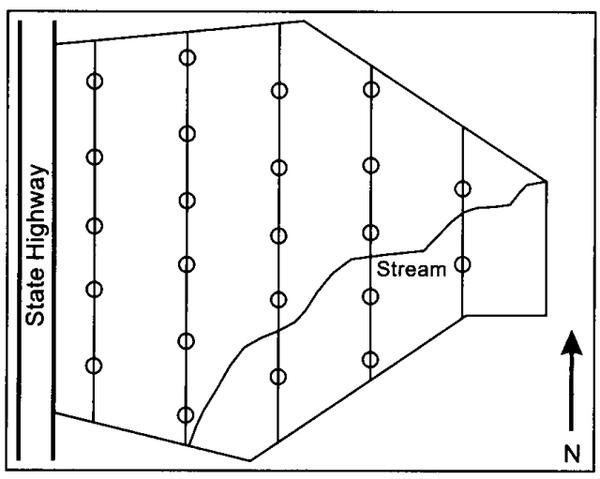
Figure 2. A typical layout of a sampling scheme.