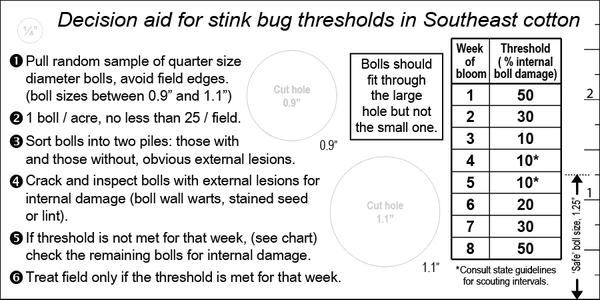
Figure 1. Front side of field decision aid showing scouting procedures, boll size selection range, and internal boll damage thresholds by week of bloom.