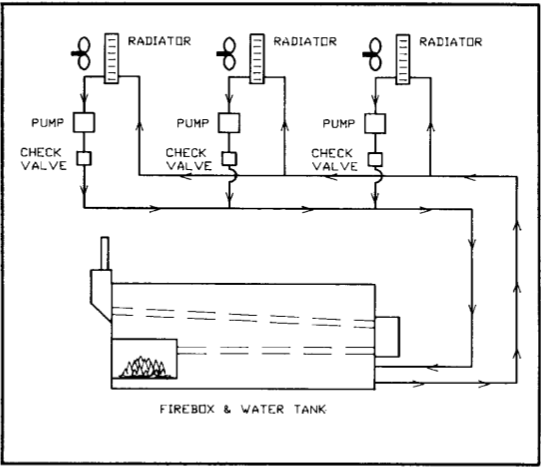
Figure 4. Typical layout of a multiload system.