
A community food garden’s success depends on healthy soil so wise soil stewardship is an essential part of managing every sustainable food garden. Nothing inspires gardeners’ commitment to the garden like successful harvests, and nothing does more to ensure bountiful harvests than healthy soil.
A community food garden presents an ideal opportunity to show the public how to be stewards of the soil, even in an urban environment. Whether the garden has traditional in-ground beds using native soil or raised beds filled with a planting mix, there are opportunities to demonstrate soil management and health. This chapter will help you select the best strategies for your garden including incorporating compost and lime into garden soils. For more information on fertilizer use, please see chapter 9, Growing Food.
The Soil Management Process
Caring for soil is an on-going process rather than a one-time event, such as putting up a fence or building a shed. Follow the lead of skilled local farmers and gardeners and create an annual plan for maintaining soil health.
Soil Test
Do a soil test early in the site selection process. The results of the soil test will provide a baseline for future work with your soil. Experts recommend a soil test every three years, though some gardens test annually, particularly during the early years while the soil is improving.
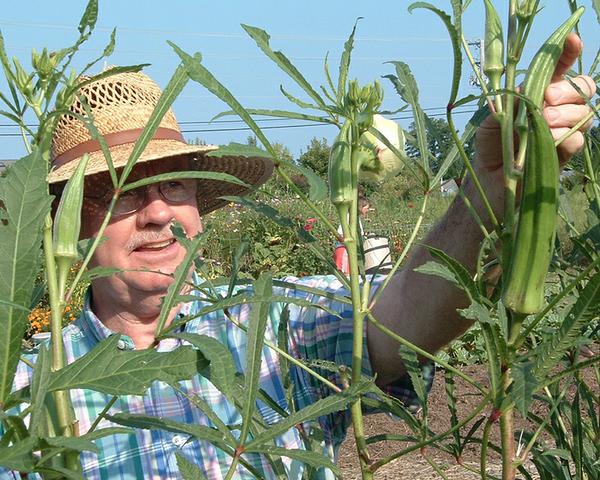
Don Boekelheide CC BY 4.0
Improve the Soil on Site or Bring in “Topsoil”?
When a garden site’s soil is acceptable—workable and reasonably well drained—improving the soil on site may be less costly and more environmentally friendly than constructing raised beds and purchasing a planter mix or “topsoil” to fill them. Preparing native soil for growing vegetables will probably require adding compost, lime, and fertilizer (plant nutrients) based on soil test recommendations.
If an otherwise promising site has soil that is in very poor condition (very hard to work, full of gravel, or easily flooded with poor drainage) or contaminated, the garden team may choose to utilize raised beds.
The choice between in-ground plots and building planters is a fundamental one for food gardeners, with implications for how much the project will cost, how the garden will look to the public, and how gardeners will manage food production. Each approach has advantages, disadvantages, and outspoken advocates, but one is not better than the other. Motivated gardeners can grow good harvests in plots and planters, so we discuss both in this chapter
Pros and Cons in a Nutshell
Well-designed and constructed raised beds are attractive and make a positive first impression. Planters may make gardening less intimidating and easier for novice gardeners, and they may provide a more effective way to organize a garden overall. In locations where soil is extremely poor or contaminated, or where handicapped access is essential, planters may be the only choice. Planters tend to drain more quickly, require more frequent watering, and warm up more quickly in the spring than in-ground beds.
The major drawback to planters is probably the cost; however, building materials and fill soil for planters are popular donations from funding agencies and civic groups because they quickly produce tangible results that can provide an attractive photo opportunity for the media. Other drawbacks include reliance on a purchased fill for the planters, resulting in reduced connection to soil stewardship or sustainability, less flexibility to move planters, and restriction to rectangular shapes when boards are used to form the sides. Using stones or blocks, however, allows planters to be constructed in curving, natural forms. Finally, once planter boxes are in place, they are much harder to remove if the garden fails. Abandoned planter boxes are a sad testament to gardens that started with much enthusiasm but were not sustainable.
In many situations, improving native soil to create plots may be much less expensive, more flexible, and more environmentally friendly and sustainable over the long run. However, there are drawbacks to gardening in in-ground beds as well. While soil stewardship strategies are straightforward and inexpensive, not all gardeners or funders are familiar with them, which may lead to a steeper learning curve. In-ground gardens may ultimately look wonderful, but they do not give the instant gratification offered when a group installs planter boxes.
Another strategy that might make sense for some gardens, especially gardens with low budgets, is veteran garden writer Barbara Pleasant's method of gardening in bags of commercial potting soil. This instant start strategy has the advantage of minimizing weed and insect problems and improving the garden soil over time.
Many community gardens have both planter boxes and in-ground plots. Planter boxes are excellent for gardeners who want smaller areas or who need easy access. In-ground gardens are better for gardeners who need more space. By combining the two approaches, a garden can have the best of both worlds.
Donna Teasley CC BY-SA 4.0
Gene Riddle
Working with Plots
Setting up a garden with plots using the native soil is a simple two-step process. First, improve the soil in the garden using compost as outlined in chapter 5, Site Preparation. Then permanently mark the location of each plot.
When marking the plots, it is not necessary to surround each plot with landscape timbers. A better and much less expensive way to define plots is with permanent metal stakes set in each corner. Stakes also make it easier to manage whole garden tasks such as mowing, composting, and tilling.
In a New Garden
Begin by cultivating the areas where vegetables will be grown. The easiest way to accomplish this task is to use a large farm tractor capable of working the soil to a depth of 6 inches or more. A sturdy front drive/rear-tine rototiller, paired with use of shovels to spade the soil by hand, is also another good option. Some gardeners may prefer turning or double digging (Jeavons 2006).
Lasagna gardening or sheet mulching is another option. No-till, no-dig, lasagna gardening involves composting on the spot, layering green material (grass clippings,) with brown material (dried leaves, cardboard) on top of the garden bed and allowing it to break down and improve the soil.
Test the Soil
Check with a Cooperative Extension agent for test boxes, report forms, and guidance on how to take reliable samples. He or she can also help you interpret the soil test results and the recommendations for how much compost, lime, and fertilizer to add during soil preparation.
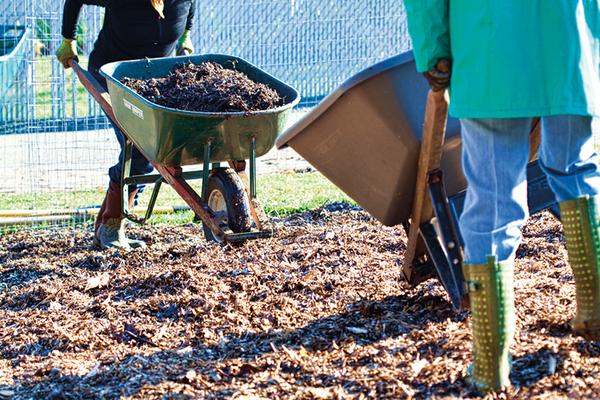
Adding Compost and Organic Matter
If possible, add 1 to 3 inches of locally produced, high-quality compost when you prepare the soil. Creating your own compost on site is an excellent option, but you still may need to purchase or seek donations when starting the garden and for an annual boost. Municipal composting programs may provide free or low-cost compost, particularly if the garden can help encourage home composting by hosting classes and demonstrations. Compost left over from commercial mushroom production and worm castings are also good options. When purchasing compost, look for products certified by the US Composting Council with the Seal of Testing Assurance (STA). Local farmers, especially organic vegetable growers, are excellent sources of information and referrals regarding sources for organic matter.
|
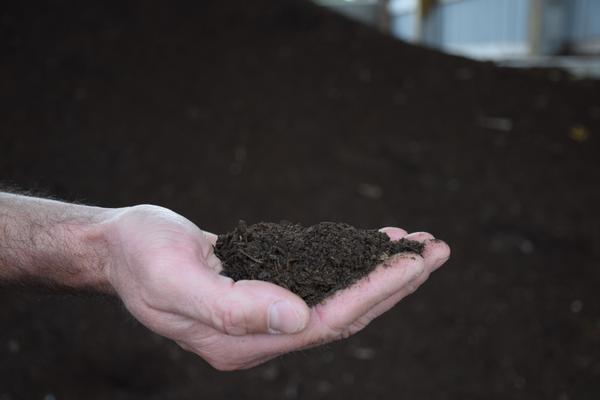
KNOW YOUR COMPOST High quality compost is recognized as "black gold" for gardens, and it is generally considered the best practical way to increase vital organic matter. However, compost is only as good as its ingredients. Keep the following inappropriate material out of compost piles: dog or cat wastes, herbicide-treated plant debris, diseased plants, and weed seeds. If you purchase compost, make sure it is Compost Council certified, and that it does not contain sewage sludge (i.e., biosolids). Potential problems include: Municipal composts:
Animal manure:
Grass clippings:
Carefully evaluate the potential danger of any products you intend to add to your garden. Ask questions and consider having compost tested for heavy metals and running a quick screen to detect broadleaf herbicides prior to purchase. |
For more information on composting see the Gardening chapter of the North Carolina Extension Gardening Handbook, AG-831, the NC State Extension Composting portal and Composting at NC Residential and Summer Camps, AG-733.
Dana CC BY-ND 4.0
Annual Soil Maintenance and Improvement
A yearly application of 2 to 3 inches of high-quality compost is very beneficial to a community food garden and even 1/2 inch brings benefits. Gardeners can easily incorporate this plot-by-plot using hand tools. Cooperative community food gardens, and some large plot gardens, apply compost to the whole garden in the late fall or winter.
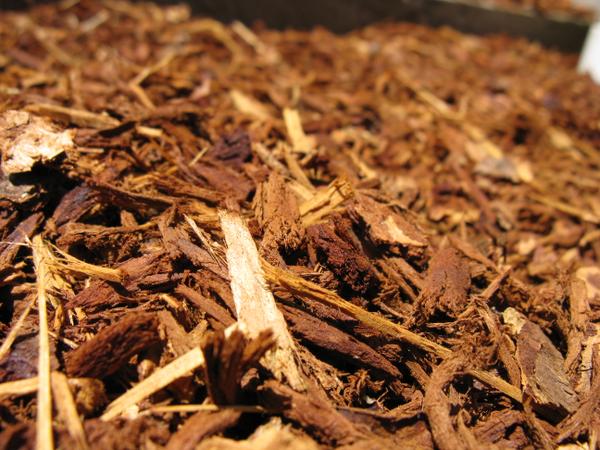
When intending to incorporate the product into the soil, avoid buying mulch (large chunks of wood chips intended for use as a top dressing) or topsoil (sand, silt, and clay) instead of compost (bio-degraded organic matter)—they are not the same thing. Seek guidance from an N.C. Cooperative Extension agent if there are any questions about which material to use.
Fertilizer should also be added on a seasonal basis if the garden’s objective is optimum food production. Harvesting removes nutrients, such as nitrogen. These nutrients should be restored, based on the requirement of the crop. For more detailed information, see chapter 9, Growing Food.
Lime
Ground limestone (lime) helps reduce acidity to improve vegetable performance. The best way to determine when and how much lime to apply is with a soil test. Typically, lime is applied every three years, but only if the soil test results indicate that it is needed. Lime can be mixed into the soil at the same time compost is added using the same techniques.
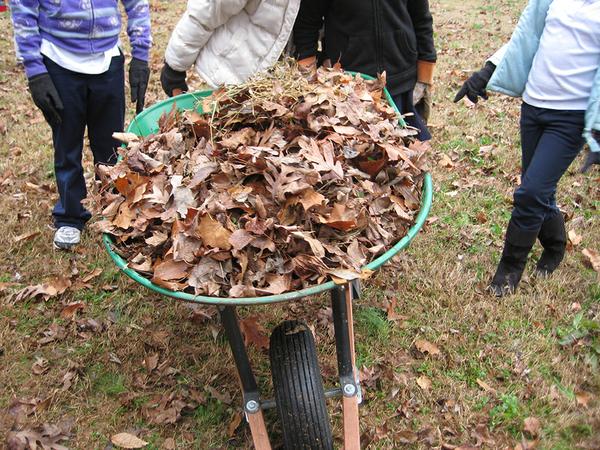
Mulch
Cover the soil with a protective layer of organic mulch, such as straw, leaves, wood chips, newspaper, or cardboard. An effective soil stewardship strategy, mulch protects the soil from erosion, discourages weeds, prevents soil from splashing onto leaves, conserves soil moisture, and moderates soil temperature. In addition, when mulch breaks down it can be incorporated into the soil as compost, improving soil structure, providing nutrients, and enhancing water retention and drainage. Experienced gardeners sometimes run their lawnmower over leaf mulch to chop it into finer pieces, making it easier to use. It is not necessary to spread leaf mulch (or any organic mulch) deeper than about 4 inches.
Use mulch in pathways and in garden beds. Coarse mulch (such as wood chips) breaks down slowly, and a 3- to 4-inch layer sufficiently covers paths and high traffic areas to suppress weeds and clearly define the pathway. Use a 1- to 2-inch layer of finer textured mulch, such as leaf mulch and straw, within plots.
| Mulch | Compost |
|---|---|
| Any material used to cover the soil. Organic mulches include small pieces of leaves, straw, pine straw, or wood and are used to prevent weeds, conserve water, moderate soil temperature and eventually breakdown and provide nutrients for plants and soil organisms. | Rich organic matter that has decayed into unrecognizable elements (you can no longer tell if it was a leaf or a tomato) incorporated into the soil to improve structure, provide nutrients, improve habitat for beneficial organisms and enhance water management. |
Another excellent way to build and protect garden soil is through the traditional technique of cover cropping—growing a crop to feed and protect the soil.
Cover crops are also called green manures because they add vital nutrients to the soil. Legumes make excellent cover crops because they enrich the soil with nitrogen. Two favorite legumes are crimson clover, grown in the cool season, and black-eyed peas, grown in the summer.
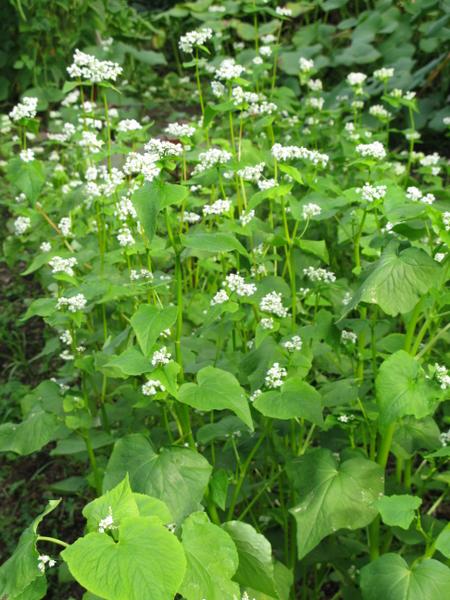
Non-legumes also help build soil. Buckwheat is popular for use in the summer, and cereal rye is often used as a winter cover crop.
Cover cropping is fun, beneficial, and can even be attractive—crimson clover, for instance, has a beautiful red flower. North Carolina gardeners can get more details about cover crops by reading An Introduction to Cover Crop Species for Organic Farming Systems, by Danielle Treadwell, University of Florida, Dr. Keith Baldwin, North Carolina Agricultural and Technical University, and Dr. Nancy Creamer, North Carolina State University.
The No-Till Option
Some community gardeners are attracted to no-till, a soil-conservation technique that disturbs the soil as little as possible. Deep mulch methods such as Lasagna Gardening (Lanza 1998) and Ruth Stout’s approach (Stout and Clemmens 1971) can be considered versions of no-till.
It is tricky to apply no-till practices to community vegetable gardening. In general, no-till vegetable production systems show inconclusive results so far in terms of yield, particularly ones created using strictly organic methods.
We recommend testing no-till in a small area before considering it for an entire garden. No-till research nonetheless teaches a lesson worth remembering in every garden: there is no benefit to overworking soil by constantly tilling it. Consistent with this concept, traditional organic gardeners only work their beds deeply every third year when adding lime, and they try to avoid unnecessary soil disturbance (and extra work) whenever possible.
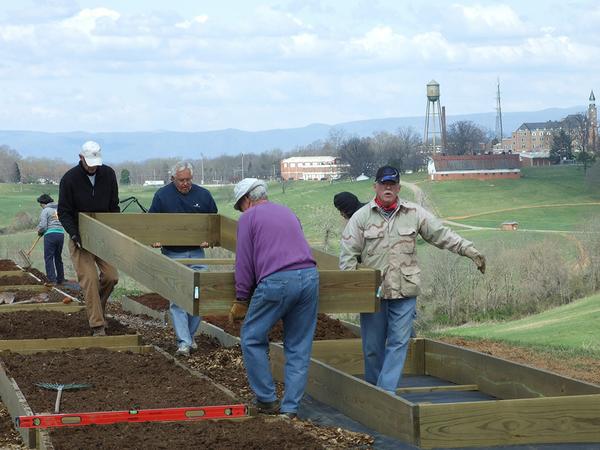
Raised-Bed Planters
Planters are a popular and familiar option in urban community food gardens, particularly where soil conditions are poor. Planters are more expensive to set up than plots because of the cost of materials, soil mix, labor, and transportation.
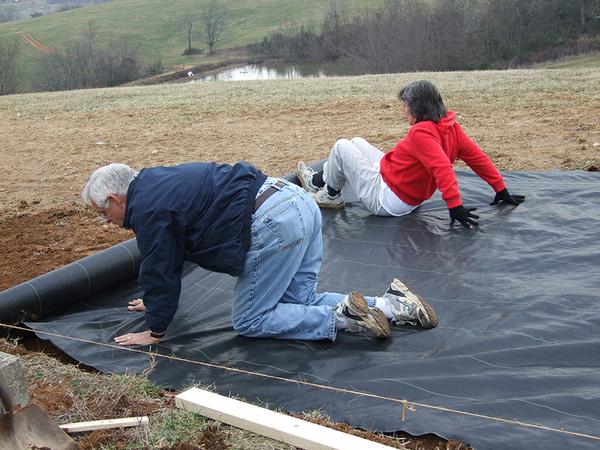
Installing raised beds is a more complex process than simply digging up a garden area. Before filling raised beds, clear the area under the planter or mow grass as closely as possible, then cover with a layer of cardboard or landscape fabric, then cover with 6 inches of hardwood mulch (tree companies are a good source).
As an alternative, treat the lawn with an herbicide applied at the correct time of year, carefully following the instructions on the label. Contact your local Cooperative Extension agent if you have questions.
|
TREATED WOOD PLANTERS The Environmental Protection Agency (EPA) has banned treated lumber containing copper, chromium, and arsenic. Known as CCA, for two decades it was more or less synonymous with the term treated lumber. CCA is no longer available to consumers; however, sometimes a well-meaning store or volunteer may unknowingly offer to donate a product made with this material. Do not use it for food gardens. New treated lumber products now in stores, such as ACQ (Alkaline Copper Quaternary) and CBA (Copper Boron Azole), may be used for food gardens. These types of lumber sometimes require special nails, however, and are not always recommended for direct contact with soil. Be sure to research the wood carefully before using. |
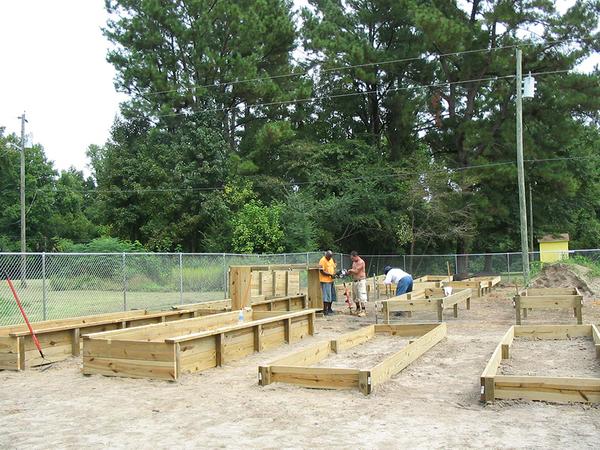
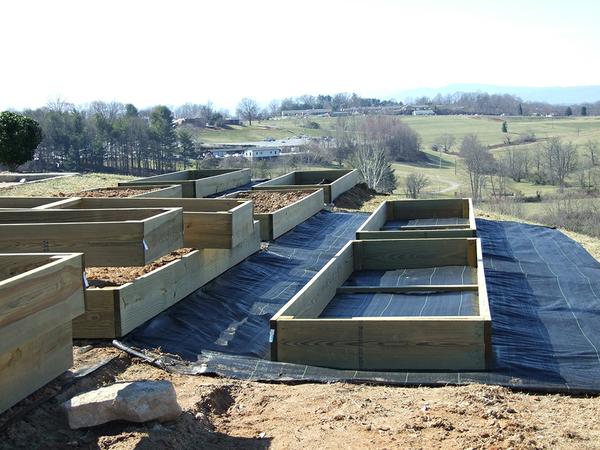
A common planter size is 4 feet by 10 feet with a rise of 8 inches or more above the natural soil level. When using wood, make construction easy and reduce waste by using standard-sized lumber and selecting a planter size to match: for example, 4 feet by 12 feet by 12 inches high (48 square feet).
Raised beds may be constructed of masonry landscaping blocks, riprap stone, rot resistant cedar, redwood, painted pine boards, or other materials. Masonry and stone have the advantage of being easily arranged to form pleasantly curved beds. Blocks can also provide a seating area along the edges of beds, which is helpful for gardeners with physical challenges.
Another option is to use woven willow branches or bamboo to create retaining walls that are essentially gigantic, attractive baskets. This traditional French, low cost technique can also be used for ornamental plants or herbs.
To date, plastic wood products made from recycled milk containers have received mixed reviews and are rarely used for constructing planters.
If there is concern that the existing soil is contaminated, seal the raised beds with water-poof plastic to prevent root contact with contaminated soil. Provide holes on the sides of the beds to facilitate drainage.
Fill planters with planter mix or soil, similar to gigantic flowerpots. The easiest option is to purchase a commercial topsoil or planter blend.
Filling a planter takes a surprisingly large amount of material. A 4-foot by 12-foot by 12-inch planter requires 1.7 cubic yards of planter mix, which equates to 48 one-cubic foot bags of planter mix, at a cost of approximately $100 ($2 per bag) per bed. In bulk, the cost would be considerably less expensive, roughly $45 per bed (at $25 per yard for commercial gardener blend topsoil). If possible, purchase in bulk instead of bags to save money and reduce waste.
Exercise caution when purchasing topsoil. Use reputable firms recommended by local community gardeners, landscaping companies, farmers, and Extension agents.
Any planter that includes large gaps, such as shipping pallets, may require a liner of landscape fabric or perforated plastic to hold soil in while still allowing drainage.
Some community gardener programs use only compost for filling planters. This practice is not recommended because compost breaks down over time, can lead to disease problems and watering difficulties, and can be expensive if purchased.
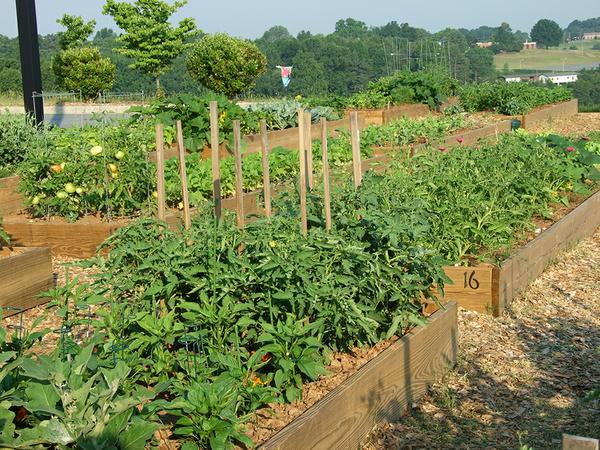
Managing Raised-Bed Planters
Managing soil in raised beds is a challenge. The planter mix or soil used to fill the planters tends to compact over time, lose nutrients, and sometimes develop disease problems.
Add 1 to 2 inches of good compost annually and incorporate into the soil with a hoe or garden fork. If the bed has been lined to protect the garden from contaminated ground soil, take care not to tear the bed’s liner. Add lime periodically, as indicated by soil test results, and apply compost seasonally as a top dressing.
Above all, be sure to rotate plants seasonally in the planters as is done with plots. Growing the same varieties repeatedly in a confined space may lead to plant diseases and pest problems.
If serious soil problems occur, including soil compaction or soil-borne disease, the best strategy may be to remove all the old material and replace it with high-quality planter soil mix.
Terracing
Terraces are common elements in traditional landscapes throughout the world. They can add an element of beauty to the garden. If the garden has any sloping areas, terraces provide some of the benefits of raised beds at a lower cost. Lay out terraces so they follow the contour of the garden’s slope, and mark them using strings and levels or a laser device. Next, install a retaining wall to hold the soil in place. Inexpensive or free stone or rubble, such as riprap or jackhammered concrete (urbanite), works quite well. Use the topsoil from the slope above the retaining wall to fill behind it and create a level surface. Add additional soil as needed.
Containers
Another option for community food gardens, particularly smaller ones with limited space or soil, is to create container gardens. Clay pots, plastic buckets, washtubs, and all kinds of unlikely objects can become a place to grow vegetables and flowers. Be sure they have a hole in the bottom for drainage, and that they are safe for growing food (no pottery with lead glazing or rubber tires).
Soil management in containers is generally similar to that in raised beds; however, because containers are much smaller, commercial bagged potting soil is often used. Containers will need more frequent watering than in-ground beds.
Containers are especially useful for getting plants growing quickly in the early days of the garden. They also add color to brighten up common areas and views. Containers make an accessible project for younger gardeners and those with physical mobility challenges. Because they are portable, unlike planters, containers can be used to create temporary food garden installations in non-traditional places.
Donna Teasley CC BY-SA 4.0

Michelle Spencer
Donna Teasley CC BY-SA 4.0

Donna Teasley CC BY-SA 4.0
Donna Teasley CC BY-SA 4.0
Publication date: Aug. 10, 2017
AG-806
Other Publications in Collard Greens and Common Ground: A North Carolina Community Food Gardening Handbook
N.C. Cooperative Extension prohibits discrimination and harassment regardless of age, color, disability, family and marital status, gender identity, national origin, political beliefs, race, religion, sex (including pregnancy), sexual orientation and veteran status.
