Introduction
The mouse - a pest adept at finding the smallest entrance into a structure, and upon entering it gains access to warmth, food, and shelter - no wonder they don’t want to leave!
How do you know they are there? Do you wait to see it scurry across your floor? If you’ve seen a mouse (or several) what can you do?
The task of mouse management can be daunting, whether you have a single furry invader or a full-on mouse infestation. There are a variety of options available for mouse management, some with higher levels of risk, but with proper consideration and safety these tools are at your disposal. Read on to learn more about typical signs of mouse infestation, and should you sleuth one (or more) out. If you would like to learn more about mouse biology and behavior - see our factsheet, Biology and Behavior of Common Structure-Invading Mice!
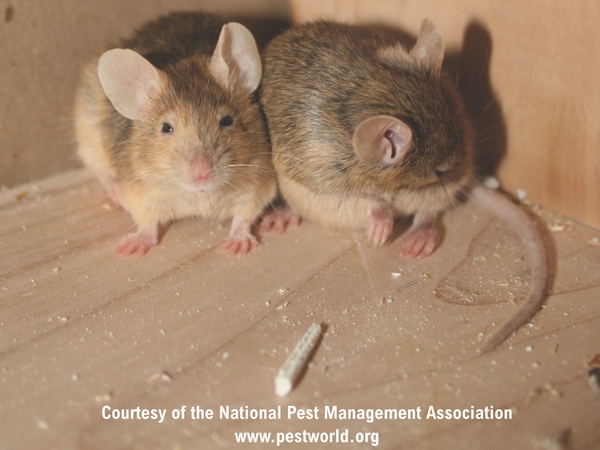
Warning: This publication will contain images of mouse control that some readers may find disturbing. Rodents (especially mice) pose immense health risks to humans, and therefore their control and elimination is essential. Read further only if you are okay with these types of images. If you aren’t, here is a cute photo of mice together in a box (Figure 1), and check out our other publications!
Signs of Infestation
It goes without saying that the most clear sign of a mouse in the house is a face to face encounter - although if this encounter includes the mouse asking you for a cookie, we’ve been warned where that can lead. Jokes aside, face to face encounters with mice are not the most common way that these pests are identified. In fact, the common common signs of mouse infestation are:
-
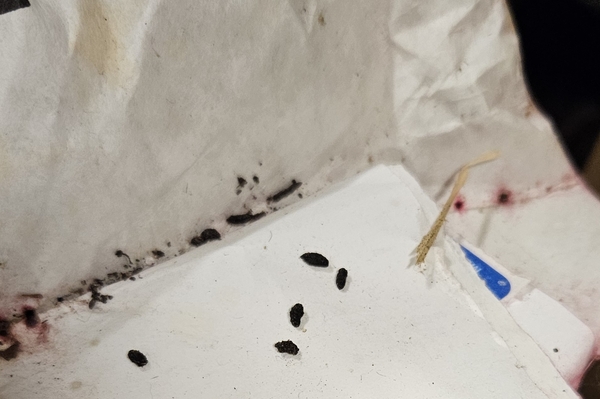
Fecal evidence: Mice can produce between 50 and 75 individual droppings per day - that’s a lot of poop. These droppings are roughly ¼ to ½ and inch in length, brown to black in color (unless bait has been deployed - more on this later), and have tapered (pointy) ends (Figure 2). These droppings can appear throughout the home, consistent with their exploratory behaviors in search of food. Look for these droppings along walls, in corners and under sinks, as well as in areas where they may find food.
-
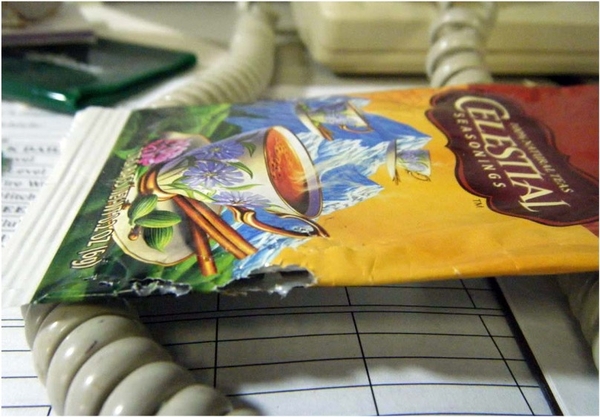
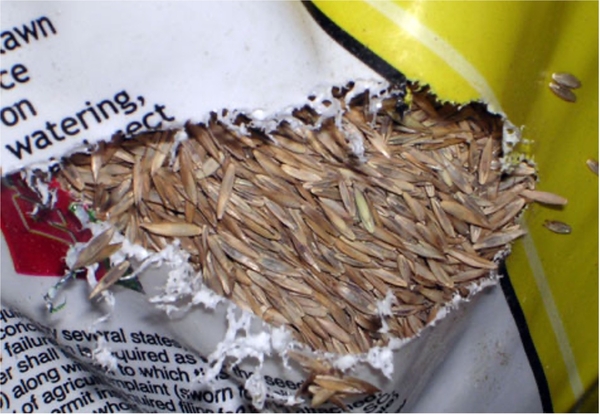
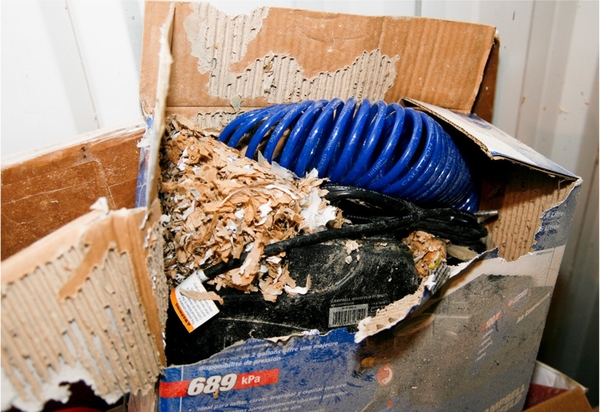
Chewing evidence: Mice are curious, and during explorations will regularly feed on various items in their environment. When it comes to feeding, mice exhibit what we refer to as “nibbling” feeding behaviors. They find food materials, chew through the packaging, and take one or several small tastes of the item before moving on (Figure 3). They will similarly chew through industrial packaging to access food (Figure 4), or may simply chew materials and wires in their environment (Figure 5). Look for these signs in your pantry, under your sink and cabinets, and other areas where mice may move through the structure unnoticed.
-
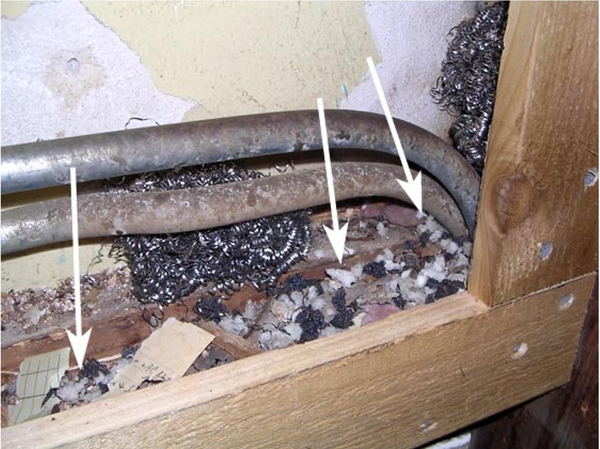
Nesting evidence: Another common sign of mouse infestation, although frequently hidden away in wall cavities and voids, are nests. Mice will collect nesting material from around the home to form nests where they will reside and raise young. These nests often resemble chewed up paper and insulation, boxes, fabrics, or any appealing material the mouse may come across (Figure 6). If you stumble across this evidence it is likely in a box or container easily accessible to mice (Figure 7).
Other evidence of mouse infestation can be a musty smell associated with mouse urine as well as scratching and clawing noises within wall voids.
Monitoring & Surveillance
The key to managing any pest issue, just as with medical needs, is proper diagnosis of the culprit. While there are clear signs to look for that indicate mouse presence, it is important to accurately identify the mouse, and to confirm that the evidence you see is indeed from a mouse and not another structure-invading rodent. Information on common structure-invading mice can be found here! This is where monitoring comes in. There are a variety of tools used to monitor mouse activity, and in fact many of these monitoring tools also serve as forms of mechanical management. These tools utilize various mechanisms to often trap and kill mice passively in the environment. Different monitoring tools have different strengths, weaknesses, and risks and should be used with an understanding of the risks involved. Key examples of these include:
-
Snap-traps: These are the traditional spring loaded mouse-traps which function by providing immediate kill (typically) of mice via a metal bar that “snaps” down onto the neck from above. They are loaded with bait AND THEN set (trust me, this will save your fingers). Once prepared these traps should be placed along walls and in areas where potential mice may travel (Figure 8).
-
Strengths: this device will often provide simultaneous monitoring and immediate control of the mouse that stumbles across it.
-
Weaknesses: Single-use then requires reset, long-term use requires bait replacement
-
Risks: Injury to fingers, especially to small curious hands of children, and to pets. Note: Mouse snap-traps are not an effective tool for rat surveillance or management. Similarly, rat snap-traps should never be used for mouse management. They can easily break fingers and injure inexperienced users.
-
-
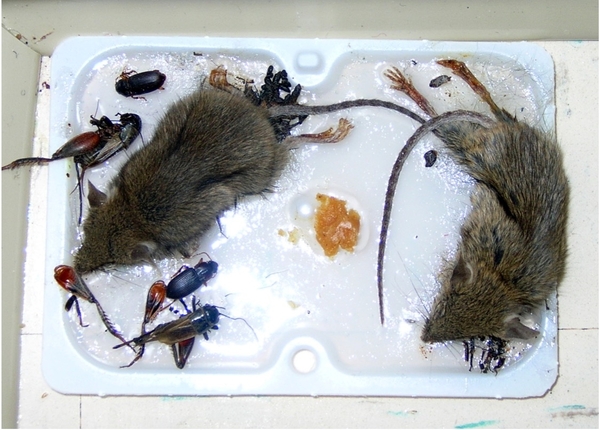
Glue boards: These are paper or plastic trays lined with a layer of super glue. This glue can be scented, or bait can be placed in the center of the trap to lure in potential mice (Figure 9). These should be placed in areas of likely rodent contact (crawlspace or basement), folded or placed away from potential contact with residents and animals if used elsewhere in the home.
-
Strengths: provide longer-term control, as long as the glue remains sticky
-
Weaknesses: prolonged time to death for caught mice (if this is a concern for you or your client), regularly collects unintended animals or insects (Figure 9).
-
Risks: contact with hands or paws can lead to entrapment in the glue. This can be resolved by using oil of some kind poured over the glue and trapped area, and gently and repeatedly working the oil and glue until the individual is freed.
-
-
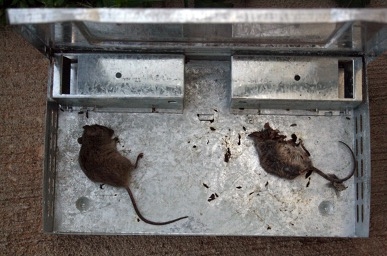
Live traps: As the name suggests, these are traps designed to catch mice alive, and allow for release into the environment outside of the home (Figure 10).
-
Strengths: Can provide mess-free collections of mice from homes where killing the mice wants to be avoided
-
Weaknesses: Live traps do not provide food or water to caught mice, and must be checked regularly or trapped individuals will die (Figure 10). If trapped mice are able to escape the container they will likely enter back into the structure.
-
Risks: Contact with live mice can occur during release, potentially exposing individuals to disease or disease transmitting arthropods.
-
Mechanical Management
As mentioned above, many of the common monitoring devices can also serve as tools for mechanical management of structure-invading mice. Briefly from the perspective of management:
-
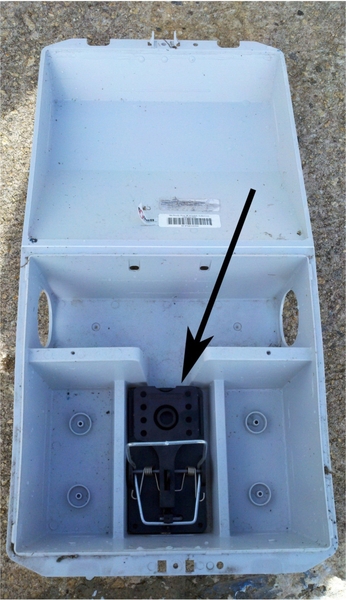
Snap-traps: Snap traps can be baited with various attractants, including food items. Peanut butter or honey can be used to stick other foods to the trigger. Snap traps can also be placed in cardboard or plastic boxes designed to hold snap traps (Figure 8). Snap traps should not be used in areas accessible to children, pets or other non targets. Bait some traps with cotton balls or a ball of string, as pregnant females will scavenge for these items to make a nest. Traps should be set along mouse runways,or areas where mouse activity is observed, to be most effective .
-
Glue boards: When mice try to cross the board they become glued to the surface and eventually die. Glue boards are scented or can be baited (such as with peanut butter). Place glue boards along mouse runs, or in areas where mouse evidence it observed. “Boxing” of the glue board can allow them to fit well into narrow areas.
-
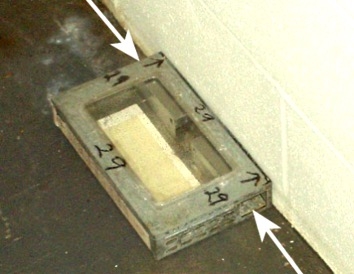
Live traps: These traps regularly contain areas designed for use with glue boards (Figure 11). This can allow for trapping and killing of invading mice, while keeping the sight of the process contained. Of important note, in some areas, it’s illegal to release captured mice on someone else’s property, so you should check local regulations before using this method.
All traps should be checked daily, if possible, to remove any dead/live mice. Longer periods of time between checking traps could result in unpleasant odors or experience for customers, residents, or the public. Of additional note, it is important to promptly remove dead mice from traps if rodent bait is also being used to prevent off-target bait exposure among predator species.
Exclusion
Exclusion is the process of sealing off all potential entry points to prevent mice from entering a building, and while some aspects of exclusion may fall under mechanical management, exclusion should be performed regularly even without evidence of mouse infestation. Exclusion is necessary to prevent and manage rodents in structures. Most exclusion can be accomplished with simple tools and construction materials, but some professional pest management companies offer exclusion services for a fee. Ask your current company, or the companies you are considering, if this is an option.
Building exterior
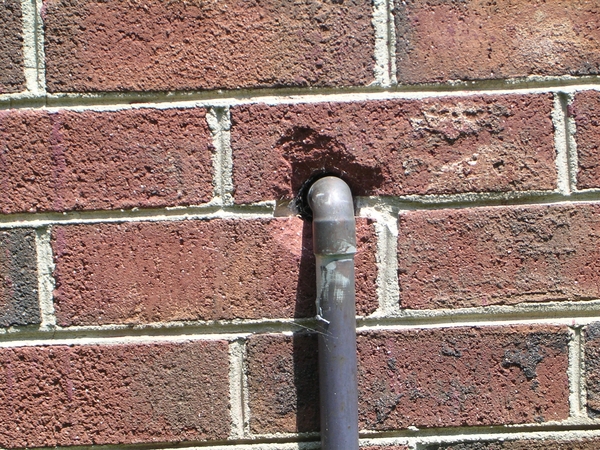
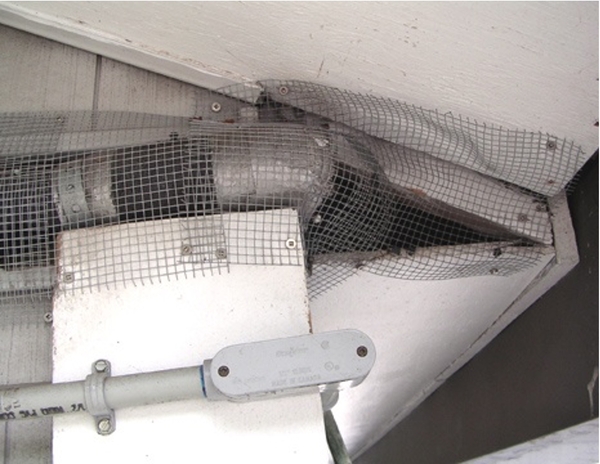
Start by identifying potential access points (gaps of ¼ inch in size or larger allow for the ingress of adult mice). Gaps and holes around electrical lines, plumbing and drainpipes, small holes and cracks in foundations, soffits, exhaust vents, roofs, etc (Figure 12).
Most small holes and cracks in building siding can be filled with the appropriate type of filler of a suitable color or painted after the material dries. Filler materials that may be used include:
-
Lath Screen or Lath Metal: This is a galvanized, light-gauge metal mesh that is installed over wooden walls before the plaster finish is applied. Lath screen does not rust or bleed through caulk and can be easily compressed to completely fill odd-shaped openings. After forcing lath screen into holes, slightly expand its sharp edges with a screwdriver to better fill the cracks and force the metal into the edges of the hole (Figure 13).
-
Steel Wool: Only 00-sized steel wool can deter rodents and is an “easy to use” filler for small holes. However, steel wool is flammable, rusts, and rodents often work their way between the steel wool and edges of the opening. Always caulk over steel wool to seal it in place.
-
Copper Mesh: Copper mesh material, such as the commercially available Stuf-Fit®, is a compressible product that does not rust. As is the case with steel wool, it is best to caulk over openings filled with copper mesh as rodents can push the mesh aside to gain entry through an opening.
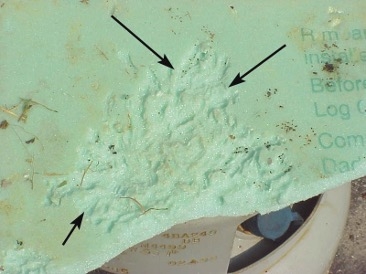
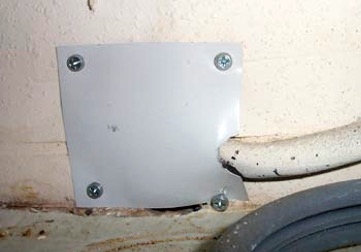
Larger holes may require a wire mesh before caulking is applied. Holes with large open spaces behind them (voids) that prevent the use of caulks may be covered with thin, galvanized sheet metal and then painted. When using sheet metal, ensure that all edges are securely attached to the structure. Expanding foam is not recommended as mice may chew through the material (Figure 14).
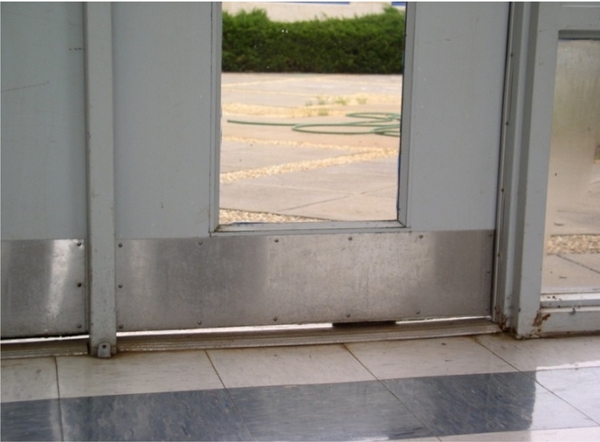
Install metal kick plates, metal thresholds, rodent-proof door sweeps or on all exterior doors that allow no more than 1⁄4-inch clearance between the door and floor (Figure 15). Rodent-proof door sweeps are not the same as weather stripping. A rodent-proof door sweep forms a tight seal and is filled with rodent-proof metal mesh. Ensure windows close properly and have intact screens, preferably constructed of metal. Seal all cracks and gaps around windows and door frames with caulk or repair the facings. Attic and crawl space openings should have tight doors, with commercially available screened vents over attic and crawl space openings. Alternatively, they may be screened with 1⁄4-inch-mesh hardware cloth.
Building Interior
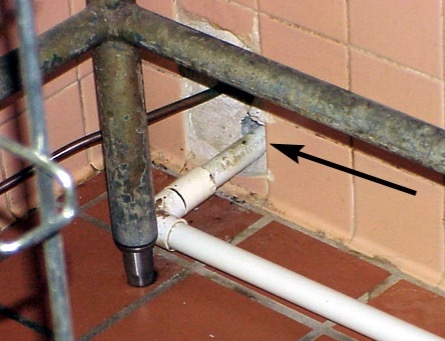
All holes, gaps, and cracks in walls, floors, ceilings, and cupboard interiors, and around bathtubs or chimneys, etc., should be sealed to keep rodents from entering rooms (Figure 16). Similarly, all open chases and gaps must be sealed around conduits, electrical wires, water pipes, exhaust vents and ducts, air conditioners, and other elements that penetrate walls, floors, and ceilings. The use of caulk, plaster, and/or paint may be needed to provide an acceptable finish.
Chemical Management (Baits & Repellents)
Baits
Chemical-based mouse management is accomplished through the use of rodenticides - chemicals specifically formulated to kill rodents. The primary mode of action for most rodenticides is as an anticoagulant. In other words, they disrupt the mouse’s ability to clot blood - often by preventing the activation of vitamin K. Ingestion of large amounts of these anticoagulant products lead to internal and external bleeding, resulting in death of exposed mice (ex. Contrac, d-Con). Other non-anticoagulant rodenticides are also available and vary in their modes of action.
Typically rodenticides are deployed in the form of a bait, designed to encourage feeding and rodenticide ingestion, and should always be deployed in secure packaging. You may be reading this section and thinking: “Wait, don’t I need to be able to clot my blood?” - and the answer is yes. Rodenticides are formulated to kill mice and other rodents, which are mammals - and you, your children, pets, and many wild animals (mammals and others) are highly susceptible to poisoning via rodenticide exposure. Secondary or accidental primary exposure of non-target animals to deployed rodenticides can be fatal, and so the utmost care should always be taken when involving rodenticides into your mouse management plan. Rodenticides are best handled by pest management professionals. Our recommendation is to rely on professional pest management services if you feel bait is required to manage your level of mouse infestation.
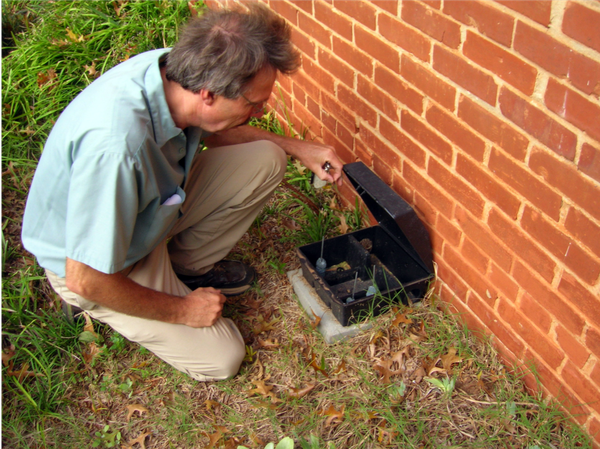
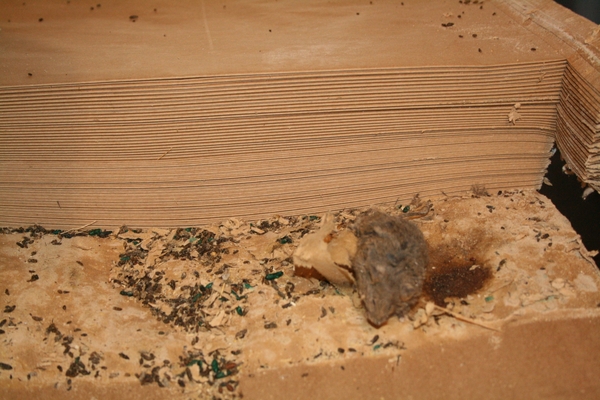
If you decide to purchase and use consumer-grade rodenticide baits make sure you follow all label instructions, and deploy the minimum amount necessary for the observed level of mouse infestation. Baits should be deployed in secure and discrete areas away from pets and children, in secure containers (Figure 17). In fact, certain bait stations incorporate mechanical control measures as well, including snap-traps (Figure 8). As hinted at above, evidence of rodenticide consumption can often be seen in mouse fecal pellets - taking on a hue of the colorful bait they consume (Figure 18). This can help to determine if bait placement and bait selection is appealing to the mice being targeted.
Repellents
This is a brief statement on repellents as a means of mouse management. These “repellents” can include various oils (peppermint), moth balls, ammonia, and commercial products that use various mixtures of these. There is some evidence that certain odors can repel mice (Jokic et al. 2018), however repellents are not a reliable form of mouse management or prevention. Highly volatile oils disappear quickly once introduced into the environment, and may compromise the efficacy of deployed baits and traps.
The information contained in this article represents a broad array of information on mouse managment - however, it is not exhaustive. Many additional products and procedures for mouse management exist, and we encourage you to explore all options available to you and to select and design a management program that meets the unique needs of your situation.
Disclaimer: Any commercial products mentioned in this publication serve as examples only, and do not represent endorsements of the products by any entities associated with this publication.
Publication date: Dec. 12, 2024
The use of brand names in this publication does not imply endorsement by NC State University or N.C. A&T State University of the products or services named nor discrimination against similar products or services not mentioned.
N.C. Cooperative Extension prohibits discrimination and harassment regardless of age, color, disability, family and marital status, gender identity, national origin, political beliefs, race, religion, sex (including pregnancy), sexual orientation and veteran status.

