
Table of Contents
Section 2: General Design Considerations
Section 3: Designing with Plants for Visual Interest
Section 4: Inspiring Discovery and Continued Excitement in the Garden
Introduction
School gardens are excellent places for students to engage with nature, observe plant growth, and make discoveries outdoors. These gardens can be rich, vibrant spaces for youth to enhance their understanding of local food, science, nutrition, and much more.
Section 1: Student Engagement
Learning in the garden often happens before the first seed is planted. Students should be involved in all stages of the garden creation, including planning and design. Including students in the conceptual process helps foster critical thinking skills and instills a sense of ownership in the garden.
Encourage students to think creatively and ask visionary questions. For example: What would they like to see in the garden? What crops would they want to grow and why? What flowers would they like to include? Have students sketch their garden plan ideas or capture their input through writing (Figure 1). Encourage them to share their ideas with one another (Figure 2).
Student-Led Design
Designing with students can be a simple process. To capture ideas, use readily available materials such as Legos or large pads of paper and markers. The most important goal is to help students become critical thinkers, daring them to think creatively. Encourage them to evaluate the physical environment, potential uses for the space, and types of plants that would be desirable.
Design exercises can be incorporated seamlessly into the curriculum. Table 1 provides a few examples of curriculum connections.
Designing with a Kit
Providing students with a standardized template helps them focus on key design features, such as spatial arrangement, garden pathways, garden programming, and crop selection. Students will be less worried about how pretty the plan is or if it “looks” as good as their classmates’ depictions. Instead, students can focus on strategic elements of the garden plan. Templates can provide design freedom that not only helps bolster confidence but also generates substantive ideation.
Teachers can create their garden templates or take inspiration from this student design activity from NC State Extension's Farm to School Garden Resource website. The activity includes popular garden features drawn to scale, including planter boxes, benches, a storage shed, a compost bin, and pollinator flowers. Students who have ideas beyond the examples provided are encouraged to draw them directly on the plan. Using dry-erase markers on laminated activity sheets provides additional design flexibility (Figure 3).
Designing with Legos
Designing with everyday items, such as Legos, helps reduce barriers to the design process. Students can intuitively connect with these familiar objects, helping them apply math skills such as calculating scale, area, and perimeter. For example, each Lego brick "stud" can represent 1 foot. Students can count and assemble one or more Lego bricks to make garden beds and then arrange these beds and other garden features on Lego building plates (Figure 4 and Figure 5). This interactive method enables students to map out design ideas, share with classmates, and develop critical thinking skills.

Figure 1. Student idea board for garden plants.
Photo credit: Remi Ham.

Figure 2. Students sharing garden ideas with a group.
Photo credit: Marcello Cappellazzi.
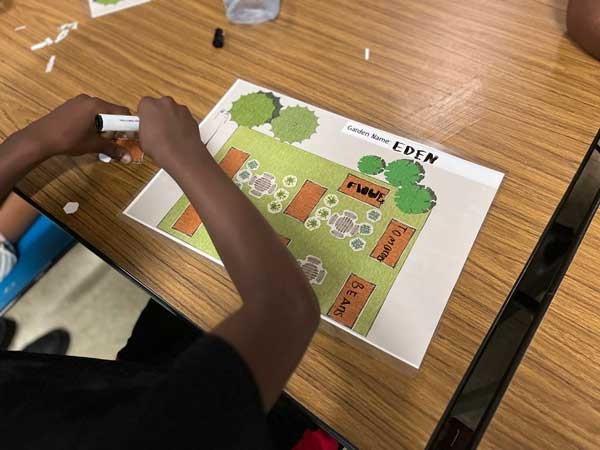
Figure 3. Student drafting garden design ideas.
Photo credit: Remi Ham.
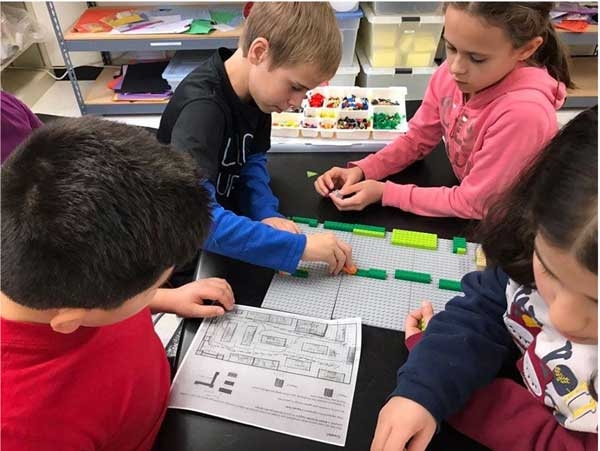
Figure 4. Students displaying their Lego garden plan.
Photo credit: Wake County Public School System teacher.

Figure 5. Students translating their group garden blueprint into Lego designs.
Photo credit: Wake County Public School System teacher.
Section 2: General Design Considerations
Phased Design
Designing and installing school gardens in phases can encompass multiple lessons. These phases can occur over weeks, months, or even years. Phased design enables you to begin planting at a smaller scale while learning more about your site, developing your team, creating a maintenance plan, and strengthening curriculum integration.
Site Considerations
Select a garden site with level topography that is conveniently accessible to students and teachers. Preferably, the garden should be in a space with high visibility that students pass frequently. For example, consider placing the garden along outdoor pathways leading to the playground, cafeteria, or outdoor classroom units. In addition, sites that are highly visible from windows or school courtyards can inspire continued curiosity and a desire to check on plant growth.
Sunlight
Eight to ten hours of sunlight is recommended for most fruit-bearing crops, such as tomatoes, peppers, cucumbers, or berries. For locations with four to six hours of sunlight, choose crops that thrive in partial sun, such as leafy greens or herbs. In your site assessment, account for seasonal sunlight changes. If trees or large buildings are immediately adjacent to the site, consider how these features might shade the garden during different times of the year. Identify two or three potential locations and conduct a light study over time (as in different seasons and times of day).
Water Access
Before installing the garden, ensure that a water source is within close reach—no farther than 50 feet is recommended. Failure to consider all aspects of water access may be detrimental to garden care. Ensure that water spigots are in proximity to the garden, identify locations of downspouts as potential catchment areas for rain barrels, and identify a location for water hose storage.
Soil Health
Soil health is critical for thriving plants. Unhealthy soil often leads to unhealthy crops. Many crops grow well with a soil pH between 6.0 and 6.5. However, some plants, like blueberries, prefer a more acidic soil. Therefore, know before you grow. Research your plants' soil needs and check with your local Extension center about free soil testing.
Pathway Width and Materials
Pathways at least 3 feet wide are recommended. Narrower pathways are less accommodating to large groups, students with special accessibility needs, or wheelbarrows. Grass pathways can work well, but mulched pathways help reduce maintenance, suppress weeds, and reduce puddling during extreme weather events.
Garden Boundaries or Fencing
Surrounding your garden with fencing helps define garden boundaries. Fencing keeps students in the garden and deters pests. Traditional wooden picket fences (Figure 6) work well but can be costly. Alternative fencing options include using chicken wire (Figure 7) to create a “wall” around plant containers or beds.
Raised Garden Beds
Raised garden beds are an excellent option for school settings. They are easy to maintain, convenient for removing weeds and amending soil, and reduce erosion. Raised beds are also easily accessible via garden pathways. Choose construction materials that can withstand weathering over long periods, but be sure they are free of harsh chemicals that can leach into the soil. While more expensive, cedar and redwood are safe and long-lasting (Figure 8). Food-safe metal, such as corrugated steel (Figure 9); concrete blocks; or retaining wall stones are also viable options.
Garden Rows
Planting in garden rows (Figure 10) is an affordable way to start your school garden. Plants are sown or transplanted directly into prepared ground. However, this method may require more prep work. Additional work includes the need for frequent soil amendments, weed control, and pest management. Test your soil before planting. Mulched paths between rows can help reduce weeds, and fencing can aid in pest reduction.
Accessibility
Elevated planters at tabletop height (about 3 feet) are more accommodating to wheelchairs or people with limited mobility. Wide pathways (about 3 feet) with flat terrain and compact surface materials better accommodate wheelchair mobility and turn radius. Wheelchair-accessible planter boxes provide an equitable experience for all students (Figure 11).
Signage
Signage helps relay useful information (Figure 12). It helps identify planting zones and also aids with plant identification. Before the first flowers or fruits form, identifying plants by foliage alone can be challenging for novice gardeners (Figure 13). Signage allows students to recognize specific crop developmental stages. Signs also can add colorful accents to the garden space (Figure 14).
Designated Teaching Spaces in the Garden
Not every garden is large enough to accommodate outdoor classroom infrastructure, such as a chalkboard, teacher platform, seating, or covered gathering spaces. If space permits, however, the following features can enhance the learning experience.
Seating
Provide enough seating for a full class size, typically 20 to 30 students. Seating options might include long benches (Figure 15), repurposed tree stumps (Figure 16), or hay bales (Figure 17). Long-lasting materials that can withstand weathering are preferred. Seating arranged in a circle or semicircle makes student participation easier, allowing students to share with one another and aiding teacher visibility. If seating is arranged in rows, space the seating to ensure that students can see the teacher.
Instructional Surfaces
Ensure that all writing or display surfaces are properly protected from the elements by using water-resistant materials or applying moisture-repellant sealants (Figure 18). Paint helps create a protective coating on structural posts. Chalkboards or dry-erase boards are affordable display options.
Shade Coverings
During hot or sunny days, shade structures or coverings can provide shelter for students and educators in the garden. Establishing a more comfortable environment for students helps them remain attentive during outdoor lessons or exploratory activities. Options include a pergola, tarp awning, or even a temporary outdoor tent that reduces heat impacts.
Garden Entryways or Arbors
Established garden entry points create a sense of place and help students connect with the garden as an outdoor classroom (Figure 19). It is important to ensure that all structural components can withstand weathering and have enough clearance for students and teachers to comfortably pass through (7 feet tall or 3 to 4 feet wide). Check your local building codes to confirm any required clearance. Materials such as weather-treated wood or metal are great choices. Containerized plants or strategically arranged garden beds can also help frame a garden entry.
Additional Garden Features
Storage for tools and equipment
Storage is an important garden component. Whether for garden equipment, tools, gloves, or plant materials, accessible storage helps secure materials and reduces deterioration. Storage bins at accessible heights are convenient for items frequently used by students, including gloves, trowels, and watering cans. Garden tools with sharp edges, fertilizers, or any soil amendments should be stored out of reach of children.
Composting station
Composting is a great educational tool within school garden spaces (Figure 20). A bonus would include educational signage adjacent to the garden composting station that describes the composting process, including the role of decomposers (Figure 21).
Irrigation
Drip irrigation systems reduce the labor required for watering plants, control watering times and frequency, and include timer options that turn the system on and off. If watering with a hose and nozzle attachment, establish a watering schedule with your school community, communicate best watering practices, and ensure that watering tools are accessible to everyone.
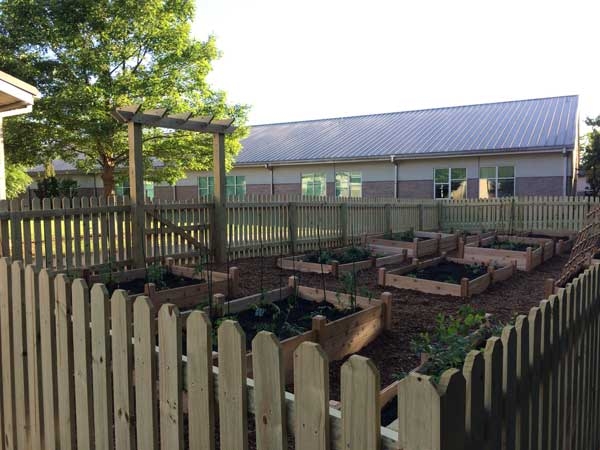
Figure 6. School garden with wood picket fence.
Photo credit: Remi Ham.
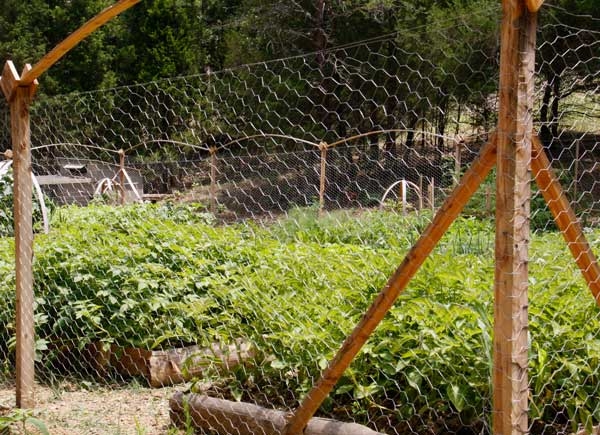
Figure 7. Vegetable garden with chicken wire fencing.
Photo credit: istockphoto.
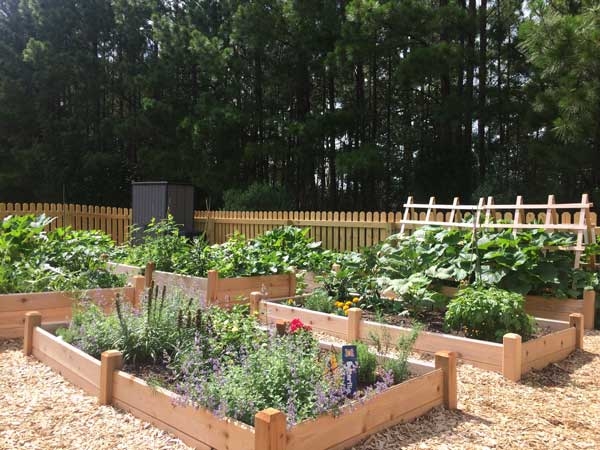
Figure 8. Cedar raised planters.
Photo credit: Remi Ham.
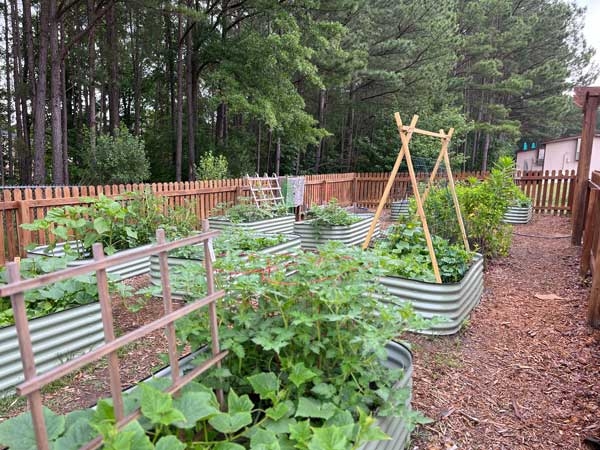
Figure 9. Corrugated steel planters.
Photo credit: Remi Ham.

Figure 10. Example of row cropping.
Photo by Remi Ham.

Figure 11. Example of hardscape path next to 3-foot-high raised planters in a garden classroom.
Photo credit: Remi Ham.

Figure 12. Informational signage highlighting seasonal crops and a garden checklist.
Photo credit photo: Remi Ham.

Figure 13. Garden signage or labeled stakes in planters help identify juvenile crops.
Photo credit: Remi Ham.
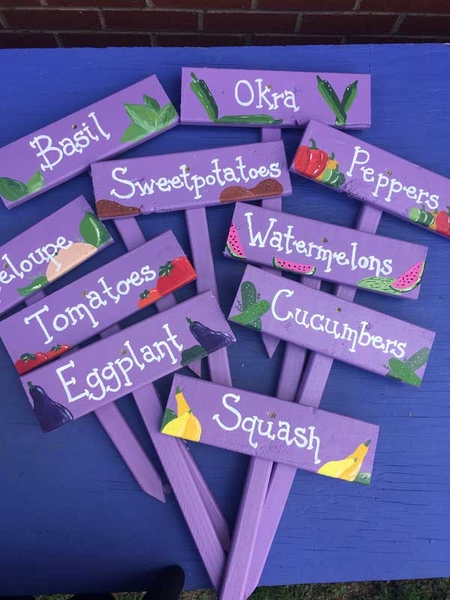
Figure 14. Garden plant labels.
Photo credit: Remi Ham.
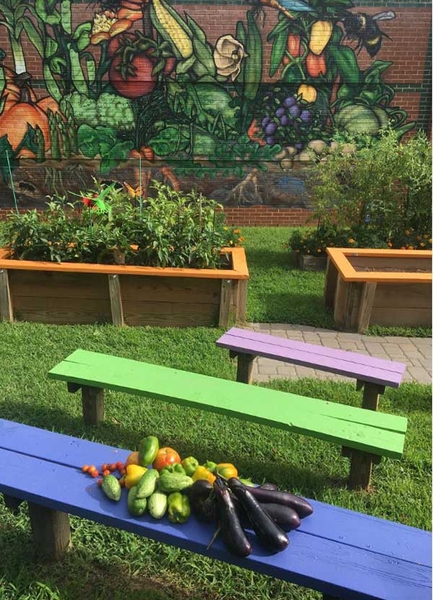
Figure 15. Colorful benches facing garden beds for classroom lessons.
Photo credit: Remi Ham.
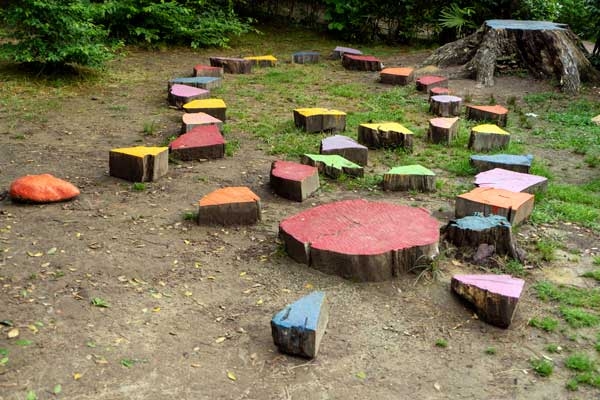
Figure 16. Tree stumps arranged for student seating.
Photo credit: istockphoto.
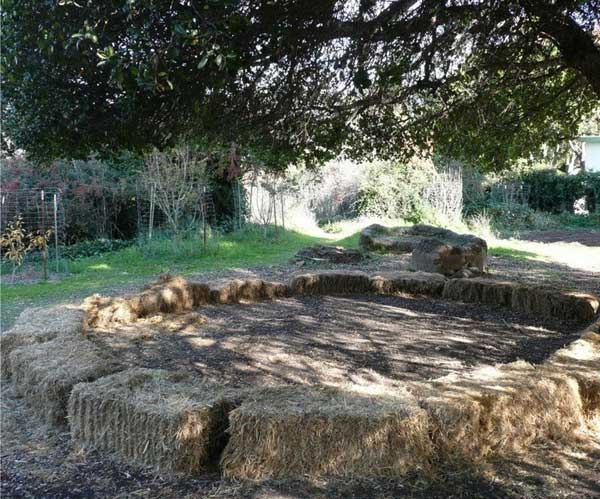
Figure 17. Hay bales arranged in a circle for student seating.
Photo credit: Remi Ham.
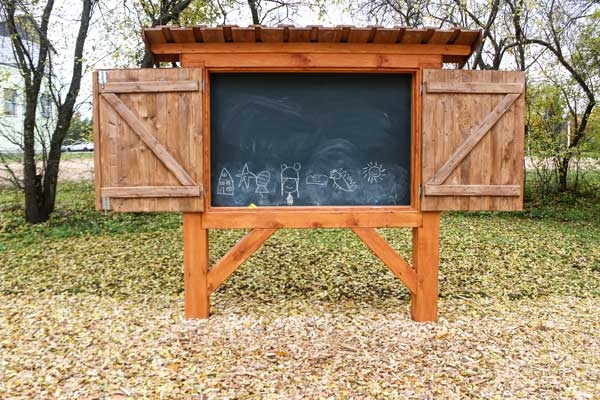
Figure 18. Outdoor chalkboard with doors and roof.
Photo credit: istockphoto.

Figure 19. Examples of school garden entryways.
Photo credit: Remi Ham.
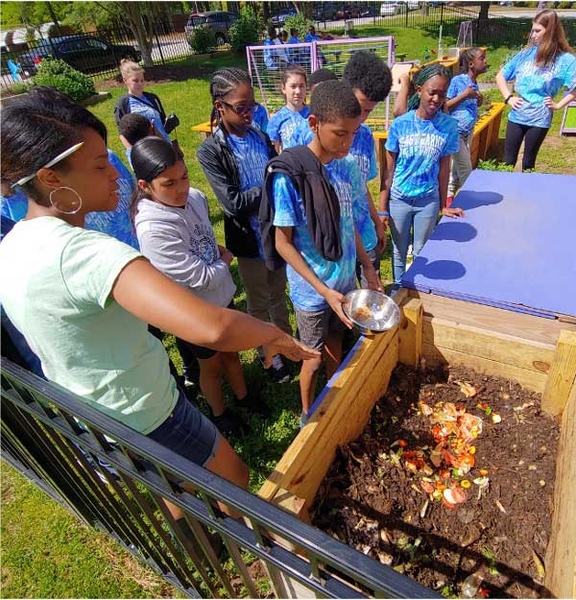
Figure 20. Students learning about composting in a garden setting.
Photo credit: Jennifer Bell.
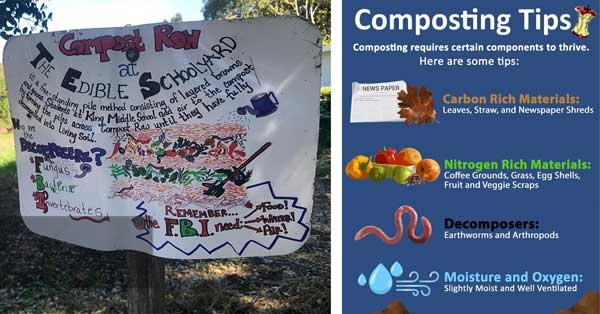
Figure 21. Informational signage highlighting the importance and roles of decomposers in the garden.
Photo credit: Remi Ham.
Section 3: Designing with Plants for Visual Interest
Strategic plant arrangements can elevate the appearance of your school garden. To create visual interest, incorporate three design factors: balance, composition, and color. Balance considers the rhythm or frequency of plant occurrence, plant height, and textural components, such as foliage. Composition establishes strategic focal points and creates a layered design with varied plant heights. Color creates patterns and cohesion among neighboring crops.
Plant Selection and Site Conditions
Choosing plants that are well suited to your site conditions and growing season is a crucial step in the design process. Depending on your location, consult either Vegetable Planting Guide for School Gardens in the Piedmont and Coastal Plain of North Carolina or Vegetable Planting Guide for School Gardens in the Foothills and Mountains of North Carolina. Additional plant resources are also available from the North Carolina Extension Gardener Plant Toolbox.
Plant Design and Composition
To create visual interest, mix vertically growing crops (planted on the northern end of the bed so that they don’t shade lower-growing crops) with those that grow lower to the ground (Figure 22). Strategically distribute vertical elements in the garden. Trellised plants create added dimension and also make harvesting more accessible (Figure 23 and Figure 31). Pole beans, cucumbers, and vining peas are great choices for vertical gardens. Strawberries are a good low-growing crop that children particularly enjoy. Horizontal vining crops add cascading effects within raised garden beds. Table 2 provides examples of plants with different growth habits. Grouping crops establishes design rhythms or patterns. Design rhythms are established by grouping plants by color, type, and texture. Design patterns include planting similar plants together in groups of three or more (Figure 24).
Garden Design Using Color
With intentional pairing and placement (Table 3), plants can visually invigorate a school garden. Continuous visual interest can be achieved by pairing pollinator-attracting plants that have bright flowers (Table 4) with vibrant foliage (Figure 27) or developing fruit. The color wheel (Figure 25) is a helpful tool for novice designers. Pairing plants with analogous (neighboring) colors or complementary (those across from each other) colors is a great way to elevate your design (Figure 26, Figure 28, Figure 29, and Figure 30).
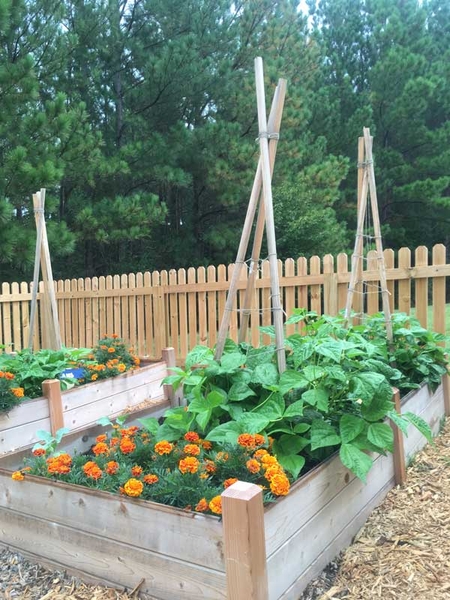
Figure 22. Trellised beans paired with marigolds.
Photo credit: Remi Ham.
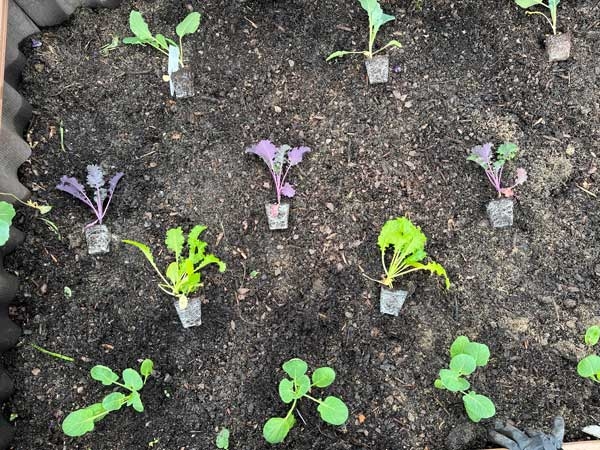
Figure 23. Trellised cucumbers and squash.
Photo credit: Remi Ham.

Figure 24. Cool-season crop plant groupings (purple and green kale).
Photo credit: Remi Ham.
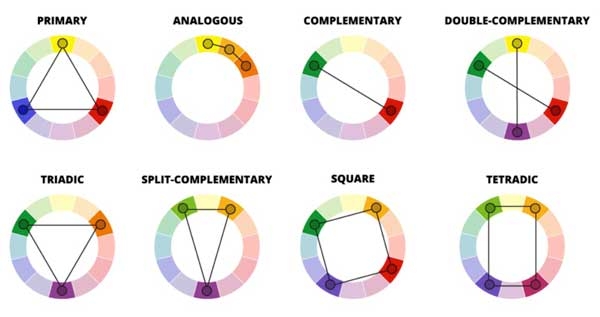
Figure 25. A color wheel is a good design tool to assist with colorful crop selection.
Photo credit: Istock Photo.
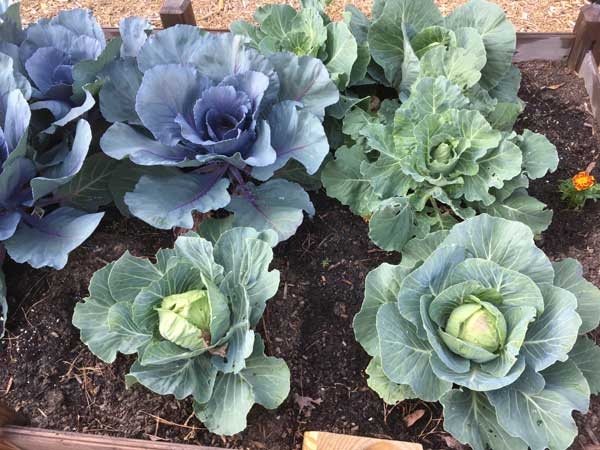
Figure 26. Purple and green cabbages.
Photo credit: Remi Ham.
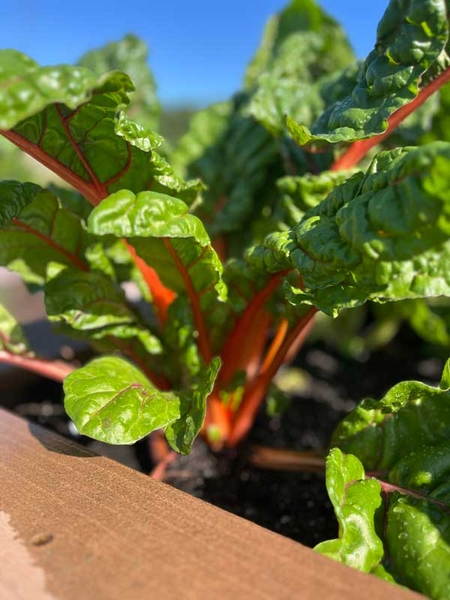
Figure 27. Swiss chard with red-orange stems.
Photo credit: Remi Ham.
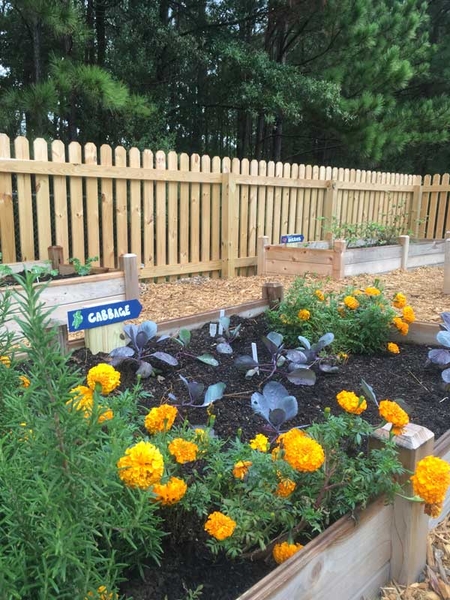
Figure 28. Purple cabbage paired with orange marigolds and rosemary.
Photo credit: Remi Ham.
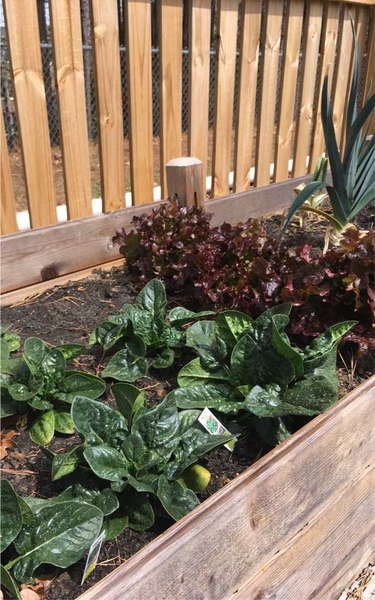
Figure 29: Spinach paired with red leaf lettuce.
Photo credit: Remi Ham.
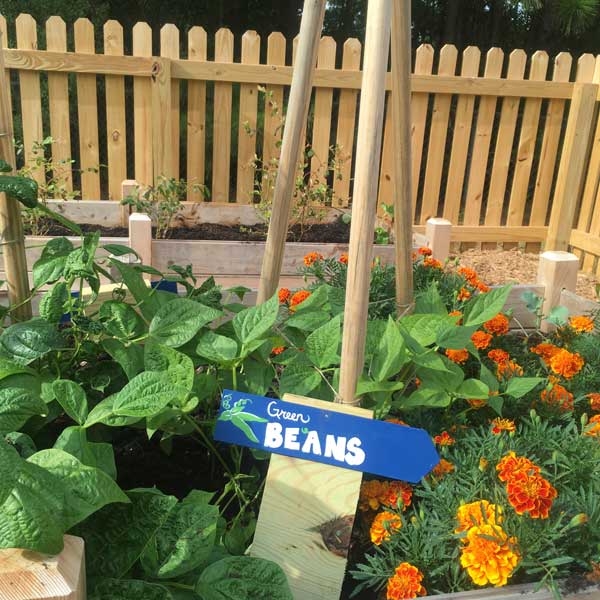
Figure 30. Pole beans paired with orange marigolds.
Photo credit: Remi Ham.
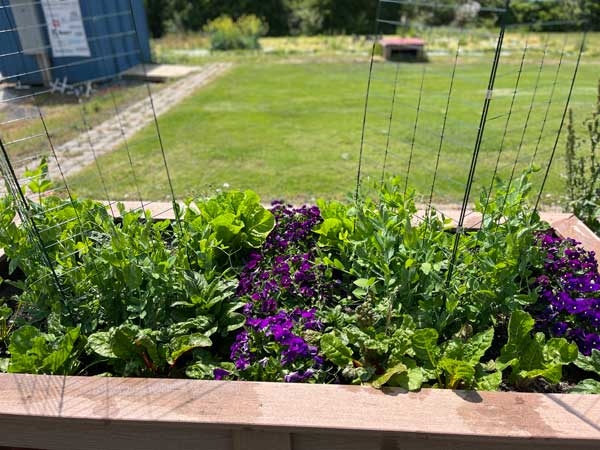
Figure 31. Trellises will provide vertical support for snap peas, which visually contrast with low-growing spinach, green leaf lettuce, and purple pansies.
Photo credit: Remi Ham.
Section 4: Inspiring Discovery and Continued Excitement in the Garden
Gardens are a place of wonder, where plants sprout before our eyes, insects and creatures abound, and there is a lesson in every visit. By implementing strategic design features, school gardens can foster ongoing excitement. The following ideas can further enhance the “magic” found in the school garden.
Choose Your Own Garden Adventure
The power of choice gives autonomy to students in their learning. Discovery ideas can range from "insect detectives" to a seasonal scavenger hunt with an assortment of options or a rub-and-sniff garden exploration. The goal is to provide semi-structured activities through which students drive their learning experience to discover something new.
"Stepping Stone" Math
Painted stepping stones (Figure 32) are a great way to establish a pathway and also an opportunity to gamify learning in the garden. Multicolored numbered stones are wonderful for practicing mathematical operations, such as addition, subtraction, multiplication, or division.
Root Viewer
Root viewer boxes (Figure 33) give students a view of plant parts that grow underground. Each garden visit offers a new opportunity for students to track, measure, and better understand the unique growth cycle of root crops. Popular crops for root boxes include carrots, radishes, and potatoes.
Plant Name Fun
School gardens can include ornamentals in addition to vegetables. Consider including plants with fun common names or interesting features, especially those that attract pollinators to the garden (Figure 34). Examples include Stachys byzantina (lamb's ear), which has soft, fuzzy leaves; Nepeta (catmint), which has a strong fragrance and delicate purple flowers; or Echinacea purpurea (purple coneflower), whose center disk flowers are great bee and butterfly attractants.
Garden Food Preparation Spaces
Food preparation areas allow students and teachers to eat and prepare tastings safely and directly in the garden. Preparation spaces may include sink stations, countertop surface areas, or outdoor cooking stations. Countertops or tables in the garden provide a place to harvest and clean produce or to hold items from indoors, such as a pitcher of clean water and culinary tools. When growing, preparing, and consuming vegetables, it is essential to follow food safety protocols.
Art in the Garden
Art is a way to uniquely invigorate a space while incorporating educational themes. Painted murals (Figure 35), creative signage, and metal sculptures or garden-themed painted rocks (Figure 36) directly and indirectly support curriculum connections. Students, school community members, or local artists can work together to create these artistic components.

Figure 32: Examples of colorful stepping stones in school garden.
Photo credit: istock photo.
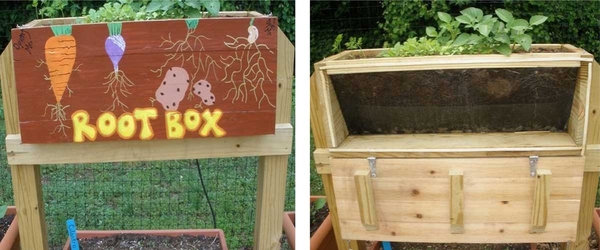
Figure 33: Example of root viewer box in a school garden, with "door" closed (left) and open (right).
Photo credit: istock photo.
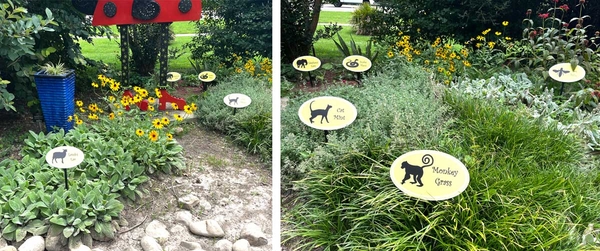
Figure 34. Example of fun signage with garden images associated with plant names.
Photo credit: Remi Ham.

Figure 35. Mural depicting North Carolina seasonal crops, pollinators, and underground insects.
Photo credit: Remi Ham.

Figure 36. Painted rock resembling a bee and metal sculpture of bee pollinating a flower.
Photo credit: Remi Ham.
Additional Resources
Resources and materials to support your school garden programming can be found on NC State Extension's Farm to School Garden Resource Website.
Publication date: July 31, 2025
AG-988
N.C. Cooperative Extension prohibits discrimination and harassment regardless of age, color, disability, family and marital status, gender identity, national origin, political beliefs, race, religion, sex (including pregnancy), sexual orientation and veteran status.