
Outline
Site Preparation
Fertilization
When to Plant
How to Plant
Irrigating
Mowing
Pest Management
Maintaining an Established Lawn
Irrigating
Mowing
Fertilizing
Weed Management
Coring (Aerification)
Power Raking (Verticutting)
When to Renovate
Weed Control Considerations
Preparation for Seeding
Seeding
Plugging
Sprigging Large Areas
Care After Planting
Objectives
This chapter teaches people to:
- Understand the basic functions of turfgrass in the landscape.
- Select the best turfgrass for a given home lawn setting.
- Establish a lawn from seed or sod.
- Implement environmentally friendly maintenance practices: watering, mowing, aerating, and fertilizing.
- Use IPM techniques to determine pest problems and their management.
- Become familiar with lawn alternatives.
Introduction
Lawns are smooth, living carpets that add beauty and recreational space to a home. As grass grows, it helps the environment by stabilizing soil and reducing air pollution, noise, heat, dust, and glare. Surveys show that an attractive, well-landscaped lawn can even add to a home’s value. By choosing well-adapted grasses and planting them in the right location, a lush lawn will grow with minimal maintenance and pesticide use.
What to Plant
Whether you are establishing a new lawn or renovating an existing one, deciding which type of grass to plant is the first step. A number of factors should be considered, including region, climate, intended use or wear at the site, and desired appearance. Different types of grass thrive in different conditions, so it is important to pick a variety adapted to your location.
North Carolina is divided into three major regions: coastal plain, piedmont, and mountains (Figure 9–1). Both cool-season (northern) and warm-season (southern) grasses are grown in North Carolina (Table 9–1). Cool-season grasses grow best in the spring and fall and less actively in the summer. They stay reasonably green in the winter. Tall fescue, Kentucky bluegrass, fine fescue, and perennial ryegrass are common types of cool-season grasses. Table 9–2 lists ratings for the performance of various cultivars of these grasses in North Carolina. Warm-season grasses are slow to green up in the spring, grow best in the summer, and go dormant after the first heavy frost. Table 9–3 lists many warm-season cultivars. Consider each site’s characteristics and your goals for the site to determine which types of grass are appropriate. Choose a grass that best meets color, density, and texture preferences. Choose a tough, aggressive, wear-tolerant grass where heavy traffic is expected. When making a selection, remember to consider the amount of time, effort and money needed for turfgrass maintenance.
| Lawn Grass | Can Be Seeded? | Tolerance Ratings | Appearance | Preferred Season | Rate of Establishmenta | Maintenance | ||||||||
|---|---|---|---|---|---|---|---|---|---|---|---|---|---|---|
| Shade | Heat | Cold | Drought | Wear | Color | Texture | Cutting Height (in.) | Fertilizer (lb N/1,000 sq ft/yr) | Mowing Frequencyb | |||||
| Mountains-Foothills | ||||||||||||||
| Kentucky bluegrass | Yes | 4 | 3 | 5 | 4 | 4 | Medium–Dark | Medium | Fall | Moderate | 1.5–2.5 | 2–3 | Medium | |
| Kentucky bluegrass/fine fescue mix | Yes | 4 | 3 | 5 | 4 | 3 | Medium–Dark | Fine–Medium | Fall | Moderate | 1.5–2.5 | 2–3 | Medium | |
| Kentucky bluegrass/perennial ryegrass mix | Yes | 4 | 3 | 5 | 4 | 5 | Medium–Dark | Medium | Fall | Fast | 2–3 | 2.5–3.5 | Med–high | |
| Kentucky bluegrass/tall fescue mix | Yes | 4 | 4 | 5 | 5 | 5 | Medium–Dark | Medium–Coarse | Fall | Fast | 2.5–3.5 | 2–3 | High | |
| Kentucky bluegrass/tall fescue/fine fescue mix | Yes | 5 | 4 | 5 | 5 | 5 | Medium–Dark | Medium–Coarse | Fall | Fast | 2.5–3.5 | 2–3 | High | |
| Tall fescue | Yes | 4 | 4 | 5 | 5 | 5 | Medium | Medium–Coarse | Fall | Fast | 2.5–3.5 | 2.5–3.5 | High | |
| Zoysiagrass | Yes | 4 | 5 | 4 | 6 | 4 | Medium | Fine | Spring–Summer | Very slow | 0.75–2 | 1–3 | Low | |
| Piedmont | ||||||||||||||
| Bermudagrass (common) | Yes | 1 | 5 | 1 | 6 | 6 | Medium | Medium | Spring–Summer | Fast | 0.75–2 | 4–4.5 | Med–high | |
| Bermudagrass (hybrid) | No | 1 | 5 | 2 | 6 | 6 | Light–Dark | Fine | Spring–Summer | Moderate | 0.75–2 | 3–6 | High | |
| Bahiagrass | Yes | 4 | 4 | 2 | 6 | 4 | Medium–Dark | Coarse | Spring–Summer | Moderate | 2–4 | 1 | High | |
| Centipedegrass | Yes | 4 | 4 | 2 | 4 | 1 | Light | Coarse | Spring–Summer | Slow | 1–1.5 | 1–2 | Low | |
| Kentucky bluegrass/tall fescue mix | Yes | 4 | 4 | 5 | 5 | 5 | Medium–Dark | Medium–Coarse | Fall | Fast | 2.5–3.5 | 2–4 | High | |
| Kentucky bluegrass/tall fescue/fine fescue mix | Yes | 5 | 4 | 5 | 5 | 5 | Medium–Dark | Medium–Coarse | Fall | Fast | 2.5–3.5 | 2–4 | High | |
| St. Augustinegrass | No | 5 | 5 | 2 | 4 | 1 | Medium–Dark | Coarse | Spring–Summer | Moderate | 2.5–4 | 2–3 | Med–high | |
| Tall fescue | Yes | 4 | 4 | 5 | 5 | 5 | Medium | Coarse | Fall | Fast | 2.5–3.5 | 2–4 | High | |
| Zoysiagrass | Yes | 4 | 5 | 4 | 6 | 4 | Medium–Dark | Fine–Medium | Spring–Summer | Very slow | 0.75–2 | 1–3 | Low–med | |
| Sandhills-Coastal Plain | ||||||||||||||
| Bermudagrass (common) | Yes | 1 | 5 | 1 | 6 | 6 | Medium | Medium | Spring–Summer | Fast | 0.75–2 | 3–4.5 | Med–high | |
| Bermudagrass (hybrid) | No | 1 | 5 | 2 | 6 | 6 | Light–Dark | Fine | Spring–Summer | Moderate | 0.75–2 | 3–6 | Very high | |
| Bahiagrass | Yes | 4 | 5 | 2 | 6 | 4 | Medium–Dark | Coarse | Spring–Summer | Moderate | 2–4 | 1 | High | |
| Centipedegrass | Yes | 4 | 4 | 2 | 4 | 2 | Light | Coarse | Spring–Summer | Slow | 1–1.5 | 1–2 | Low | |
| St. Augustinegrass | No | 5 | 5 | 2 | 4 | 2 | Medium–Dark | Coarse | Spring–Summer | Moderate | 2.5–4 | 2–4 | Med–high | |
| Tall fescue | Yes | 4 | 4 | 5 | 5 | 5 | Medium | Coarse | Fall | Fast | 2.5–3.5 | 2–4 | High | |
| Zoysiagrass | Yes | 4 | 5 | 4 | 6 | 4 | Medium–Dark | Fine–Medium | Spring–Summer | Very slow | 0.75–2 | 2–4 | Low–high | |
| Key for tolerance ratings: 6–Excellent, 5–Very good, 4–Good, 3–Fair, 2–Poor, 1–Very poor Note: Some improved cultivars are better adapted and more pleasing in appearance than the comparison rating provided for a given lawn grass. Check with your local Cooperative Extension center concerning specific cultivars that have characteristics of interest to you. See Table 9–4 for suggested months of establishment. a Establishment rate is dictated by planting dates, seeding and planting rate, intensity of culture, and environment. b Mowing frequency is dictated by season, intensity of management, and use. |
||||||||||||||
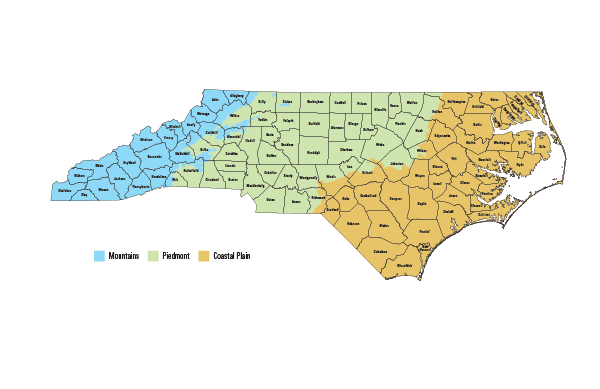
Figure 9–1. A regional map showing the mountain, piedmont, and coastal plain regions of North Carolina.
Cool-Season Grasses
Tall fescue, Kentucky bluegrass, fine fescues, and perennial ryegrass are cool-season perennial grasses used for lawns, mostly in the mountain and piedmont regions of North Carolina (Table 9–1). Unlike warm-season grasses, cool-season grasses remain green throughout most of the winter. They are better adapted to the mountains and piedmont and suffer more stress in the coastal plain. These grasses perform best in spring and fall and have a tendency to show signs of stress in the summer. Cool-season grasses are best seeded in early fall, but fair results may be obtained from seeding in early spring (mid-February to late March in the North Carolina piedmont). Generally, late winter or spring seeding of these grasses is not recommended.
Tall Fescue
Tall fescue is best adapted to the North Carolina mountains and piedmont but can be successfully maintained on the heavy silt loams in the coastal plain (Figure 9–2). It is a reliable performer and easily started from seed. It is the best grass to plant for a green lawn year-round. Tall fescue thrives in sun or medium shade in the mountains and piedmont. It will not perform well in full sun in the coastal plain, especially if the soil is sandy. It can be seeded by itself or mixed with Kentucky bluegrass or fine fescue, or both, particularly where shade is a concern. Tall fescue is a bunch-type grass, so damaged or bare areas need to be re-seeded. It exhibits good disease resistance, drought tolerance, and cold tolerance. It tolerates moderate traffic and persists with minimum care. Several improved tall fescue cultivars have been developed that are more shade tolerant, denser, and finer textured than Kentucky 31, a commonly used older cultivar. These characteristics become more evident as the turf matures and the maintenance level increases. Research has shown that some of these improved cultivars also have darker green color, improved disease and drought tolerance, hold up to wear better, and have a lower growth habit.
Experts recommend planting a blend of two or three cultivars rather than seeding just a single cultivar. This broadens the genetic base and gives the turf a better chance of withstanding a variety of challenges. Use a seeding rate of 6 pounds per 1,000 square feet (sq ft). Do not assume more seed is better. Higher seeding rates can result in weak, thin stands that are more susceptible to disease and high temperature stress.
Tall fescues perform best when mowed at a height of 3.5 inches, and should never be mowed shorter than 2.5 inches. Tall fescue may turn brown but often survives short periods of drought. Under certain circumstances, some tall fescue may be lost if a drought exceeds three weeks. To maintain a green lawn, it is best to irrigate, if possible, during periods of drought.
Kentucky Bluegrass
Kentucky bluegrass produces a high-quality, medium- to fine-textured turf when grown in the right climate (Figure 9–3). In North Carolina, it is well suited for the mountains and can be grown in combination with tall fescue in the piedmont. It is not suitable for use in the coastal plain. Kentucky bluegrass prefers fertile, limed, well-drained soils in sun or light shade. Excellent sod results from rhizomes (underground stems) that spread, with most cultivars recuperating from and tolerating pest control measures and moderate levels of traffic. Many new cultivars with improved color, texture, and pest resistance are now commercially available.
As with most cool-season grasses, it is best to broaden the genetic base by planting a blend of two to three cultivars rather than seeding a single cultivar. It is also common for Kentucky bluegrass to be seeded in combination with tall fescue. Tall fescue enhances drought and heat tolerance, whereas the Kentucky bluegrass provides finer texture and greater recuperative potential. Generally, Kentucky bluegrass grows better than tall fescue in moderate shade. When mixed with tall fescue, Kentucky bluegrass tends to dominate where the soil is limed, the turf is adequately fertilized, and the grass is kept mowed fairly short.
Kentucky bluegrass should be mowed at a height of 1.5 to 2.5 inches when planted alone. It should be mowed at 2.5 inches or higher when mixed with tall fescue. Seeding rates range from 1 to 2 pounds per 1,000 square feet. Higher rates can result in weak, thin stands that are more susceptible to disease and high temperature stress.
Even though Kentucky bluegrass may turn brown during a two- to four-week summer drought, it is not necessary to irrigate. Letting the grass go dormant prevents it from becoming stressed by drought conditions. Kentucky bluegrass recovers well from most droughts, and watering often increases disease problems.
Fine Fescues
Fine fescues include creeping red, chewings, and hard fescue. The name is derived from the very finely textured leaves, which are almost as fine as pine needles (Figure 9–4). Noted for tolerance to shade, drought, and poor soil conditions compared to other cool-season grasses, fine fescues are often included with tall fescue or Kentucky bluegrass when planted in the shade or when the grass will be subject to low maintenance. They are best adapted to the mountains but can be grown in the piedmont. They should not be used in the coastal plain. They may not persist in sunny locations exposed to high temperature extremes, excessive soil moisture or humidity, or heavy traffic.
Fine fescue seed should be mixed with Kentucky bluegrass because most of the fine fescues are bunch type and do not have the ability to spread. New seedlings establish quickly due to excellent seedling vigor. Seed fine fescue at 1.5 pounds per 1,000 square feet when mixed with either tall fescue or Kentucky bluegrass.
Fine fescue should be mowed at 1.5 to 2.5 inches when mixed with Kentucky bluegrass but at 2.5 inches or higher when mixed with tall fescue. Fine fescues generally do well in more natural areas with infrequent mowing.
Perennial Ryegrass
Perennial ryegrass is similar in appearance to Kentucky bluegrass but is only adapted to the mountains (Figure 9–5). In North Carolina it is never seeded alone but always mixed with Kentucky bluegrass. These grasses complement each other because perennial ryegrass establishes faster than Kentucky bluegrass, and Kentucky bluegrass has the ability to spread and fill in damaged areas.
A mix of Kentucky bluegrass and perennial ryegrass should be seeded at the rate of 2.5 pounds per 1,000 square feet, with Kentucky bluegrass making up 60 percent of the mix by weight. Perennial ryegrass should be mowed at 1.5 to 2.5 inches when mixed with Kentucky bluegrass.
Annual Ryegrass
Annual ryegrass (Figure 9–6) is used only when a temporary turf cover is needed. It is never recommended for permanent lawn mixtures because it dies in late spring when temperatures approach 80ºF or higher. It is sometimes found in inexpensive commercial seed mixtures, and those should be avoided. Because annual ryegrass is an annual, it must be reseeded each fall. Annual ryegrass has been used by some homeowners to provide winter color for bermudagrass lawns. It is never recommended for overseeding other warm-season grasses.
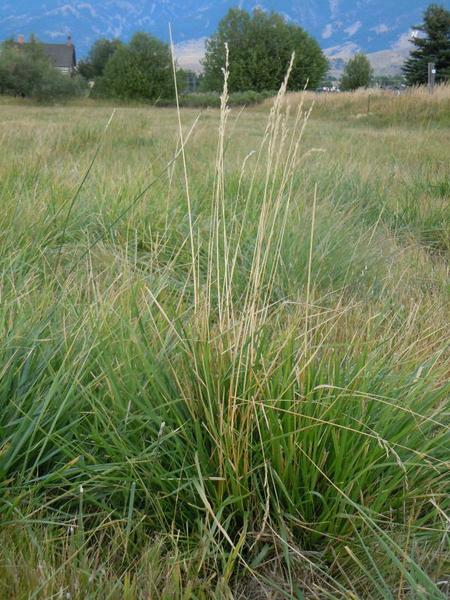
Figure 9–3. Kentucky bluegrass.
NC State University
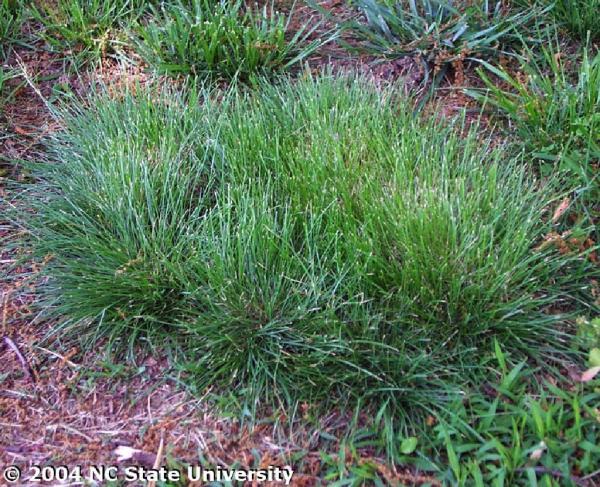
Figure 9–4. Fine fescue.
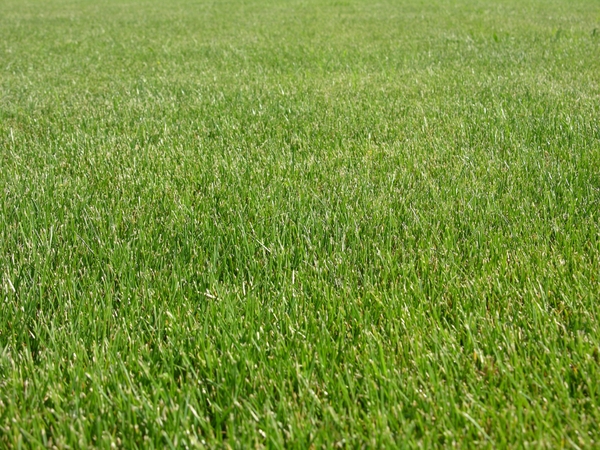
Figure 9–5. Perennial ryegrass.
Grady Miller, NC State University
Figure 9–6. Annual ryegrass.
Warm-Season Grasses
Bermudagrass, zoysiagrass, centipedegrass, St. Augustinegrass, carpetgrass, and bahiagrass are classified as warm-season perennial grasses. All except bahiagrass and carpetgrass are recommended for lawns in the North Carolina piedmont and coastal plain (Table 9–3). They grow best in the summer, go dormant in the fall at the first heavy frost, turn brown, and then green up slowly the following spring. For these reasons, warm-season grasses usually perform better farther east and south in these regions. Warm-season grasses are best planted in late spring and early summer. Unlike cool-season grasses, some warm-season grasses must be planted either by sod or other vegetative means because seeds either are not available or do not result in uniform stands. Warm-season grasses are usually seeded or planted as a single variety (monoculture) rather than in blends and mixtures.
A comparative chart of principal lawn grasses used in each region is provided in Table 9–1. Study the chart to help select the appropriate grass for the site and the intended use of the lawn. This information is based on cultivar (variety) trials and observations by turfgrass researchers at NC State University. Cultivar performance recommendations are based on overall quality ratings for each of these commercially available varieties. The National Turf Evaluation Program (NTEP) trial research results have been consolidated into an easy-to-use question-and-answer program that provides proven grass types and cultivars suitable for each region and use.
The release and evaluation of turfgrass cultivars changes rapidly, so contact a local Cooperative Extension center for the latest information on grass characteristics and selection.
Bermudagrass
Bermudagrass spreads by stolons and rhizomes. It can invade flowerbeds and other areas because its runners spread rapidly both above and below ground (Figure 9–7). Bermudagrass is, however, extremely drought tolerant and grows rapidly on any type of soil except where drainage is poor. It makes a good turf when fertilized and mowed low and often. Cultivar textures range from coarse to fine, forming a dense, durable surface when grown in full sunlight. It does not tolerate shade. Bermudagrass is well adapted to sandy soils, establishes quickly, withstands wear and traffic, and recovers rapidly from injury.
Most finely textured, high-quality turf-type bermudagrasses are planted using sod, sprigs, or plugs. Common bermudagrass, which is the most coarsely textured (that is, it has wide leaf blades), can be seeded. Several newer cultivars with a medium texture can also be seeded.
Bermudagrass should be seeded at 1 to 2 pounds per 1,000 sq ft. If the seed is coated, the seeding rates may need to be doubled.
Good performance can be achieved with a rotary mower with sharp blades set as low as possible without scalping. Uneven ground can make mowing below 1 inch difficult. For this reason, a 1- to 2-inch mowing height is recommended when using a rotary mower. For best results, bermudagrass should be mowed often during its peak growth in mid-summer (at least twice per week), especially at the lower mowing heights.
Zoysiagrass
Zoysiagrass spreads by stolons and rhizomes, but it is easier to keep out of flowerbeds than bermudagrass (Figure 9–8). It produces a very dense, wear-tolerant lawn that grows well in full sun and light shade. It has stiff leaves that produce a very dense turf, which people often describe as feeling like “walking on a cushion.” Zoysiagrass grows more slowly than bermudagrass, rebounds more slowly from damage, and thus requires less frequent mowing. The leaves are stiff, making mowing difficult unless the mower blades are sharp. Zoysiagrass is very drought resistant. Once fully established, it rarely needs irrigation to survive in North Carolina.
Zoysiagrass was once limited to two cultivars: Meyer and the finer textured Emerald. These low, slow-growing cultivars cannot be planted from seed and must be planted vegetatively (sod, stolon, plug, or sprig). They are very slow to establish from plugs, often taking three years for total coverage when planted on 12-inch centers. These older cultivars can become thatchy—puffy due to an accumulation of dead, dying, decaying plant residue at the soil surface. This happens especially when these grasses are mowed high and infrequently or heavily fertilized. Thatch may need to be removed every two to three years, but care should be taken due to the slow recovery rate of these cultivars.
In the last 20 years, a number of zoysiagrass cultivars have been released. These new cultivars, including El Toro, Crowne, Palisades, Empire, and Jamur, are coarser in texture (similar to newer tall fescues) and are quicker to establish and recover from injury. They are not as cold tolerant as Meyer and should not be mowed as short as Emerald and Meyer. Cavalier, Zeon, and Zorro are new zoysiagrass cultivars with a moderate growth rate and a fine texture similar to Emerald. Cold tolerance of zoysia is not a problem in North Carolina’s piedmont and coastal plain.
A few cultivars of zoysiagrass, such as Compadre, Zenith, Zen 100, and Zen 300CS, can be seeded. These coarse-textured zoysiagrasses are typically mowed with a rotary mower.
Centipedegrass
Centipedegrass is a slow-growing, stoloniferous, apple-green, coarsely leaved turfgrass that is best used as a low maintenance, general purpose turf (Figure 9–9). It requires little fertilizer once established (0.5 to 1 pound of nitrogen per 1,000 sq ft per year) and infrequent mowing. It grows well on acidic soils in full sun to partial shade. It does not tolerate traffic, compaction, high soil pH, high soil phosphorus, excessive thatch, drought, or heavy shade.
Centipedegrass is slow to establish and may take two to three years when seeded. It should be mowed when it attains 1 inch in height and no higher than 2 inches. Centipedegrass can become thatchy, especially when mowed high and infrequently or when heavily fertilized. Thatch may need to be removed every two to three years, but care should be taken because the stems can easily be torn from the ground, leaving bare spots. TifBlair, an improved cultivar from the University of Georgia, is quicker to establish and more cold tolerant then common centipedegrass. It also retains its green color later in the fall.
St. Augustinegrass
St. Augustinegrass is a fast-growing, stoloniferous turfgrass best adapted to the North Carolina coastal plain (Figure 9–10). It has a medium- to dark-green color and very coarsely textured leaves. With proper maintenance, it provides a dense, lush lawn. St. Augustinegrass is very shade and salt tolerant but is considered the least cold tolerant lawn grass. The cultivar Raleigh has the best cold tolerance and is well adapted for the eastern side of the piedmont and the western side of the coastal plain. Seed is unavailable, so cultivars must be vegetatively planted. St. Augustinegrass grows best in fertile, well-drained soils.
This fast-growing grass needs to be mowed frequently at 3 to 4 inches during the growing season using a rotary mower. It should never receive more than 4 pounds of nitrogen per 1,000 sq ft annually. At high rates of fertilization and irrigation, thatch buildup may become a problem. St. Augustinegrass is not tolerant of heavy traffic, compaction, or cold weather.
Carpetgrass
Carpetgrass is a slow and low-growing, stoloniferous, medium-green, coarsely textured lawngrass (Figure 9–11). It produces a low maintenance, general purpose turf. Carpetgrass resembles St. Augustinegrass and centipedegrass and is often mistaken for centipedegrass but has broader leaves. It grows well in full sun to moderate shade and performs well in wet, shaded, acid soils where other lawngrasses may not grow. It grows best in full sunlight when daytime temperatures are between 60° and 90ºF, and does not tolerate cold, drought, salt, or traffic. Carpetgrass requires only 1 pound of nitrogen per 1,000 sq ft annually. It needs to be mowed only infrequently at 2 inches. It can be seeded, but it is not commonly available in most retail outlets. It is considered a minor use grass in North Carolina.
Bahiagrass
Bahiagrass spreads by stolons and rhizomes (Figure 9–12). Bahiagrass is never recommended as a lawn grass because of its open canopy, unsightly seedheads, and difficulty in mowing. It is best used on roadsides where appearance is not a concern and low maintenance is the priority. Bahiagrass can be seeded, but seed is not commonly available at retail outlets. It is often considered a weed in improved turfgrasses.
Table 9–2. Cool-season grass cultivars with excellent performance in North Carolina.
| Grass Type | Cultivar Name | ||||
|---|---|---|---|---|---|
| Tall fescue | 2nd Millennium Avenger Barlexas Barlexas II Barrera Barrington Biltmore Bingo Bonsai Bravo Cayenne Constitution Coyote DaVinci Desire |
Dominion Dynasty Endeavor Escalade Falcon II Falcon IV Fidelity Finesse II Fireaza Firebird Focus Grande II Greenkeeper Greystone Hunter |
Inferno Jaguar 3 Justice Kalahari Kitty Hawk 2000 Legitimate Lexington Magellan Masterpiece Matador Millennium Millennium SRP Mustang Mustang 3 |
Olympic Gold Padre Picasso Plantation Proseeds 5301 Prospect Pure Gold Quest Rebel Exeda Rebel IV Rebel Sentry Regiment II Rembrandt Rendition |
Rhambler Scorpion Serengeti Signia Silverstar Southern Choice II Stetson Tarheel Titan Ltd. Titanium Tracer Ultimate Watchdog Wolfpack |
| Kentucky bluegrass | Alpine Apollo Arcadia* Arrow Award Awesome Bariras Baronie Bedazzled Bewitched Beyond |
Blackstone Blueberry Bodacious Boomerang Bordeaux Boutique Brilliant Cabernet Champagne Champlain |
Chicago Eagleton Envicta Everest Everglade Excursion Freedom II Hallmark Impact Jefferson |
Jewel Langara Liberator Limousine Midnight Moonlight NuGlade Odyssey Prosperity Quantum Leap |
Rambo Rita Royce Rugby Showcase Skye Sonoma Total Eclipse Unique Washington |
| Fine fescue | Ambassador Berkshire Cardinal Class One Compass* |
DP Edgewood* Firefly Fortitude Garnet |
Gotham Jasper II Musica* Oxford Pathfinder |
Predator* Quatro Razor* Reliant IV* |
Scaldis Spartan II Seabreeze Zodiac |
| Perennial ryegrass | Accent II Allstar 3 Apple GL Brightstar SLT Caddieshack II Charismatic II Citation Fore Dart DCM |
Derby Extreme Fiesta 4 Fiji Goalkeeper II Grand Slam 2 Harrier Headstart 2 Homerun Inspire |
Keystone II Line Drive GLS Majesty II Manhattan 5 GLR Monterey 3 Nexus Palace Palmer III Palmer IV |
Panther GLS Paragon GLR Pentium Phenom Pianist Pinnacle II Pizzazz Premier |
Primary Quicksilver Repel GLS Revenge GLX Secretariat II Silver Dollar Top Gun II Transformer Zoom |
| *These cultivars have not been tested in North Carolina but have performed well in surrounding states. | |||||
Table 9–3. Performance of warm-season grass cultivars in North Carolina.
| Grass Type | Cultivar | Comments |
|---|---|---|
| Bermudagrass, seeded cultivars | Arizona Common Mohawk Numex Sahara Princess 77 Riviera Savannah Southern Star Sunbird Sundevil II Sunstar Transcontinental Yukon |
|
| Bermudagrass, vegetative cultivars |
Celebration |
|
| Centipedegrass | Common Tifblair |
Tifblair is an improved cultivar that exhibits better cold tolerance compared to Common. |
| St. Augustinegrass | Common Raleigh |
Raleigh is noted for its improved cold tolerance compared to Common St. Augustinegrass. |
| Zoysiagrass, coarsely textured varieties | Compadre Crowne El Toro Empire Jamur Meyer Palisades Zenith |
Seed is available for Compadre and Zenith. |
| Zoysiagrass, finely textured varieties | Cavalier Diamond Emerald Zeon Zorro |
|
| Because the release and evaluation of turfgrass cultivars changes rapidly, you are encouraged to contact the Cooperative Extension center in your county for the latest information on grass characteristics and selection (www.turfselect.ncsu.edu). | ||
Figure 9–7. Bermudagrass.
Scot Nelson, Flickr CC0 1.0
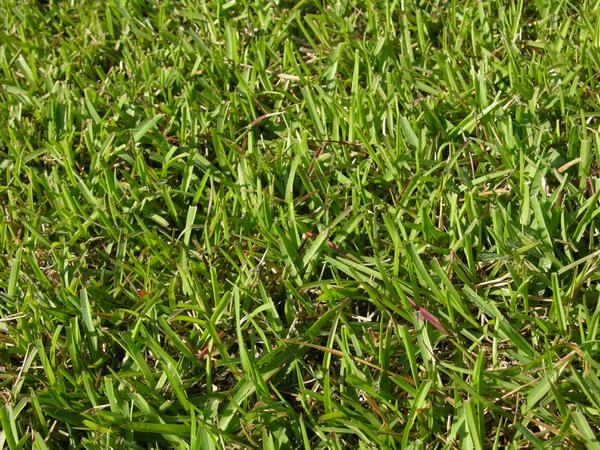
Figure 9–9. Centipedegrass.
Grady Miller, NC State University
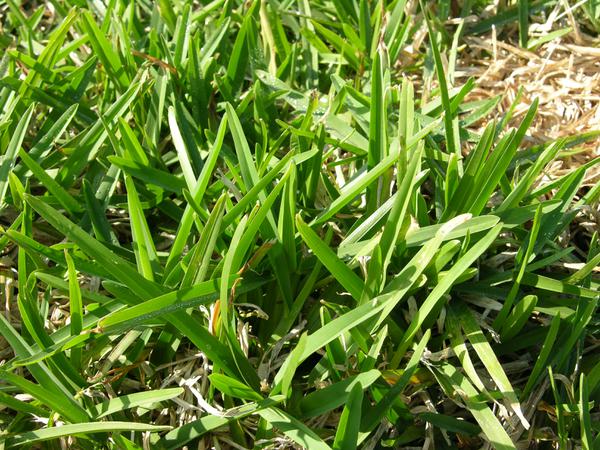
Figure 9–10. St. Augustinegrass.
Grady Miller, NC State University
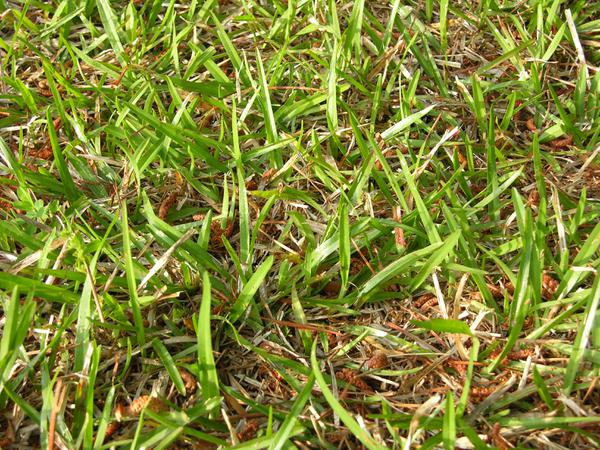
Figure 9–11. Carpetgrass.
Grady Miller, NC State University
Establishing a New Lawn
Establishing a healthy, attractive lawn means planting the best grass for the site at the right time and in a careful manner. Grass can be seeded or established using vegetation in the form of sprigs, plugs, or sod. The type of grass and the planting method selected determines the best time of year to plant. Site and soil preparation, including fertilization, are especially important.
Site Preparation
Preparing the site involves removing weeds and debris, planning for drainage, and grading the site. Insist that the builder not use the site as a dumping ground for paint, concrete, and other materials. Think about how the lawn will be accessed for mowing and fertilizing. Avoid terraces, steep grades, poorly drained areas, and heavily shaded spots. Perennial weeds may need to be managed with a nonselective herbicide. Hard-to-control weeds may require the services of a professional.
Install tile drains in poorly drained areas. Get professional advice about the type of drain and installation. Remove the topsoil (usually four to eight inches) and stockpile it nearby if grading is needed. If topsoil is brought from other sites, be cautious. It may contain diseases and hard-to-control weeds or weed seeds.
Complete site preparation by following these steps:
- Build protective walls to maintain the existing grade out to the edge of the canopy of trees if the final grade is to be appreciably higher or lower than the present level.
- Shape the underlying subsoil to the desired contour, and redistribute topsoil uniformly above the subsoil. A 2 to 3 percent slope is needed for proper drainage away from buildings. Make certain the soil is firmed after shaping. There should be no footprints visible after walking on the prepared soil.
- Water the area to enhance settling. Fill areas that settle unevenly to avoid standing water.
- If possible, mix 1 to 2 cubic yards of compost per 1,000 square feet into the top 6 to 8 inches of subsoil if planting in heavy clay or very sandy soils. Clay soils are prone to compaction and require frequent aerification (removal of soil cores).
Soil Preparation
Well-prepared soil with adequate nutrients for growing grass encourages the development of a healthy lawn.
Take soil samples from the front yard and the backyard to determine soil pH and nutrient requirements. A single soil test may be all that is necessary if there are no obvious differences in soil texture or terrain of the front yard and backyard. If the soils seem different, collect soil samples to a depth of 3 to 4 inches from several (10 to 15) locations and mix them together to produce a composite sample. Send approximately 1 cup of the air-dried soil sample to the NC Department of Agriculture and Consumer Services Agronomic Division Soil Testing Services, 1040 Mail Service Center, Raleigh NC, 27607. Boxes and forms can be obtained at a local Cooperative Extension center or at the Agronomic Division office in Raleigh. Allow several weeks for the results to be posted.
If recommended by the soil test report or the fertilization guidelines presented below, incorporate lime and fertilizer into the top 6 to 8 inches of the soil using a disk or rototiller. Regardless of the region, grass with a deeper root system is able to extract more moisture and nutrients from the soil, improving drought tolerance and overall health of the plant.
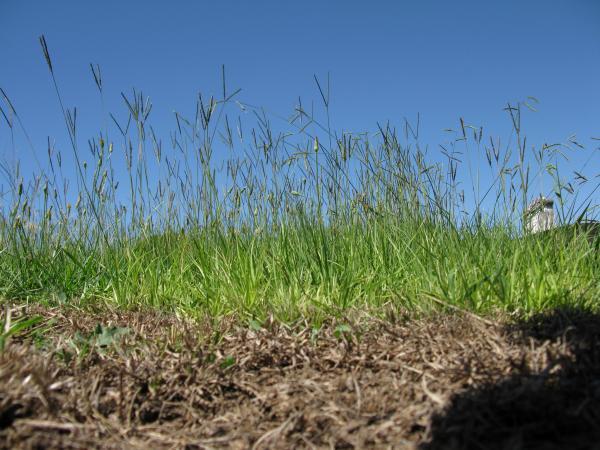
Rake or harrow the site to establish a smooth and level final grade (Figure 9–13). Soil particles should be no larger than marble size, and pea gravel size is even better. Hand raking is the best way to level the soil and work out hills and hollows. Allow time for rain or irrigation to settle the soil, and roll or cultipack lightly to firm the soil before planting seed, sprigs, plugs, or sod. Hand rake again to break up the crusty surface before planting.
Fertilization
As recommended above, it is best to submit a soil sample for testing when establishing a new lawn to determine which, if any, nutrients should be added. This is especially important when planting centipedegrass. It prefers acidic soils and low levels of phosphorus and may not require the addition of lime and phosphorus.
Fertilize before planting. Apply fertilizer and lime when the soil is prepared based on these guidelines:
If a soil test was conducted, apply the amount of lime and fertilizer recommended by the soil testing laboratory. For additional information about fertilizer components and interpreting a soil test, see “Soils and Plant Nutrients,” chapter 1, or visit the NCDA&CS webpage.
If no soil test was conducted, follow these recommendations for all grasses except centipedegrass:
- Apply 75 pounds of ground limestone per 1,000 square feet.
- Apply a starter-type fertilizer (one that is high in phosphorus) based on the type of grass and the planting method.
- Fertilizer bags have a three-number system such as 8-8-8 or 5-10-10. These numbers indicate the percent, by weight, of the primary nutrients Nitrogen (N), Phosphorus (P), and Potassium (K). The percentages are always noted in the following order:
N Nitrogen for green color and growth.
P2O5 Phosphorus for good establishment and rooting.
K2O Potassium to enhance pest and environmental stress tolerance.
Some common examples of starter fertilizers for a 1,000 square foot area include 40 pounds of 5-10-10, 20 pounds of 10-20-20, or 16 pounds of 18-4-6. For sandy soils, typical to the North Carolina coastal plain and sandhills, fertilizer rates should be increased by 20 percent.
Apply fertilizers uniformly and with care using a centrifugal (rotary) or drop-type spreader. Apply half the fertilizer in one direction and the other half moving at right angles to the first pass to ensure thorough and uniform coverage (Figure 9–14).
For seeded lawns: Fertilize the new seedlings approximately six to eight weeks after emergence. For more specific maintenance information on a particular grass type, refer to the NC State TurfFiles web page. Use a complete N-P-K turf-grade fertilizer that provides about 1 pound of nitrogen per 1,000 sq ft or the amount recommended on the soil test. The fertilizer should have a 3-1-2 or 4-1-2 analysis (for example, 12-4-8 or 16-4-8), and one-fourth to one-half of the nitrogen should be a slow-release form.
Encourage faster spread of vegetatively planted warm-season grasses by fertilizing every three to four weeks with 0.5 to 1 pound of nitrogen per 1,000 sq ft throughout the first growing season or until the plants have completely covered the desired lawn area. To help reduce turf loss, avoid high nitrogen fertilization of cool-season grasses in the late spring or summer and of warm-season grasses in the fall or winter. If higher nitrogen fertilization is applied, there may be a greater occurrence of diseases.
When to Plant Cool- and Warm-season Grasses
Seeding: Cool-season grasses are best seeded from mid August to early October, depending on location. Seeding beyond these dates increases the chance of failure caused by winter injury. Spring or late-winter seedlings are often less than satisfactory because the seedling roots do not have time to become well established before the heat and drought of summer. If seeding of a cool-season grass is not accomplished in the fall, the best alternative date for the North Carolina piedmont is mid-February to early March. Coastal plain areas would be seeded two weeks earlier, whereas the mountain areas would be seeded two weeks later.
If a cool-season grass will be seeded in the fall, such as tall fescue or Kentucky bluegrass, and the lawn site is ready for seeding in late March, April, May, or June, temporary cover can be obtained by seeding annual ryegrass at 1.5 to 2 pounds per 1,000 square feet, and then amending the soil based on your soil test report. It is also possible to go ahead and seed the desired cool-season grass. This procedure may succeed in some years. In any event, it provides ground cover until fall. And even if all of the grass dies, it prevents erosion and weeds.
Warm-season grasses may be seeded successfully between March 1 and July 1, depending on the species used and the location.
Sodding: Cool-season grass sod may be installed successfully anytime in the cooler portions of the growing season when the ground is not frozen. Warm-season grasses are best established by sodding at the same dates suggested for seeding, about March 1 until July 1. Warm-season sod does not produce roots unless the soil temperature exceeds 55°F for several weeks. Professional sod installers have been successful in establishing lawns beyond those dates, but care must be given to ensure that the soil does not dry out.
Vegetative: Warm-season grasses may be planted vegetatively (by sprigs or plugs) from March 1 through July 1.
How to Plant
Lawns can be established by seeding, sodding, or vegetative planting (sprigs or plugs). Buying poor-quality seed or plants often results in less-than-satisfactory performance, pest problems, and general disappointment. Selection of seeds or plants is especially important when establishing a lawn. Read the information on the seed tag carefully, and make sure there are no noxious weed seeds and low levels of other crop seed. One way to be sure a seed or planting material is true to type, free of noxious weed seed, and contains low levels of other crop seed is to purchase certified seed or sod. A blue certified tag indicates that the seed or plants have met certain standards to assure high quality and low levels of contaminants. The NC Crop Improvement Association (NCCIA) offers a list of certified sod producers on its website.
Seeding is the most economical method of establishing grasses. To ensure uniform coverage, use a centrifugal (rotary) or drop-type spreader. Apply half the seed in one direction and the other half moving at right angles to the first pass (Figure 9–14). Lightly cover the seed by hand raking or dragging with a mat or span of chain-link fence. Roll the soil lightly to firm the surface and provide good seed-to-soil contact.
Mulch grass seed with weed-free small-grain straw or hay. Use one bale per 1,000 square feet for warm-season grasses and one to two bales for cool-season grasses. This helps conserve moisture, control erosion, and reduces surface crusting until establishment. Once in place, stabilize the mulch by rolling or watering. Twine netting can be used if wind displacement is a problem. If applied evenly and lightly, these materials need not be removed.
Vegetative planting is necessary for some grasses that do not produce viable seed (seed that will germinate). When this method is used, the planting material must be kept fresh and moist from the time it is harvested until established in the new site. Fertilize with 0.5 to 1 pound of nitrogen per 1,000 square feet every one to three weeks for the fastest spread.
Space planting is the planting of separate shoots or sprigs (runners, cuttings, or stolons) at regular spacings. This labor-intensive method is best used for planting small areas. Spacing is determined by how fast the grass spreads, the amount of material, and how much time is available. The closer the spacing, the faster the lawn will become established (Figure 9–15).
Broadcasting is the uniform distribution of sprigs (cut stems) over the entire area. The sprigs are pressed into the top 0.5 to 1 inch of soil by hand or by using an old disk set straight, special planter, cultipacker, or roller. Large areas planted with bermudagrass or zoysiagrass sprigs require a minimum of 3 to 5 bushels (yards) of sprigs per 1,000 sq ft and 5 to 10 bushels (yards) for extremely fast cover. St. Augustinegrass is seldom established through broadcasting because the stems are too sensitive.
Plugging is planting individual pieces (2 inches or larger) of sod (or plugs) on 6-inch or 12-inch centers. This is an excellent way to introduce a more adapted lawn grass into an old lawn in an effort to replace old grass by crowding it out. Zoysiagrass, St. Augustinegrass, and centipedegrass are often planted by plugging.
Sodding is placing sod stripped from one site to another for an “instant” lawn. Lay sod as soon as possible after it has been harvested to prevent injury (Figure 9–16).
- Make sure the soil is moist (but not overly wet) before laying sod. Irrigating the soil several days before delivery is often adequate.
- Install the sod within 24 hours of delivery. Plan to unstack and unroll the sod if it cannot be laid within 48 hours.
- While installing, keep sod in the shade to lessen the chance of heat buildup.
- Start sodding from a straight edge (driveway or sidewalk), and butt strips together, staggering them in a bricklike pattern (Figure 9–17).
- Avoid stretching sod. Use a knife or sharp spade for trimming to fit irregularly shaped areas.
- Lay sod lengthwise across the face of slopes, and peg or stake the pieces to prevent slippage.
- After the sod has been placed, roll the lawn to ensure good sod-to-soil contact. Then begin watering.
Again, to ensure high quality and better chance for success, it is highly recommended that certified sod be used. A list of producers growing certified sod, and the varieties they carry, can be found on the NCCIA website.
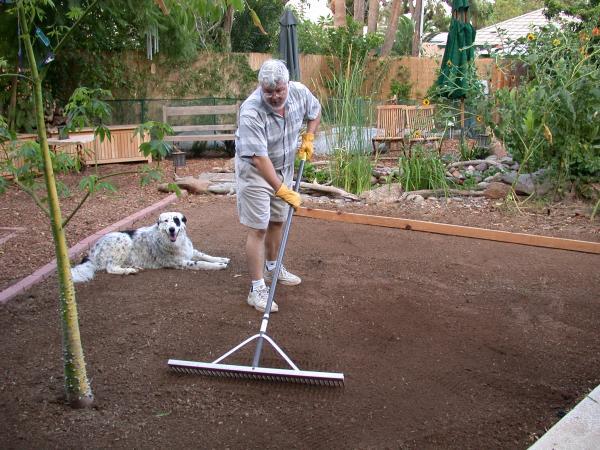
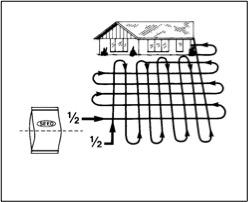
Figure 9–14. Suggested pattern for applying seed and fertilizer.
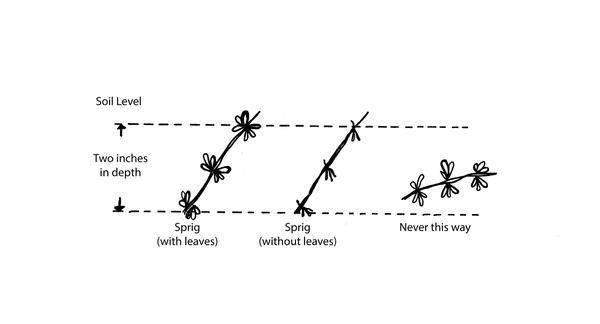
Figure 9–15. Cross-section of space planting. In space planting always leave some part of the plant or sprig above ground.
Renee Lampila
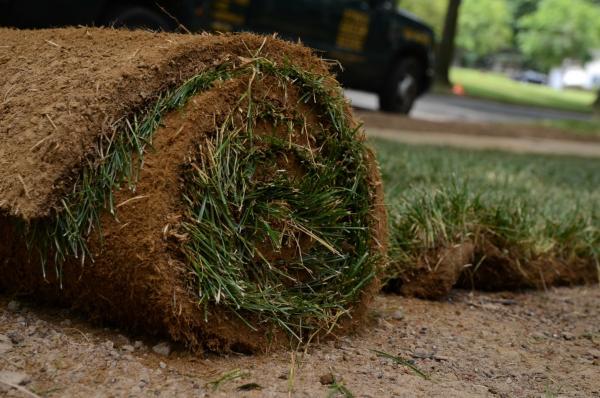
Figure 9–16. Install sod as soon as possible after it has been harvested to prevent injury to the turf.
slgckgc, Flickr CC BY 2.0
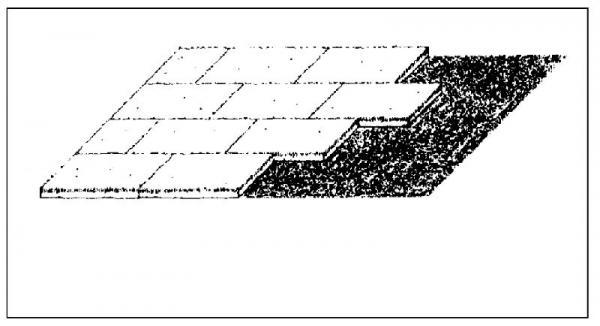
Figure 9–17. Start sodding from a straight edge and butt strips together in a bricklike pattern.
Caring for a New Lawn
Irrigation
To prevent drying of planting material, keep the top 1.5 inches of the soil moist. This may require light watering two or three times a day for 7 to 21 days. Bluegrass takes 7 to 14 days longer to germinate than other cool-season grasses. As the seedlings grow and root, water less often but for longer periods. For mixtures containing bluegrass, do not make the mistake of decreasing water as soon as the first seedlings appear. Continue watering until the bluegrass seedlings emerge. After the third mowing, water to a depth of 6 to 8 inches about once a week or when needed.
Mowing
Begin mowing as soon as the grass is 50 percent higher than the desired height. For example, mow tall fescue back to 3 inches when it reaches 4.5 inches. The frequency of mowing is governed by the amount of growth, which depends on temperature, fertility, moisture conditions, the season, and the natural growth rate of the grass. The suggested height of cut is given in Table 9–1. Cut often enough that less than one-third of the total leaf surface is removed. Use a mower with a sharp blade. To reduce the danger of spreading disease and injuring the turf, mow when the soil and plants are dry. If clippings are heavy enough to hold the grass down or shade it, catch them or rake and remove them. Otherwise, do not bag the clippings. Allow them to fall into the turf where they decay and release nutrients. This may reduce the need for fertilizer by 20 to 30 percent.
Pest Management
Fungicides and insecticides are rarely needed on new lawns. Weeds are common and it is environmentally responsible to have some tolerance of weeds in a lawn. If weeds are deemed a problem, be aware that different planting methods require different management methods. If any pesticides or herbicides are used, always read and follow label directions.
Seeding: Broadleaf weeds are common in new seedings. Many are controlled with frequent mowing at the proper height. Selective preemergence herbicides may be used to manage some annual grassy weeds such as crabgrass. Other herbicides may be applied to young seedlings during establishment. Get the latest recommendations by visiting the NC State TurfFiles web page.
Planting sprigs, broadcasting sprigs, and plugging: Herbicides may be applied for control of certain annual grasses and broadleaf weeds when sprigging bermudagrass, centipedegrass, St. Augustinegrass, and zoysiagrass. Do not apply these herbicides over the rooting areas of trees and ornamentals that are not listed as being tolerant on the herbicide label.
Sodding: Preemergence herbicides can be applied for annual weedy grass control after sodding cool- and warm-season grasses.
Maintaining an Established Lawn
A lawn is considered established when it has been mowed three times. Lawn Care Maintenance Calendars for specific grass types are available online through the NC State TurfFiles website.
Irrigation
Improper irrigation of lawns results in wasted water, added cost, and unhealthy plants. Water should be applied only when a reasonable portion of the lawn shows signs of moisture stress. A dark bluish-gray color, footprints that remain for some time after walking, and wilted, folded, or curled leaves are indications that it is time to water (Figure 9–18).
Table 9–4. Planting dates and rates for cool- and warm-season grasses in North Carolina.
| Lawn Grass | Optimum Planting Datea | Planting Rate per 1,000 Square Feet | ||
|---|---|---|---|---|
| Seed (pounds) | Sprigs for Space Planting (bushels)c | Sprigs for Broadcast (bushels)c | ||
| Mountains-Foothills | ||||
| Kentucky bluegrass | Aug. 15–Sept. 1 | 1.5–2 | − | − |
| Kentucky bluegrass/fine fescue mix | Aug. 15–Sept. 1 | 1.5+1.5 | − | − |
| Kentucky bluegrass/tall fescue mix | Aug. 15–Sept. 1 | 1+5 | − | − |
| Kentucky bluegrass/tall fescue/fine fescue mix | Aug. 15–Sept. 1 | 1+5+1 | − | − |
| Kentucky bluegrass/perennial ryegrass mix | Aug. 15–Sept. 1 | 1.5+1 | − | − |
| Tall fescue | Aug. 15–Sept. 1 | 6 | − | − |
| Piedmont | ||||
| Bermudagrass | April–Julyb | 1–2 | 0.75 | 3–10 |
| Bermudagrass (hybrid) | April–July | − | 0.75 | 3–10 |
| Bahiagrass | March–June | 5 | − | − |
| Centipedegrass | March–July | 0.25–0.50 | 1–2d | − |
| Kentucky bluegrass/tall fescue mix | Sept. 1–Sept. 15 | 1+5 | − | − |
| Kentucky bluegrass/tall fescue/fine fescue mix | Aug. 1–Sept. 1 | 1+5+1 | − | − |
| St. Augustinegrass | April–July | − | 1 | 1 |
| Tall fescue | Sept. 1–Sept. 15 | 6 | − | − |
| Zoysiagrass | April–Julyb | 1–2 | 1–2d | 3–10 |
| Sandhills-Coastal Plain | ||||
| Bermudagrass | April–July | 1–2 | 0.75 | 3–10 |
| Bermudagrass (hybrid) | March–Julyb | − | 0.75 | 3–10 |
| Bahiagrass | March–June | 5 | − | − |
| Centipedegrass | March–July | 0.25–0.50 | 1–2d | − |
| St. Augustinegrass | April–July | − | − | − |
| Tall fescue | Sept. 15–Oct. 15 | 6 | − | − |
| Zoysiagrass | March–Julyb | 1–2 | 1–2d | 3–10 |
| a Seeding beyond these dates increases the chance of failure. Sod consisting of cool-season grasses can be installed any time the ground is not frozen. Warm-season grasses can be installed as long as soil temperature exceeds 55ºF. b For best results, choose earlier dates when using vegetative material. c 1 square yard of turf pulled apart is equivalent to 1 bushel of sprigs. d Often plugged using 3 square yards of turf cut into 2-inch squares on 12-inch centers to plant 1,000 square feet. |
||||
If irrigation is not available or desirable, then an alternative to irrigating is to allow the turf to go semi-dormant. Tall fescue, bermudagrass, and zoysiagrass are tolerant of drought if allowed to go dormant. See Extension publication AG-661, Water Requirements of North Carolina Turfgrasses, for additional information. General watering recommendations include the following:
- Water in the early morning if possible. This is the preferred time to water because it reduces the risk of disease, water loss through evaporation, and improper water distribution. Also, the demand for water by industry and municipalities is usually low at this time.
- Water established lawns to a depth of 6 to 8 inches to encourage deep rooting. Usually, 1 inch of water per week is adequate. Ideally, this would not be applied in one application. Applying 0.5 inch of water every three to four days is adequate for most situations.
- Use cans or a rain gauge to determine how much water is being delivered in a certain period of time. It takes 640 gallons of water to apply 1 inch of water per 1,000 sq ft. Because clay soils accept water slowly, water should be measured to prevent wasteful runoff. Water clay soils until runoff is about to occur. Wait 30 minutes for the water to be absorbed. Then apply more water until the desired depth or amount is achieved. This same technique can be used on slopes and compacted soils. Few lawns established on clay soils can absorb more than 0.5 inch of water per hour. Sandy soils require more frequent watering. Applying 0.5 inch of water every third day is usually sufficient. Adjust any automatic irrigation system to supplement rainfall so that the lawn is not over-watered.
Take certain precautions if there will be no irrigation throughout the summer. Slowly ease a lush, actively growing lawn into dormancy. This can be accomplished by allowing the drought stress symptoms to appear between infrequent irrigation cycles, by mowing high, and by not over-fertilizing with nitrogen. Brown, withered leaves are normal signs of dormancy, so do not be alarmed by them. If the lawn is conditioned for this stress and has a reasonable level of maintenance, it should survive without permanent damage. Most turfgrasses can withstand three to six weeks (or longer) without rainwater or irrigation and exhibit minimal or no damage, depending on the situation.
In the absence of rain, water dormant lawns with a minimal amount (about 0.25 inch) every three weeks to keep the growing points hydrated. It is difficult to maintain vibrant green color in cool-season grasses during the summer. Irrigation helps maintain color, but may also increase the risk of disease. For this reason, it is particularly important that cool-season grasses not be overwatered.
Be vigilant about checking irrigation systems for overspray and be sure to direct heads so they are not hitting tree trunks, plant foliage, fences, buildings, or other hardscape elements. Repeated overspray can cause salt buildup and can damage plants and structures (Figure 9–19). It is also important to check irrigation timing so water does not run off the lawn and onto a sidewalk or street (Figure 9–20).
Mowing
Use either a rotary (centrifugal) or reel (cylinder) mower. The reel mower is preferred if grasses are cut to less than 1 inch (Figure 9–21).
- Keep the mower blades sharp and balanced. The cleanest cut and best mowing are obtained when the mower blades are sharp. Dull mower blades reduce lawn quality by tearing instead of cleanly cutting the grass. Tearing creates many ragged leaf ends that quickly wither and bleach and are easy ports of entry for disease. Using a sharp mower is especially important for difficult-to-mow grasses, such as zoysiagrass, bahiagrass, and certain perennial ryegrass cultivars. A properly sharpened and balanced mower blade also reduces mower vibration, lengthens mower life, and reduces fuel consumption by as much as 22 percent.
- Mow at the proper height. The frequency of mowing is governed by the desired grass height and by the amount of growth, which depends on temperature, fertility, moisture conditions, season, and the natural growth rate of the grass. In most instances, this may amount to biweekly and weekly mowing. To maintain a high-quality lawn, turfgrass should be cut often enough that no more than one third of the leaf surface is removed with each mowing. The proper mowing heights are presented in Table 9–1. If the lawn gets too high during wet seasons, raise the mower height and cut off a fourth to a half of the present growth. Then lower the mower to its proper height and mow again in a day or two.
- Leave clippings to decompose when they are short. Some homeowners bag lawn clippings because they think that the clippings add to the buildup of thatch, which can be harmful to the lawn. Actually, thatch is made up of roots, stems, and the lower portions of leaves that are below the mower blade. Frequent mowing, mowing when the grass is dry, and proper fertilization are the best ways to reduce thatch buildup. Though studies have shown that a lawn of 1,000 square feet can produce 500 pounds of clippings in one growing season, these clippings contribute very little to thatch. In fact, clippings that remain on the lawn quickly decompose and release valuable nutrients. Fertilizer use can be reduced by 20 to 30 percent.
- Rake, bag, and remove the clippings when mowing is delayed. If prolonged periods of rainfall prevent mowing, clippings may be long enough to shade or smother the grass. Collected clippings can be used as mulch around trees and shrubs or added to compost. If persistent herbicides have been used on your lawn, however, do not use the clippings as mulch or in a compost pile as the herbicides may not break-down and they can impact desired plants. Because yard trash accounts for 20 percent of the waste in our overflowing landfills, legislation has been passed that bans depositing yard trash in most public landfills. Homeowners must now look for other alternatives. Contact the local Cooperative Extension center for information about composting yard trash and other uses for this material.
Fertilizing
A soil test should be made at least every two to three years to determine the amounts of lime, phosphorus, and potassium needed by an established lawn. Failure to test can result in under- or overfertilization that can lead to plant damage, contamination of storm water, and unnecessary expense. A complete fertilizer with an N-P-K ratio of 4:1:2 or 4:1:3 can be used in lieu of a soil test, but it is not advised.
Cool-season grasses: Avoid any nitrogen fertilization of cool-season grasses, such as tall fescue, after the February application until September for the North Carolina central Piedmont. If one additional application of nitrogen is made between these dates to improve the color, the rate should not exceed 0.5 pound of nitrogen per 1,000 sq ft. This nitrogen should be applied in the central piedmont no later than April 15 (two weeks earlier in the coastal plain and two weeks later in the mountains). This application does not improve the longevity of tall fescue but enhances its green color.
The application of high rates or repeated low rates of nitrogen to cool-season grasses in the spring or summer greatly increases the severity of brown patch (Rhizoctonia spp.), which can kill the grass. If nitrogen is applied to tall fescue in spring or summer, or both, are applied to tall fescue, fungicide applications may be necessary to reduce disease symptoms.
Warm-season grasses: Avoid fall or winter applications of nitrogen to reduce winter injury.
Lime
Most soils in North Carolina are acidic and just right for centipedegrass, which requires a pH close to 5.5. Most turfgrasses, however, prefer a soil pH between 6.5 and 7.0 for optimum nutrient availability. Lime may be applied any time during the year. Winter is usually best, however, because there is less traffic. Gentle winter rains minimize runoff, and alternate freezing and thawing help incorporate lime into the soil.
Fertilizers and lime should be applied uniformly with a centrifugal (rotary) or drop-type spreader. Apply half the fertilizer in one direction and the other half moving at right angles to the first pass to ensure uniform coverage (Figure 9–14).
How to Determine Fertilizer Requirements
The three-number ratio on the fertilizer bag tells you how much of an element is present by weight. A 10-10-10 bag of fertilizer contains 10% Nitrogen, 10% Phosphorus, and 10% Potassium. A 100 lb bag of this fertilizer contains 10 lb of nitrogen, 10 lb of phosphorus, and 10 lb of potassium. If more nitrogen is desired, look for a formulation that has a higher ratio of nitrogen to phosphorus or potassium such as 16-6-12. In this case, 16 lb would be nitrogen, 6 lb phosphorus, and 12 lb potassium. The percentages never add up to 100% because the remainder of the bag is a mixture of secondary nutrients such as calcium, magnesium, and sulfur, micronutrients, and fillers such as sand or granular limestone.
Example: a 50 lb bag of 16-4-12 has 8 lb of N, 2 lb of P and 6 lb of K.
Bag Weight × % of Nutrients = lb of Nutrients
50 lb × .16 = 8.0 lb of nitrogen
50 lb × .04 = 2.0 lb of phosphorus
50 lb × .12 = 6.0 lb of potassium
Example: a 4 lb bag of 8-4-0 has about 5 oz* of N, 2.5 oz of P, and zero K
*Changing the weight to the equivalent in ounces makes it easier to work with bags containing smaller amounts.
Bag Weight × % of Nutrients = oz of Nutrients
64 oz × .08 = 5.12 oz nitrogen
64 oz × .04 = 2.5 oz phosporus
64 oz × 0.0 = 0.0 oz potassium
Fertilizer recommendations are usually in lb/sq ft. To apply 1 pound of nitrogen per 1000 sq ft of lawn: Divide 100 by the first number on the fertilizer bag to determine the amount of product to be used per 1000 sq ft.
Example: Apply 1 lb of nitrogen per 1,000 square feet of a 16-4-8 fertilizer. 100 divided by 16 equals 6.25 pounds of fertilizer, which delivers 1 pound of nitrogen per 1,000 sq ft.
To apply 0.5 pounds of nitrogen per 1,000 sq ft of lawn, divide 50 by the first number on the fertilizer bag. 50 divided by 16 equals 3.13 lb of fertilizer. Therefore 3.13 lb of fertilizer delivers 0.5 lb of nitrogen per 1,000 sq ft.
Example: Apply 0.5 lb of nitrogen per 1,000 square feet of a 10-10-10 fertilizer. 50 divided by 10 equals 5 lb of fertilizer. Therefore, 5 lb of fertilizer per 1,000 sq ft delivers 0.5 pounds of nitrogen per 1,000 sq ft.
Weed Management
Weeds occur in any lawn, but a thriving turfgrass lawn naturally crowds out most weeds. Choosing a proper location and turfgrass variety and preparing the site before planting gives the lawn the best possible start. Once established, paying close attention to adequate moisture, proper fertilization, and frequent mowing (at no more than 50 percent of the height of the grass blades) keeps the turfgrass in top condition. Frequent mowing also stops weeds from flowering and going to seed. Turfgrass that is stressed from drought or overwatering, burned from too much fertilizer, or stressed from scalping is much more likely to struggle with weed populations. Compaction can also negatively affect turfgrass, causing weeds to more easily establish themselves.
Having many weeds in your lawn can be frustrating, but having some tolerance for weeds keeps chemical use to a minimum. Tolerating some weeds can also improve soil conditions and help support the ecosystem. Weeds like dandelion have taproots that break up heavy clay soil. Their blooms are food for many pollinators such as honey bees and butterflies. Clover is a legume and so has nitrogen-fixing bacteria in the roots, and its blossoms are a favorite of honey bees.
If herbicides are deemed necessary, use them as part of an integrated plan based on good cultural practices. No one herbicide is going to be effective to manage all weeds in a lawn. Being able to properly identify weeds and understand their life cycle is essential to their management. Read more about common weeds and management techniques in chapter 6, “Weeds.”
Young and actively growing weeds are easiest to manage. Removing weeds by hand as they appear, and before they flower and set seed, can be an effective technique for a small area. If an herbicide is used, make sure that the soil is moist several days before application. Carefully read and follow directions and precautions on the herbicide labels. Treat only those areas that need it.
To help control weeds that may have gone to seed in the lawn, use a preemergence herbicide. Pre-emergent herbicides stop all seeds from emerging from the soil, so do not apply them when trying to renovate a lawn with new grass seed.
Postemergence herbicides are used for actively growing weeds that have emerged from the soil. Postemergent herbicides can be either selective or nonselective, contact, or systemic. Selective means the herbicide affect only certain types of plants (usually monocots or dicots). Nonselective herbicides kill any growing plant, so these should be used with great caution. Contact herbicides damage any tissue they come into contact with, while systemic herbicides translocate through a plant and can be more effective against older weeds. Selective broadleaf post-emergence herbicides should be used four to six weeks before seeding with grass. Most selective post-emergent herbicides that control annual grassy weeds, such as crabgrass, should also be applied at least four weeks before seeding with the desired grass.
Weed and feed products contain a preemergence or postemergence broadleaf herbicide, and sometimes both. These products should be used only when a high number of weeds is present and treatment is necessary—not every time the lawn is fertilized. Certain broadleaf herbicides can be absorbed by tree and shrub roots and can cause damage if applied too close to the drip line.
Coring (Aerification)
Soils that are subject to heavy traffic are prone to compaction. Coring alleviates this condition. Use a device that removes soil cores. Chop up the cores, and, if possible, distribute them by dragging with a span of chain-link fence or a mat. Coring should be accomplished when the lawn is actively growing so that it can recover from any injury. Core cool-season grasses in fall or early spring. Core warm-season grasses in late spring or early summer. Some lawn care and landscape companies offer coring services if rental equipment is not available.
Power Raking (Verticutting)
Sod-forming grasses, such as Kentucky bluegrass, bermudagrass, zoysiagrass, St. Augustinegrass, and centipedegrass, tend to build up thatch when they are heavily fertilized and watered. When thatch exceeds 0.75 inch, lawns should be power raked and cored. A light power raking is better than trying to remove too much debris at one time. When not excessive, thatch buildup can be removed from warm-season grasses by cutting as closely as possible at spring green-up and then raking by hand. To avoid seriously injuring the lawn, a 3-inch blade spacing is required to remove thatch from centipedegrass and St. Augustinegrass. Some lawn care and landscape companies have specialized equipment and offer power raking services.
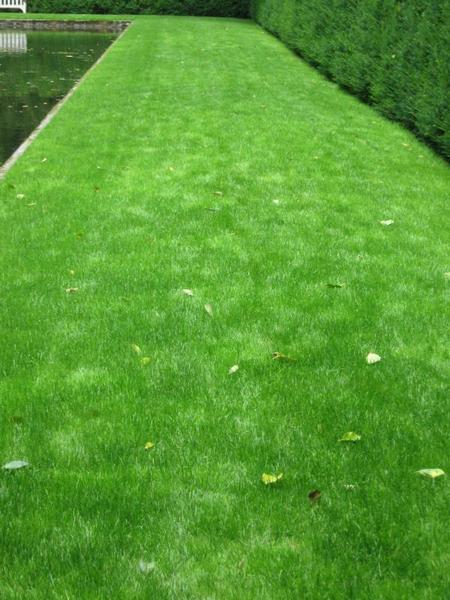
Figure 9–18. Footprints that remain sometime after walking indicate irrigation is needed.
Glenn Fleishman, Flickr CC BY 2.0
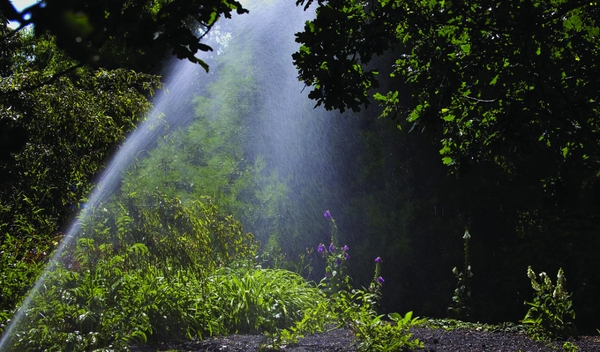
Figure 9–19. Sprinklers that overspray and hit trees, shrubs, or other structures can cause salt buildup and damage to plant tissue.
RonPorter, Pixabay, CC BY 0
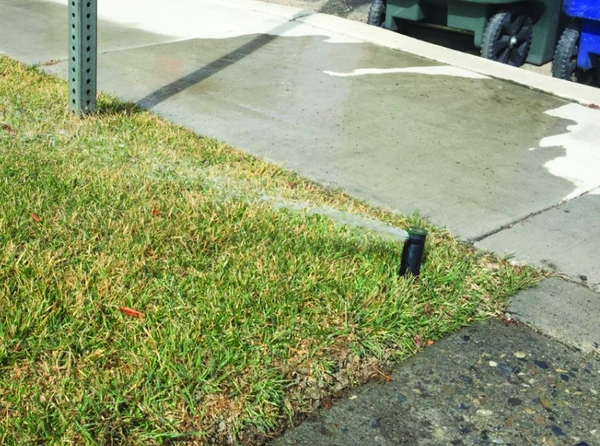
Figure 9–20. Water running off onto the sidewalk from an irrigation system that was set to run too long.
FFamartin, Wikimedia Commons CC BY-SA 4.0
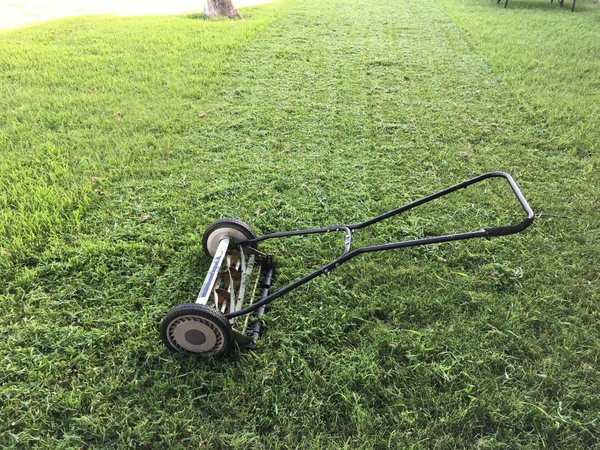
Figure 9–21. Reel lawn mower.
rseigler0, Pixabay CC BY 0
Renovating a Lawn
Lawn renovation refers to any procedure beyond normal maintenance (short of soil modification) required to upgrade an existing lawn. A deteriorated lawn is often a symptom of some underlying problem. Failure to identify and correct the exact problem can lead to further lawn deterioration and the need for repeated renovation. These are some of the major causes of turf deterioration:
- improper site location
- poor establishment procedures
- improper lawn management (irrigation, fertilization, mowing)
- poorly adapted lawn grasses
- excessive thatch buildup
- disease, insect, or weed infestation
The problems that caused the lawn to deteriorate must be corrected before the renovation process begins.
When to Renovate
Late summer to early fall is the best time to renovate cool-season lawns. Warm-season lawns are best renovated in late spring to early summer. Attempts to upgrade existing lawns when conditions are not conducive to good growth are difficult at best.
Considerations
When renovating a lawn, the first step is the management of undesirable vegetation that competes with newly planted grasses. Some weeds growing in small areas may be removed by hand weeding or by using a small hoe, rake, or shovel. Hard-to-control weeds, such as perennial grasses with underground shoots or weeds in large areas, may be controlled with herbicides.
To control perennial grassy weeds, undesirable turfgrasses, annual grasses, and broadleaf weeds, spray a nonselective herbicide. It takes several applications spaced three to four weeks apart to completely control bermudagrass. If perennial grassy weeds like bermudagrass are scattered throughout, consider killing the entire lawn.
When using an herbicide that translocates from the leaves to the roots of the plant, do not disturb the soil or plants before treatment. Tillage or renovation techniques, such as vertical mowing, coring, or slicing, should be delayed for seven days after application to allow proper movement of the herbicide into the weeds’ underground parts.
Preparation for Seeding
Preplanting renovation procedures are designed to create the optimum environment for the establishment of newly planted grasses. This process includes the following steps:
- Reduce competition from existing grasses and remove unwanted vegetation, including thatch.
- Apply the required fertilizer and lime.
- Prepare a good seedbed.
Reduce competition. Set the rotary or reel mower at the lowest setting, mow, and collect the clippings. Remove all undesirable vegetation, dead grass, thatch, and weeds so that the soil is exposed. This may not be necessary if a slit seeder is used. A rake or hoe is ideal for small areas. Several passes with a dethatcher (power raker or vertical mower) is usually the best choice for large areas. If thatch is excessive, it may be necessary to make another pass with a dethatcher after mowing. Both mowing and dethatching reduce plant competition and enhance light penetration for good germination and fast establishment.
Apply fertilizer and lime. Uniformly apply needed fertilizer and lime based on soil test results. Hand application is fine for small areas, but a rotary or drop-type spreader should be used on large areas to ensure uniform application.
Prepare a good seedbed. In small bare spots, loosen the top 4 to 6 inches of the soil with a rake, hoe, or shovel. On soils difficult to loosen with hand equipment, loosen the top 2 to 3 inches for good results. Fill in low areas, and smooth the surface so clods are smaller than marbles. Large areas and areas that contain 50 percent desirable grasses are best prepared for seeding by using a piece of equipment (such as an aerator or coring machine) that brings small soil cores to the surface. This brings soil to the surface with minimal disruption and create an environment for good seed-to-soil contact. Core in several directions, allow plugs to dry, and then pulverize them with a mower, dethatcher, or by dragging a span of weighted-down chain-link fence behind a tractor or lawn mower. Because tines have a difficult time penetrating dry, compacted soils, coring is best achieved when the soil is damp.
Seeding
Bare spots larger than 4 inches in diameter should be replanted. Smaller areas tend to fill in naturally, provided the lawn grass is capable of spreading. Tall fescue and perennial ryegrass exhibit a bunch-type growth habit and are incapable of spreading. Choose a blend or mixture that is compatible with the environment and the existing lawn. To ensure uniform coverage, use a rotary or drop-type spreader, applying half the seed in one direction and the other half at right angles to the first pass. Incorporate seed and fertilizer into the top 1/8-inch of soil by lightly pulling a leaf rake over loosened soil or running a vertical mower over areas that were just power raked and cored.
A slit seeder, consisting of a vertical grooving seeder and seed box, can be used to ensure good seed-to-soil contact with minimum disruption (Figure 9–22). Seed should be drilled in a diamond-shaped pattern. Dry, compacted soils, obstructions such as rocks and trees, and excessive slopes may limit the usefulness of a slit seeder. Bare areas that are seeded should be mulched to enhance germination.
Plugging
Plugging can be used for those grasses that spread laterally—not bunch-type grasses such as tall fescue, ryegrass, bahiagrass, and fine fescue. Place plugs on either 6-inch or 12-inch centers, depending on the desired establishment speed. Use a plugging device to remove plugs of soil from bare areas, and switch them with plugs collected from healthy areas. Apply a starter-type fertilizer, such as 10 pounds per 1,000 square feet of 5-10-10 fertilizer.
Sprigging Large Areas
Large areas of 15,000 sq ft or more can be sprigged using this method, which is often reserved for bermudagrass. Rototill the recommended amount of fertilizer and lime, indicated by soil test results, or apply lime at 75 pounds per 1,000 sq ft and 10-10-10 fertilizer at 20 pounds per 1,000 sq ft to the area to be sprigged. Spread sprigs over the surface using rates provided in Table 9–4 for new areas. Press them into the top 0.5 to 1 inch of soil using a cultipacker, or roller (Figure 9–23). Roll the area to firm the soil and ensure sprig-to-soil contact.
Care After Planting
Keep renovated areas moist with light sprinklings several times a day. As the seedlings, plugs, or sprigs grow, continue to decrease the frequency of watering while increasing the duration to promote deep rooting. After the third mowing, water to a depth of 6 inches.
Mow the area as normal, using a sharp blade. But continue to severely stunt existing vegetation by mowing short until desirable grasses have germinated and the desired mowing height is achieved. This reduces the competition for new seedlings.
Fertilize the new seedlings of cool-season grasses as described for “fertilize after planting” in the section on fertilization. Use the example provided in that section to determine how much fertilizer to use.
Warm-season grasses can be fertilized every four weeks until coverage is complete. Use a complete N- P-K fertilizer that provides about 1 pound of nitrogen per 1,000 sq ft. Twice-monthly applications of a nitrogen-only fertilizer that provides about 0.5 pound of nitrogen per 1,000 square feet may help warm-season grasses fill in more rapidly. Keep unnecessary traffic off the renovated lawn until it is well established.
Figure 9–22. A core aerator (left) pulls plugs of soil out of the ground, which makes it better for soil compaction. A slitseeder (right) has disks that make slices in the soil, a hopper feeds seed into the slits, and then a roller behind rolls it in.
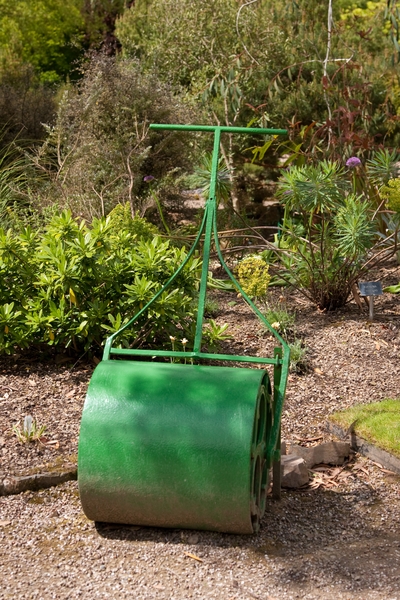
Figure 9–23. A cultipacker or roller ensures the seeds have good soil contact to help with germination rates.
Kerry Garratt, Flickr CC BY-SA 2.0
Integrated Pest Management
People are becoming more concerned about the potential effects of chemicals on our environment. Research indicates that pesticide use poses a minimal threat to the health of humans, animals, and the environment. But because we cannot be certain, many people choose to avoid pesticides. What is the best way to handle a pest problem that is destroying the appearance of a lawn? Should pesticides be used, cultural practices changed, or both?
The balanced use of all available control methods is called integrated pest management (IPM). The idea is simple. All available prevention and control methods are used to keep pests from reaching damaging levels. Pesticides are used only when necessary. Read more in chapter 8, “IPM.”
Planting the best-adapted grass and then watering, mowing, and fertilizing it properly form the basis for integrated pest management. Keeping the lawn healthy enables it to tolerate low levels of diseases and pests and makes the area a good habitat for beneficial organisms that help control pests.
Properly identifying an insect or disease helps guide appropriate management strategies. Table 9–5 lists common turf insects and diseases. The Turffiles web page is an invaluable tool in giving background information on common turf insects and available treatment options. The TurfFiles page also has background information on common turf diseases, a tool to help you identify diseases based on signs and symptoms in your lawn, and several strategies for managing those diseases.
To best use natural controls, it is important to develop a sound understanding of the biology and ecology of the lawn environment. Fortunately, many books and other educational materials are available to assist the homeowner. There is also an increasing number of offerings from companies that specialize in organic lawn care. These range from organic fertilizers, nematodes or bacteria that attack caterpillars, to traps, and nontoxic repellents. Some are quite effective, whereas the effectiveness of others has not been well documented. As each product is tested and proven to be effective, it will be added to the list of available options for turf pest management. In the meantime, if chemical control is necessary, select the safest effective pesticide and closely follow label recommendations.
Chemicals should be applied when the pest is most susceptible. Treat only those areas in need, and regard pesticide use as only one of many tools available in lawn care. Integrated pest management can be successful, but homeowners must realize that more time and labor are required and high expectations may not be met when pest issues and environmental conditions are severe. Read more about some of the common insects and diseases that affect turfgrass in chapter 4, “Insects,” and chapter 5, “Diseases and Disorders.”
Table 9–5. Common turf insects and diseases.
| Insects | Diseases |
|---|---|
| Beneficial | Anthracnose |
| Cicada Killer Wasps | Brown Blight |
| Formica Ants | Brown Patch |
| Scoliid Wasps | Copper Spot |
| Solitary Bees | Damping Off |
| People Pests | Dollar Spot |
| Fire Ants | Fairy Ring |
| Hornets | Gray Leaf Spot |
| Yellowjackets | Gray Snow Mold |
| Plant Pests | Large Patch |
| Chinch Bugs | Leaf Spot/Melting Out |
| Crane Fly Larvae | Microdochium patch (Pink Snow Mold) |
| Cutworms | Net Blotch |
| Fall Armyworms | Powdery Mildew |
| Ground Pearls | Pythium Root Rot |
| Hunting Billbugs | Red Leaf Spot |
| Japanese Beetles | Red Thread |
| Mole Crickets | Rust |
| Rhodesgrass Mealybugs | |
| Sod Webworms | Spring Dead Spot |
| Springtails | Summer Patch |
| Sugarcane Beetles | White Patch |
| Twolined Spittlebugs | Yellow Patch |
| White Grubs | Yellow Tuft |
Lawn Alternatives
Turfgrass is the best choice for areas of the landscape that are heavily used by family and pets for play and sports activities. However, lawns can require significant time and money for maintenance, water, and fertilizer. There can be an environmental impact from the air pollutants released by gas lawn mowers and the fertilizer nutrients and pesticides that make it into water sources. If there are turf areas in a landscape that are underused, consider one of the many attractive, wildlife-supporting lawn alternatives (Figure 9–24).
Not all turfgrass needs to be removed at one time. Try starting with a small patch of grass, perhaps on the side of a home. Or carve out an area at the edge of an existing turf patch. Some lawn alternatives can take a few seasons to become established, so be patient.
To remove some existing turfgrass, try one of these methods:
Layer it: This method requires the least muscle by smothering the grass in place, but it does take time. Place six to eight layers of newspaper or one layer of cardboard on top of the grass with a 3-inch layer of weed-free mulch or compost to keep it in place (Figure 9–25). Water it down and wait. It can take between three months and a year to kill the grass beneath the mulch. Once the grass is dead, the nutrient-rich soil is ready to plant. It works most quickly to start in summer months when the grass is actively growing versus in the fall when the grass is starting to store energy in its roots.d
Turn it over: Turn the soil over and break up the grass roots using a power tiller weekly for six weeks. Be sure to remove from the site any roots or stems that are pulled up, as even a small piece of root can resprout (Figure 9–26).
Cut it out: Use a flat shovel or sod cutter to remove the grass in chunks. Cold compost these pieces of sod over the next year. There is no need to turn the pile; the sod will gradually turn into usable compost for the yard or garden.
Conducting a soil test of the planting area gives insight into plants that are well adapted to this soil type and allows for the addition of amendments if they are needed. Incorporating a 1-to 2-inch layer of compost into the soil helps plants become established quickly.
Choosing a Ground Cover
Many different ground covers are available from local and mail-order nurseries. Choosing one that thrives in given site conditions offers a low-maintenance alternative to turfgrass. Native ground covers are well-adapted to the climate, and they are a great choice for supporting local biodiversity.
For a list of specific ground covers that perform well, check the North Carolina Extension Gardener Plant Toolbox and search for “Native Plants.”
Here are some ground covers to consider:
Clover (Trifolium repens). A member of the legume family, clover can thrive in sun to partial shade and needs no fertilizing (Figure 9–27). Clover is well adapted to acidic soils. It is more forgiving of foot traffic than moss, but does not tolerate heavy running and playing. If animals and children will frequently use the area, an alternative plant may be more suitable. Sow seeds in the spring after nighttime temperatures are consistently higher than 40°F. Keep the soil moist until the clover germinates. While white flowering clover is a favorite of honey bees, red clover (Trifolium pratense), has petals that are too long for a honey bee’s tongue. Bumblebees and other pollinators frequent red clover.
Mondo grass (Ophiopogon japonicus). This evergreen ground cover is an easy maintenance alternative to a traditional grass lawn (Figure 9–28). Regular mondo grass grows up to 6 inches tall if a taller look is preferred. Dwarf mondo grass grows to just 2 inches tall and more closely resembles a turfgrass lawn. Regular mondo grass should be mowed annually in late winter to promote new growth. Mondo grass is native to Asia, but is adapted to North Carolina’s climate. Mondo grass is a good choice for areas that receive regular foot traffic. Plant mondo grass in the spring or fall using plugs spaced 6 inches apart. Placing a light layer of mulch between the plugs discourages weeds and keeps the roots moist.
Lilyturf (Liriope muscari). Lilyturf, also known as liriope, is native to Eastern Asia. This evergreen ground cover features dark green strappy leaves and grows well in North Carolina. It is similar in appearance to mondo grass, but it has wider leaves and it grows to a height of 1- to 1½-feet tall (Figure 9–29). Liriope tolerates a wide range of soil conditions and grows well in sun to light shade. It is considered drought tolerant when established but it looks most attractive when it has consistent irrigation. It handles occasional light foot traffic. Place plantings 1 foot apart and lightly mulch between them to discourage weeds until the ground cover is filled in. It does well in the planting strip between sidewalks and streets or for planting on steep banks. Lilyturf is listed as a “Rank 3 - Lesser Threat” on the North Carolina Native Plant Society’s weedy plant list. Because of its weedy nature, it is best planted in contained areas.
Moss (Hypnum or Thuidium spp.). Moss is a great grass alternative for damp spots (Figure 9–30). It thrives in North Carolina’s acidic soil. Moss grows very low to the ground and does not need mowing. The fine texture of moss balances beautifully with nearby flowering perennials and evergreens. Moss needs very little water once it is established, and fertilizer is not needed. Be advised that it does not handle heavy foot traffic well. If landscape traffic patterns lead to walking through a moss planting on a daily basis, a flagstone or paver walkway will help keep the moss in good condition. In the spring after the last frost, plant moss by pressing chunks into freshly raked soil. Keep it moist for the first three weeks. Depending on the growing conditions and spacing when planted, a moss lawn could take up to a year to fill in.
Sedge (Carex spp.). Sedges have grass-like leaves and grow in clumps. They come in many sizes and textures, and grow in several different kinds of soils. They can closely resemble a grass lawn, but need to be mowed only a few times a year (Figure 9–31). If a taller, more meadow-like look, is preferred, leave sedge unmowed. Sedge can handle light foot traffic and can be planted in either spring or fall. Letting the seeds drop after flowering helps fill in any spaces and thickens the planting. If the sedge suffered any frost damage, be sure to mow it in the spring.
Sedum (Sedum spp.). There are many sedums, so look for a creeping variety that reaches only about 4 inches tall (Figure 9–32). Sedums transplant well, so pieces of the plant can be dug up and moved around to new locations. They are drought tolerant and do not need fertilizing. By the second year in the ground, sedums become dense enough to out-compete weeds. Blooms that occur in the late spring attract pollinators. Despite their short root systems, sedums do very well when planted along banks or hillsides. Consider planting different varieties in the same area for an extended bloom. Sedums withstand only light foot traffic.
Thyme (Thymus spp.). Thyme is well known for its culinary uses because of its pungent aroma and flavor. Thymes are slow spreading and drought tolerant. Thyme does best with fast-draining soil, so amendments such as compost may be needed to improve drainage. Each plant grows about 6 inches a year. Planting from pots can be an expensive option for a large area. Expect to be on top of weeding the first year. During the second year, thyme begins to out-compete new weed seeds, and by the third or fourth season, it reaches full coverage (Figure 9–33). To speed up the process, divide larger clumps to fill in any gaps. Once filled in, thyme is close to trouble-free. It doesn’t require mowing or fertilizing and only needs water in drought conditions. It can handle moderate (once or twice a day) foot traffic, and it releases a lovely fragrance when strolled over.
Installation
Once appropriate plants have been selected (Figure 9–34), it is time for installation. Planting in the fall gives roots time to become established in warm soils while the cool air temperatures put a lower demand on shoot growth.
Adequate rainfall also reduces the need for supplemental irrigation to help the plants become established. Spring, with its mild temperatures and adequate rainfall, would be the second best time to plant.
Dig planting holes wider than the size of the root ball. Try digging a trench for planting large areas. Spacing depends on the number of plants and their growth rate. Install root balls at the same depth they were growing in their containers, filling any remaining space with soil and tamping it down to press out air pockets. Water new plantings as soon as possible to minimize transplant shock.
A 1- to 11⁄2-inch layer of mulch conserves soil moisture, prevent erosion, suppress weeds, and help buffer the soil from air temperature fluctuations. As plants mature and their canopy expands, the need to mulch is greatly reduced. Depending on the size of the plants and planting area, it may be easier to spread mulch prior to planting.
Irrigate regularly for the first three months or until established. Choose plants with moisture requirements that match the climate’s natural rainfall, and the plants probably do not need supplemental irrigation after the first year, except perhaps during extreme drought (Figure 9–35).
Maintenance
The need for weed control is be highest during the first year or two and diminish as plantings spread to completely cover the ground. Application of a slow-release fertilizer once or twice annually encourages good plant coverage. Use fertilizers at appropriate levels for lowest environmental impact.
Few ground cover shrubs require pruning, though some gardeners employ it as a technique for stimulating new growth or neatening the appearance of a plant grouping. Prune spring-flowering plants after they bloom and summer- and fall-flowering plants in early spring before new flower buds form. Pruning in late summer or fall is not recommended because it stimulates new growth that could be injured by the winter elements.
Use IPM for disease or pest control. Selecting ground covers appropriate to the site conditions generally translates to well-adapted, healthy plants with minimal pest or disease problems. On the other hand, if a plant is stressed by failure to have its requirements met, it may experience increased susceptibility to pests and disease. Practice IPM to monitor potential problems and minimize harm to the environment. Incorporating a diverse array of native plants into a landscape design may aid in pest management. Native plants attract a diverse population of native insects, and native predators.

Figure 9–24. The turfgrass in this front yard was underused (above). The homeowner decided to remove the grass and replace it with perennial plants, a spiral garden, and vegetable beds adding diversity and increasing functionality (below).
Kate Ware
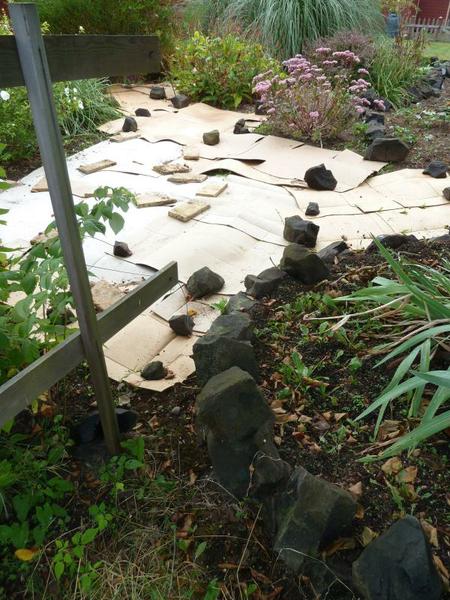
Figure 9–25. To remove existing turfgrass, put wet newspaper (several sheets thick) or cardboard down and then cover it with a 3-inch layer of weed-free compost or mulch. It can take between three months to a year to kill the grass underneath.
Kathleen Moore CC BY 2.0
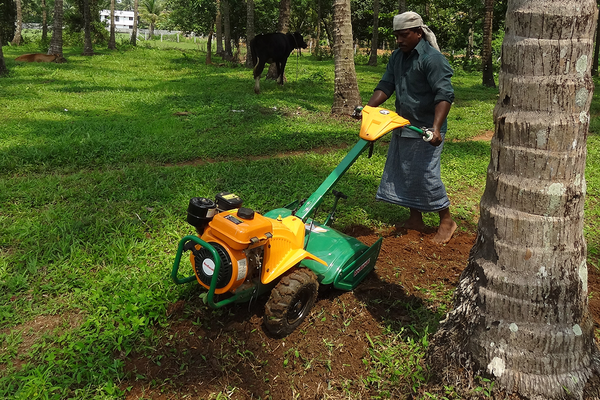
Figure 9–26. Turning the soil over using a power tiller every week for six weeks helps to remove grass from a site. Even small parts of the root or stem can resprout so be sure to rake those up.
Ash901, Wikimedia Commons CC BY-SA 4.0
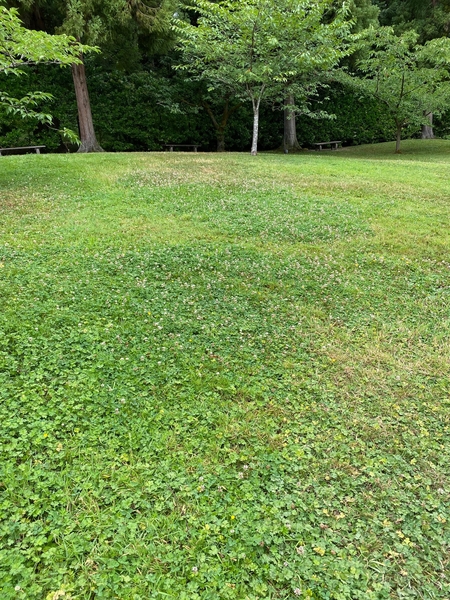
Figure 9–27. White clover (Trifolium repens), makes an excellent ground cover and pollinator plant.
Kathleen Moore CC BY 2.0
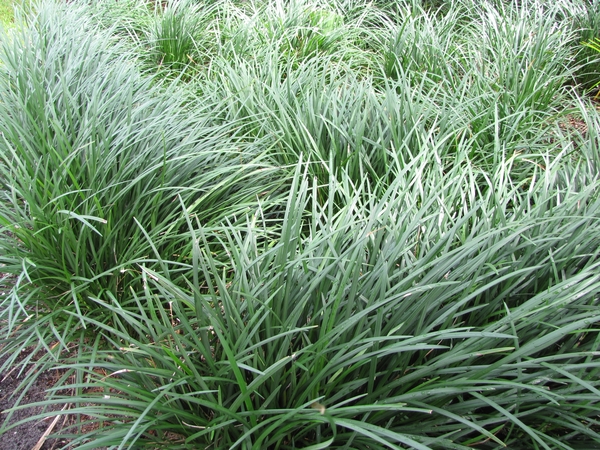
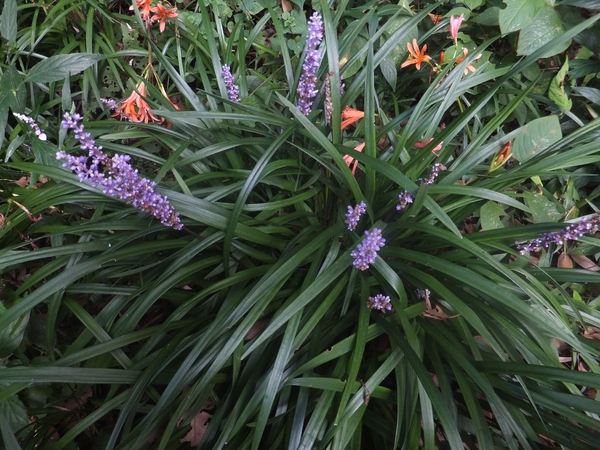
Figure 9–29. Liriope, a little taller than mondo grass, is a lawn alternative. It flowers best in full sun.
Syrio, Wikimedia Commons CC BY-SA 4.0
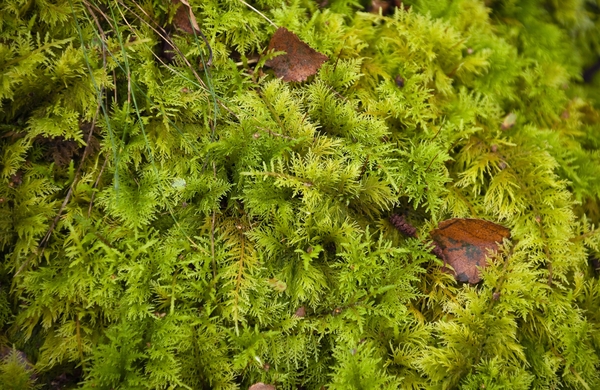
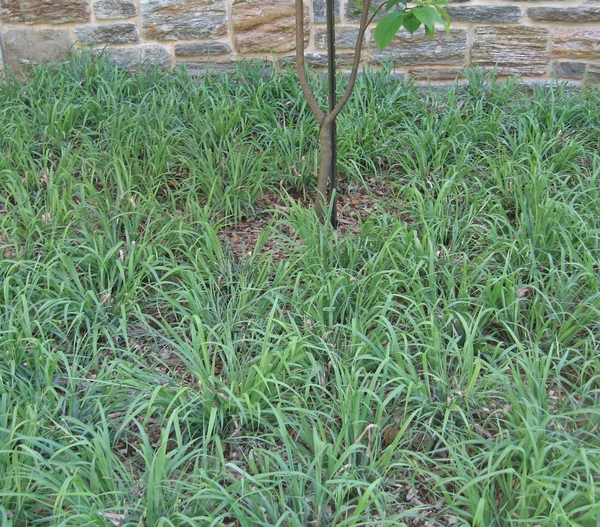
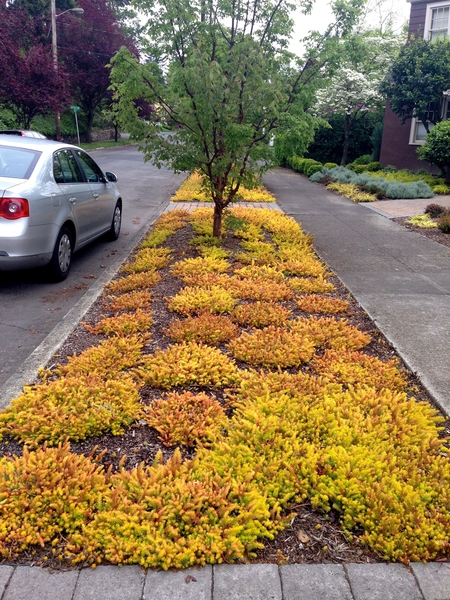
Figure 9–32. Sedum (Sedum spp.) used as a low-maintenance alternative in a roadway median.
Megan Hangsen, Flickr CC BY-SA 2.0
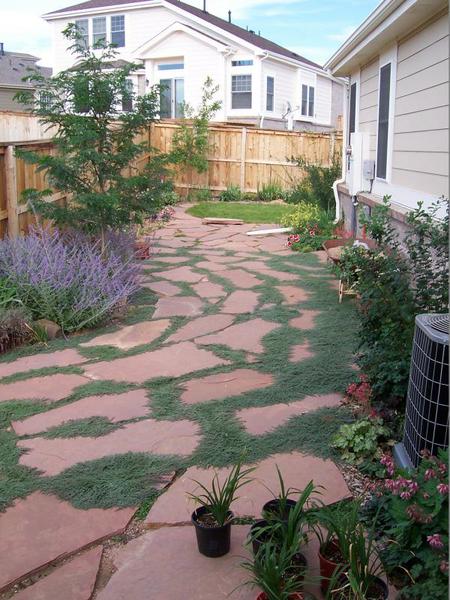
Figure 9–33. Wooly thyme (Thymus pseudolanuginosis) Turkish Speedwell (Veronica liwanensis) are planted between the stones and withstand foot traffic very well.
Patrick Standish, Flickr CC BY 2.0
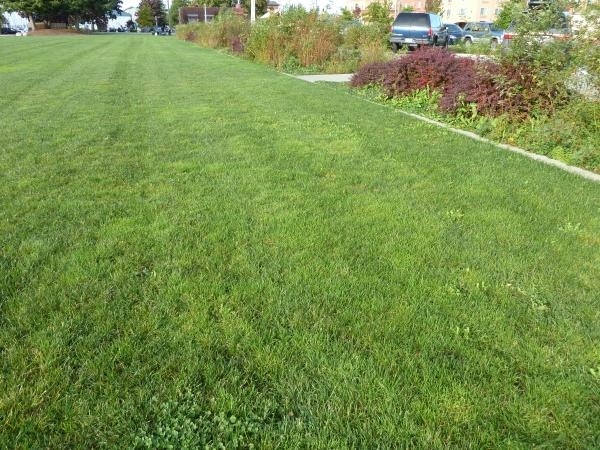
Figure 9–34. A diverse border planting provides habitat for beneficial insects.
Kathleen Moore CC BY 2.0
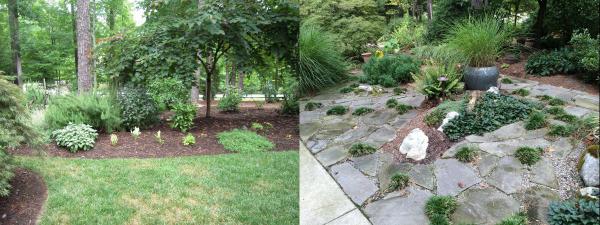
Figure 9–35. Left: The front yard before. Right, after: Mondo grass planted between pavers provides interest in this turfgrass-free front yard. Once established, the mondo grass receives only rainwater.
Barbara Goodman CC BY 2.0
Case Study—Think about IPM: A Brown Area in the Lawn
You have noticed that a brown area appears in the middle of your tall fescue lawn each year. This year the area seems to be even bigger. You worry about it spreading and wonder if there is anything you can do to treat it.
Review the five IPM steps summarized in this section and conduct some background research on tall fescue grass.
1. Monitor and scout to determine pest type and population levels.
The grass grew well for the first five years after planting. Last year you noticed a small brown area that appeared as the weather heated up in the summer. This year the area has grown and is now about 4 feet in diameter (Figure 9–36). A sample could be sent to a diagnostic lab to determine if a disease may be causing the problem. But a more cost-effective response simply requires digging a little deeper to reach the root of the problem.
2. Diagnostics: Accurately identify host and pest.
The following diagnostic steps and questions will help you accurately identify the problem. Responses are included in italics.
Step 1. Identify the plant: Review images and descriptions and select the one most like your turf. Tall fescue.
Step 2. Describe the problem: Examine both the healthy and damaged leaves carefully. There is a 4-foot wide, irregular area of dead brown grass in the middle of the yard.
Step 3. Identify what is normal: What does the healthy part of the plant look like? Dark green thin blades. This is seen on edges of the lawn.
Have you had a soil test? No (For information on how to submit a soil test, see “Soils and Plant Nutrients,” chapter 1.)
Step 4. Describe cultural practices: Describe the age and history of the plant. The grass was installed as seed five years ago.
Irrigation. It is watered three times a week for 45 minutes.
Fertilizer. It was fertilized at the beginning of the summer. I do not remember what type, but I followed the label for the amount.
Maintenance. It is mowed two times a week during the growing season with a push mower, and the mower is set to remove only a third of the blade of grass so grass blades are more than 1 inch tall after mowing. The clippings are left on the lawn.
Step 5. Review environmental conditions: What is the yard’s topography? The backyard is fairly flat.
Are there any significant water issues? It has not rained for three and a half weeks, and it has been very hot for the past two months. There is never any standing water when it rains.
Describe the light near this plant. How many hours of sunlight? There is a large maple tree on the west side of the yard and a large elm on the south side, so it stays shaded for most of the day. Maybe two hours of full sun per day.
Describe any recent changes or events. My neighbor lost a tree last winter on the west side of the yard, so there is slightly more light on that side. I had a party two months ago and there were a lot of people walking on the lawn.
Step 6. Identify signs of insects and pathogens: On the leaves? No insects are visible, and no fungus can be seen.
On the roots? No insects are visible, and no fungus can be seen.
Step 7. Identify symptoms of pathogens: On the leaves? There is no evidence of insect feeding. Some of the leaf blades are all brown, and some have irregular brown spots with a dark halo around them (Figure 9–37).
On the roots? There is no evidence of insect feeding. Roots look pretty normal, but some are a little brown.
Step 8. Describe distribution of damage in the landscape:
Are other plants in the landscape affected? No other types of plants in the yard are affected.
Step 9. Describe distribution of damage on the plant and specific plant parts:
Where is the damage seen on the plant? On the aboveground portions of the grass, some leaves are all brown and some have spots.
Step 10. Identify the onset of the problem:
When did you notice this problem? The spot appears in the heat of the summer; it appeared last year and is bigger this year.
Brown patch. You can confirm this diagnosis by comparing your responses during the diagnostic steps to the disease description. For example, see Step 2: The size of the damage matches. In Steps 7 through 10, the responses match the description of brown patch.
3. Consider economic, aesthetic, and injury thresholds.
The lawn is vital to your enjoyment of the landscape. The disease is severe enough to warrant investigation. The grass will continue to decline without intervention.
4. Implement a treatment strategy using physical, cultural, biological, or chemical control, or combine these strategies.
From the information found on the TurfFiles web page you learn brown patch is a common disease of tall fescue in North Carolina. Tall fescue is a cool-season grass that does not grow well in our summers. Unfortunately, there is no possible way to get "rid" of the disease. There are, however, many ways to manage the disease effectively.
Physical: This disease is most problematic when lawns have poor air movement and significant shade. Anything to promote more sunlight and air movement helps minimize brown patch development. Pruning up the bottom limbs on the maple and elm trees helps.
Cultural: Aggressive fertilization before the onset of summer stress promotes brown patch. Light, frequent fertilizer applications should be conducted during the summer. Some cultivars of tall fescue have partial resistance to the brown patch fungus. This means the grass might get the disease, but it is less severe.
Biological: There are no known biological treatments for brown patch.
Chemical: Fungicides are effective for brown patch management. Check the North Carolina Agricultural Chemicals Manual for recommendations. Many of these products are not available to the public, so a contract with a landscape company may be necessary.
5. Evaluate treatment success.
The improved light from pruning the maple and elm trees seem to have kept the spot from growing larger. You are careful to apply only light amounts of fertilizer in the summer. You started a garden journal to keep track of weather patterns, maintenance, and fertilizer applications so you have records to look back on when future problems occur.
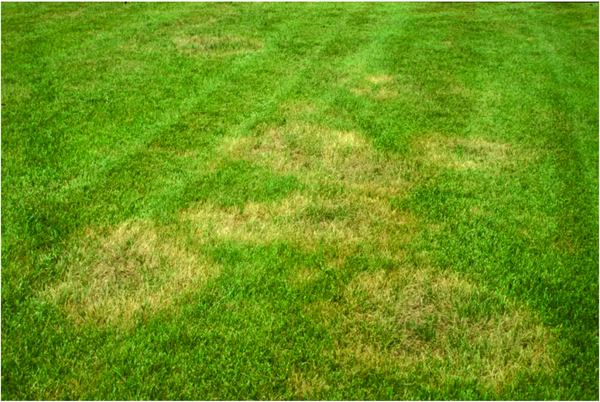
Figure 9–36. A brown area on tall fescue grass.
NC State Turf Pathology
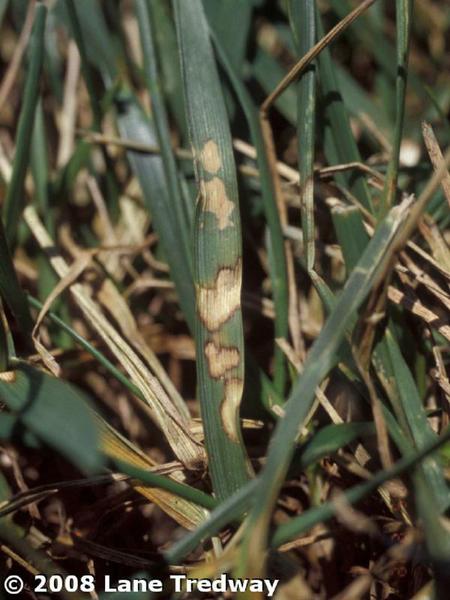
Figure 9–37. Irregular brown spots with a dark outline around them on the grass blades.
NC State Turf Pathology, Lane Tredway
Frequently Asked Questions
1. Should I bag my grass clippings?
Generally the answer is no. The clippings produced by properly maintained and mowed turf break down rapidly because they are 75 to 85 percent water. Research has shown that a fourth of a lawn’s fertilizer needs can be met by recycling grass clippings. If you have a problem with large patch (Rhizoctonia solani) or another disease, then bag clippings to lessen spread of the disease. Do not compost diseased clippings.
2. How do I control excessive thatch buildup in my lawn?
As turfgrass grows, it produces new roots, leaves, and stems. As older roots and shoots die and slough off, they accumulate on the soil surface as thatch. All healthy turf has some thatch, and appropriate amounts of thatch (1⁄4- to 1⁄2- inch) make a lawn more tolerant to traffic, decrease soil compaction, protect grass crowns from temperature extremes, decrease water loss from the soil surface, and return nutrients to the soil environment. Excessive thatch, however, limits turfgrass rooting, attracts insect pests, encourages fungal growth, and can prevent water from penetrating into the soil. Mechanical dethatching is usually recommended when thatch build-up is thicker than 1⁄2- inch. Routine hand raking of thatch is effective in small areas; vertical mowers or power rakes may be used in larger areas. Note that centipedegrass and St. Augustinegrass may not tolerate vertical mowers or power raking, so ensure that your type of turf will not be seriously injured by a particular method of thatch removal before beginning. Thatch removal can be performed on our warm-season grasses in late winter when they are dormant, or in the spring after green-up when the grasses are actively growing.
3. Weeds have taken over my lawn. What can I do?
The most effective way to achieve long-term weed control is by promoting and maintaining a healthy and vigorously growing lawn. Weakened or slowly growing turf allows sunlight to penetrate the soil surface, encouraging weeds to invade and become established in the landscape. The correction of management practices, such as improper mowing height and poor fertilization, reduces weeds in the home lawn. Some weed species can become established even with good turf management practices. Hand-pulling is an option in some cases; in others, herbicides can be used as a short-term aid in weed management. There are several pre- and post-emergence herbicides on the market that help control broadleaf weeds in the lawn. Ensure that the active ingredient is labeled for use on the weed(s) you are trying to control. Your county Extension center can provide assistance in weed identification if needed. Always read the label carefully, and be sure your species of turfgrass is tolerant of a particular herbicide.
4. The soil in my lawn is compacted. What can I do to resolve this?
Foot traffic, mowing, recent home construction, and even rainfall can contribute to soil compaction, which is especially problematic in clay soils. Soil compaction prevents air and water from penetrating the soil. Grass roots need air and water to grow, so soil compaction results in weaker, thinner turf and more weeds. Core aeration, which is the removal of small cores of soil from the top few inches of soil, allows more air, water, and nutrients to enter the root zone of your turf, helping to alleviate this condition. The results include reduced water runoff; enhanced water, nutrient, and gas uptake; faster thatch breakdown; and better heat and drought tolerance in your turf area.
The best time to perform core aeration on our warm-season grasses is in late spring or early summer when the grass is actively growing. The soil should be moist, but not wet. Be sure to mark sprinkler heads, shallow lines from the sprinkler, and underground utility, cable, and septic lines to prevent damage. Soil cores should be left on the lawn; they work their way back into the soil within two to four weeks. Lawns may be fertilized, seeded, or top-dressed with a soil amendment immediately after coring. Be sure the timing of fertilization corresponds with the recommendations on the maintenance calendar for your particular turf. The county Extension center has maintenance calendars for our warm-season grasses, or you may access them online. Lawns can be aerated once a year, especially under heavy use conditions and with heavy clay soils. If core aeration equipment is not available for rent or purchase, some lawn care companies may offer this service. Note that spike aeration is not recommended, as this method of aeration only further compacts the soil.
5. When can I plant a fescue lawn?
If sodding, tall fescue can be planted any time the ground is not frozen. If you are planting from seed, the ideal time is between August 15 and September 1 in the NC mountains, September 1 to September 15 in the piedmont , and September 15 to October 15 in the coastal plain. Seeding beyond these dates increases the chance of failure. Spring-seeding tall fescue is not recommended, especially outside North Carolina’s mountain region.
6. My neighbor’s lawn seems to always look greener than mine. What can I do and when should I do it to keep my lawn looking green?
Just because a grass is greener does not mean the grass is healthier. It may be a species or grass cultivar that is genetically darker than yours. Moisture stress also affects leaf color. In addition, two fertilizers, nitrogen (N) and iron (Fe), are the most commonly used nutrients for deeper turfgrass color. The application of high rates or repeated low rates of nitrogen to cool-season grasses in the spring or summer greatly increases the severity of brown patch.
7. What is the best grass to plant in my area?
There is no one best grass to plant in any area of North Carolina. The decision should be based on region, microclimate, intended use or wear at the site, and desired appearance. Over the last several years, zoysiagrass lawns have become increasingly popular. Each grass has its merits and disadvantages. Other lawn grasses found in the area to a lesser degree are centipedegrass, bermudagrass, fine fescues, and tall fescue + Kentucky bluegrass mixes. All of these grasses are used across much of the state, although some species lend themselves more to certain regions.
8. There are mushrooms in my lawn. Should I worry about them?
Many homeowners become worried when a prolific group of mushrooms develops in their yard. There is no need to worry about mushrooms with respect to your turf’s health. Mushrooms are fungi—ubiquitous organisms that grow and thrive in many turf systems. Typically mushrooms appear after a rain when the weather is warm. Spore germination during warm, moist conditions is how fungi reproduce. Mushrooms are lawn allies in that they feed on the organic material (such as thatch, buried wood, and tree roots) present in the yard, breaking it down into nutrients available to turf. Even when mushrooms develop into what is sometimes called a fairy ring, there is no need to fret. These types of fungi rarely damage turf used for home lawns. If substantial mushroom formation has developed, however, it may be time to consider a lawn aerification program. Aerification can help minimize the buildup of thatch, and it can also slow the development of mushrooms in the lawn. The best recommendation for managing mushrooms is to mow them. Fungicides are typically not effective against these fungi in a landscape.
9. I noticed some orange stuff on my shoes after I walked through the grass. What is it?
That depends on the tint of the orange color. In North Carolina, some of our soils are highly oxidized and have a reddish-brown or reddish-orange tint. This could be a possible reason for the orange stuff on the bottom of shoes. Another cause could be a disease called rust. This disease is caused by a fungus that produces many different spore types, and one of those types is a rust color, hence the name of the disease. In North Carolina we see rust on zoysiagrasses, Kentucky bluegrass, and tall fescue. Typically this disease is most active in spring and fall and can produce copious amounts of spores. The spores can develop into orange clouds after mowing and most certainly can turn shoes orange. Although a lot of spores are produced, rust is rarely more than a cosmetic issue.
To learn more about common lawn problems see Appendix C, "Diagnostic Tables."
If you have questions about this chapter contact your local N.C. Cooperative Extension Center.
Further Reading
Bruneau, Arthur H. and Gail G. Wilkerson, eds. Turfgrass Pest Management Manual: A Guide to Major Turfgrass Pests & Turfgrasses. Raleigh, North Carolina: North Carolina Cooperative Extension Service, 2006. PDF file.
Daniels, Stevie, ed. Easy Lawns: Low Maintenance Native Grasses for Gardeners Everywhere. Brooklyn, New York: Brooklyn Botanic Garden, 2001. Print.
Ortho All about Lawns. 2nd ed. Hoboken, New Jersey: John Wiley & Sons Inc., 2008. Print.
Penick, Pam. Lawn Gone!: Low-Maintenance, Sustainable, Attractive Alternatives for Your Yard. New York: Ten Speed Press, 2013. Print.
Chapter Text Hyperlinks
National Turf Evaluation Program
NCDA Agronomic Services – Soil Test Forms & Information
USDA “Understanding the Soil Test Report”
NC State lawn care maintenance calendars
NC Producers Growing Certified Sod
TIMS Turf Irrigation Water Management Model
Herbicide Carryover in Hay, Manure, Compost and Grass Clippings: Caution to Hay Producers, Livestock Owners, Farmers, and Home Gardeners, AG-727
For More Information
NC State Resources
- Caring for Your Lawn and the Environment, AG-597
- Carolina Lawns, AG-69
- Entomlogy and Plant Pathology Publications
- Lawn care maintenance calendars
- Herbicide Carryover in Hay, Manure, Compost and Grass Clippings, AG-727
- Protect Water Quality, AG-439-21
- Turf Diagostic Tables
- Turf Pathology
- NC State TurfFiles
More NC State Resources
Other Resources
- Brown Patch in Home Lawns, by University of Nebraska (3:48 minutes)
- National Turf Evaluation Program
- Turfgrass Council of North Carolina
Contributors
Author: Grady Miller, Professor, Crop Science
Contributions by Extension Agents: Shawn Banks, Sam Marshall, Jessica Strickland, Mary Hollingsworth, Peg Godwin, Kerrie Roach
Contributions by Extension Master Gardener Volunteers: Linda Alford, Jacquelyn Weedon, Lee Kapleau, Karen Damari, Judith Bates, Barbara Goodman, Chris Alberti, Connie Schultz
Content Editors:
Lucy Bradley, Associate Professor and Extension Specialist, Urban Horticulture, NC State University; Director, NC State Extension Master Gardener program
Kathleen Moore, Urban Horticulturist
Copy Editor: Barbara Scott
Text adapted in part from Carolina Lawns (AG-69), N.C. Cooperative Extension at NC State University.
How to cite this chapter:
Miller, G. 2022. Lawns, Chapter 9. In: K.A. Moore, and. L.K. Bradley (eds). North Carolina Extension Gardener Handbook, 2nd ed. NC State Extension, Raleigh, NC. <http://content.ces.ncsu.edu/9-lawns>
Publication date: Feb. 1, 2022
AG-831
Other Publications in North Carolina Extension Gardener Handbook
- 1. Soils & Plant Nutrients
- 2. Composting
- 3. Botany
- 4. Insects
- 5. Diseases and Disorders
- 6. Weeds
- 7. Diagnostics
- 8. Integrated Pest Management (IPM)
- 9. Lawns
- 10. Herbaceous Ornamentals
- 11. Woody Ornamentals
- 12. Native Plants
- 13. Propagation
- 14. Small Fruits
- 15. Tree Fruit and Nuts
- 16. Vegetable Gardening
- 17. Organic Gardening
- 18. Plants Grown in Containers
- 19. Landscape Design
- 20. Wildlife
- 21. Youth, Community, and Therapeutic Gardening
- Appendix A. Garden Journaling
- Appendix B. Pesticides and Pesticide Safety
- Appendix C. Diagnostic Tables
- Appendix D. Garden Tools
- Appendix E. Season Extenders and Greenhouses
- Appendix F. History of Landscape Design
- Appendix G. Permaculture Design
- Appendix H. Community Gardening Resources
- Appendix I. More NC State Resources
- Glossary
N.C. Cooperative Extension prohibits discrimination and harassment regardless of age, color, disability, family and marital status, gender identity, national origin, political beliefs, race, religion, sex (including pregnancy), sexual orientation and veteran status.