
Outline
Start with High-Quality Plants
Potting Mixes, Substrates, or Growing Media
Objectives
This chapter teaches people to:
- Understand the differences between growing plants outdoors in containers versus indoors.
- Properly water, fertilize, prune, and repot container-grown plants.
- Recognize and manage common abiotic problems of container-grown plants.
- Identify and manage common pests and diseases of container-grown plants.
- Select houseplants that are appropriate for various home environments.
- Select outdoor plants that are appropriate for containers in various landscape environments.
Introduction
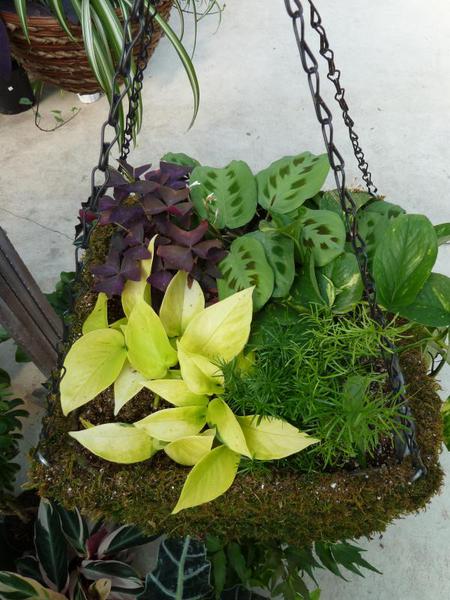
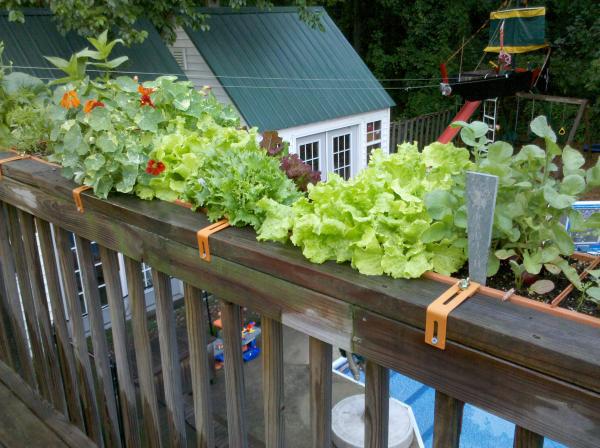
Plants grown in containers offer homeowners flexibility, whether the plants are houseplants indoors or colorful annuals on an outdoor patio. Planting in containers allows a gardener to easily make changes in location if sunlight or temperatures do not encourage plant growth. Indoor container plants not only improve air quality but also help to enhance the visual interest of a home (Figure 18–1). Outdoor containers offer people without a large yard or garden the opportunity to grow vegetables, herbs, or flowers for personal enjoyment (Figure 18–2). Gardeners with physical limitations may find that plants in raised containers are easier to maintain than those planted in the ground. The possibilities are endless—with new exciting plant varieties that thrive in containers and the bounty of beautiful containers that can be found at local retailers and garden centers.
All plants need the same basic environmental conditions to survive. Correct management of growth factors—light, water, temperature, air movement, relative humidity, and fertilization—and the proper growing medium are the keys to success with container-grown plants. Indoor and outdoor container-grown plants share many characteristics, but each situation also has some unique needs. This chapter first explores what all container-grown plants have in common and then reviews the differences between outdoor and indoor container gardening.
Start With High-Quality Plants
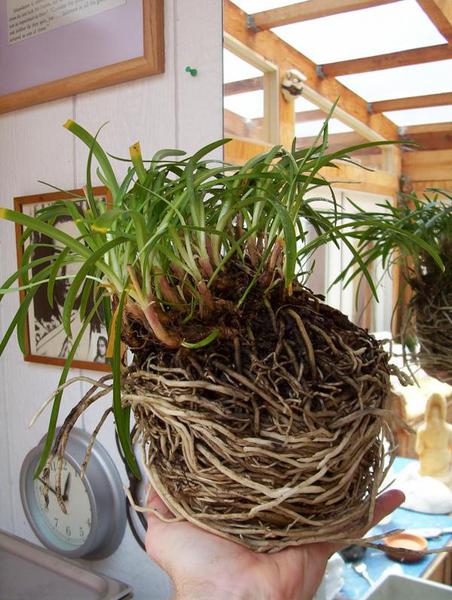
The first step toward successful container gardening is to start with healthy, attractive, high-quality plants. When shopping for a new plant, pick up the pot and view it from all sides. Plants should be full and lush with no empty areas or dead material. Plant growth should be stocky and sturdy, not spindly. The potting mix or media should be weed-free. The foliage should be turgid, with no necrosis, chlorosis, tears, or holes. The colors should be true to type. (If solid green, the foliage should not be faded or “washed out.” If variegated, the leaves' colors should contrast and not be reverting back to solid green.) Evaluate whether the plant is properly potted in its container. It should fit snuggly in its pot, and its roots should not be pushing out of the pot. Next, examine the plant’s roots. Gently slide the plant out of the pot to examine the roots. For most species, a healthy root system has white or tan roots. The roots should be growing towards the bottom or sides of the pot but not circling horizontally around the inside. Girdled roots indicate that the plant has been confined in a pot for too long, which can stunt its growth (Figure 18–3). And finally, inspect leaf-axils and the undersides of the leaves for signs of insects or diseases.
Many houseplants are sprayed with “leaf shines” to make them more attractive. Leaf shines, however, consist of an unnatural polish that clogs stomates. Therefore these plants should be avoided.
Transporting Plants
After selecting healthy plants, protecting them from light, temperature, or wind extremes during transport is vital. When bringing plants home for the first time, the following guidelines provide the best transportation care.
In the summer, heat can build up quickly in a closed vehicle. So avoid leaving plants in a car for an extended period. Sun shining directly on delicate leaf tissue can burn leaves, even if the overall inside temperature is comfortable. Place plants out of direct sunlight to prevent sunburn. If plants must be transported in the back of a truck, be sure to cover them with a tarp to prevent wind damage, which can result in broken limbs and torn and desiccated leaves.
In winter, many tropical plants can incur damage at temperatures below 50°F. This damage is called chilling injury. Depending on the temperature and the exposure time, plants may quickly show signs of chilling injury, or damage may not appear for several weeks. To protect tropical plants from cold temperatures when transporting, wrap them thoroughly in newspaper, paper bags, or plastic sleeves before leaving the store. Warm up the car ahead of time, and place plants inside the passenger compartment. The trunk of most cars is too cold to transport plants safely.
Selecting a Container
Plants can be grown in containers that are purchased, built, or recycled. Four important aspects to consider are container material, size, color, and drainage. By choosing the proper container, you protect the plant from stress that results from the container drying out too quickly, restricted root growth, or roots sitting in water and developing root rot.
Container materials can be divided into these basic categories:
- Nonporous: plastic, metal, fiberglass, glazed (Figure 18–4)
- Semi-porous: wood, pressed fiber (Figure 18–5)
- Porous: clay, unglazed ceramic, terracotta (Figure 18–6)
Choose containers made out of materials that suit your growing purposes. Porous and semi-porous containers lose moisture more quickly and require more frequent watering than nonporous containers. So porous and semi-porous pots are best used to grow plants that do not require a lot of water. The increased moisture loss is advantageous for species such as cacti and succulents.
Material
When container gardening outdoors, unglazed ceramic pots should not be used for plants that remain outside during the winter. These pots absorb water, which will freeze and crack the pot. The growing medium in outdoor pots fluctuates in temperature by as much as 30°F between day and night. This problem can be exacerbated when metal pots and small containers are placed in the sun. Wood and plastic containers can safely remain outside year-round. Cedar and redwood are naturally resistant to decay and can last around 10 years without staining or painting. Heavy-duty plastic containers are the most lightweight of all containers, retain moisture well, and can easily be moved near a protective wall when overwintering plants, but their colors can fade when exposed to direct sunlight for long periods. All containers should be cleaned with soapy water and disinfected with a non-bleach household disinfectant product before use.
Weight
When container gardening, we usually select containers for aesthetic appeal rather than horticultural practicality. The weight of the pot, however, should be considered for plants that are top-heavy, plants that will be subjected to wind, or plants that are moved around frequently to give them the proper interior environments. In addition, the pot’s porosity is important. If someone tends to overwater their container plants, a porous container should be used. Container gardeners who underwater their plants should choose nonporous containers that help to hold moisture in the potting mix.
Trick of the trade:
Whether growing containerized plants outdoors or indoors, double-potting can reduce moisture loss. Double-potting is placing a slightly smaller pot inside a larger one and filling the space between them with mulch or Styrofoam (Figure 18–7).
Color
Dark-colored containers absorb more heat than light-colored ones, causing the potting media to dry out faster and the potting mix temperatures to rise. When gardening outdoors, this temperature change can be an asset in the winter. In the summer, however, the increased heat can burn fragile roots. Therefore avoid placing dark containers in full sun.
Drainage
Drainage holes are necessary in all containers to prevent plant roots from standing in water and developing root rot. If the container sits flat on a solid surface such as a paved patio, drainage holes can be placed along the side of the container, ¼-inch to ½-inch from the bottom (Figure 18–8). If herbs or a fruit tree are to be showcased in an attractive pot that does not have drainage holes, the plant needs to be double-potted (Figure 18–7). Never put a layer of gravel or rocks in the bottom of a container beneath the potting mix in an effort to improve drainage. Doing so causes the water to collect in the potting mix just above the gravel. Only when no air space is left in the potting mix will the water drain into the gravel below, So gravel in the bottom does little to keep soil above it from being saturated by overwatering.
Size
A container’s size should match the plant’s growth requirements for two reasons. First, restricted root growth results in decreased plant growth. Root restriction is a physical stress on the plant that causes a pronounced decrease in root and shoot growth. Second, flowering and fruiting is also reduced for plants in small pots. Consider both depth and total volume of the container. The minimum recommended container size per plant is listed for vegetables in Table 18–1 and fruit in Table 18–2. Choosing larger containers is beneficial, however, as they do not dry out as quickly and require less frequent watering. Shallow-rooted annual plants and vegetables—such as lettuce, radishes, and scallions—need a minimum potting mix depth of 6 inches to 8 inches, whereas carrots grow better with a potting mix depth of 10 inches to 12 inches. Most herbs can be grown in a 4-inch to 6-inch diameter pot. Some herbs with a large taproot, however, need a 12-inch deep container. (Refer to the recommendations for success with herbs in the NC State Extension publication AG-748, Container Garden Planting Calendar for Edibles in the NC Piedmont.) Perennial plants and fruits require large containers (Table 18–2) for adequate root growth. Interior plants grow best in pot sizes that are one size larger than their root system. For small pots, 8 inches in diameter or less, a pot that is 1-inch to 2-inches wider than the current root ball works well. For large pots, 10 inches or wider in diameter, 2-inches to 3-inches wider than the plant’s root ball is ideal.
| Vegetable | Minimum Size Container | Spacing | Minimum Container Depth |
|---|---|---|---|
| Beans | 2 gallon | 2–3 inches | 8–10 inches |
| Beets | 2 quart | 2–3 inches | 8 inches |
| Bok choy | 1 gallon | 6 inches | 20 inches |
| Carrots | 2 quart | 2–3 inches | 10 inches |
| Collards | 3 gallon | 12 inches | 12 inches |
| Cucumbers | 1 gallon | 1 plant per container or 12–16 inches | 8 inches |
| Eggplant | 5 gallon | 1 plant per container | 12–16 inches |
| Green garlic | 2 quart | 4 inches | 4–6 inches |
| Kale | 3 gallon | 6 inches | 8 inches |
| Lettuce | 2 quart | 4–5 inches | 6–8 inches |
| Mustard greens | 3 gallon | 6 inches | 4–6 inches |
| Peas | 2 gallon | 2–3 inches | 12 inches |
| Peppers | 2 gallon | 1 plant per container or 14–18 inches | 12–16 inches |
| Potatoes | 30 gallon | 5–6 inches | |
| Radishes | 2 quart | 2–3 inches | 4–6 inches |
| Scallions | 2 quart | 2–3 inches | 6 inches |
| Spinach | 1 gallon | 2–3 inches | 4–6 inches |
| Squash | 2 gallon | 1 plant per container | 12–24 inches |
| Swiss chard | 2 quart | 4–5 inches | 8 inches |
| Tomatoes | 5 gallon | 1 plant per container | 12–24 inches |
Table 18–2. Minimum Container Size Needed For Fruit
| Fruit | Minimum Container Size |
|---|---|
| Apples | 20–25 gallon |
| Blueberries | 2 feet × 2 feet × 2 feet |
| Figs | 10 gallon |
| Grapes | 15 gallon |
| Peaches | 20–25 gallon |
| Strawberries | 8-inch deep container |
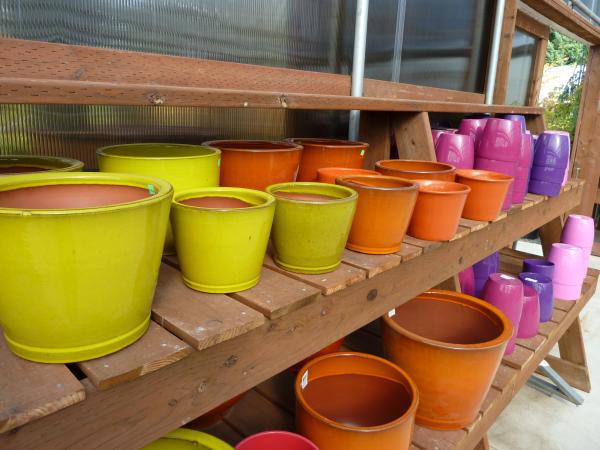
Figure 18–7. Double-potted plant.
Renee Lampila
Figure 18–8. Drainage holes drilled along bottom of planter box.
Renee Lampila
Potting Mixes, Substrates, or Growing Media
The potting “soil” used to grow container plants is really not soil at all. True soils are field soils that often retain too much water, have too little pore space (for oxygen), are too heavy, and potentially harbor harmful diseases, insects, and weeds. Because of these drawbacks, field soils are no longer used for growing plants in containers.
Instead, materials called “soilless substrates” (also referred to as “substrates,” “media,” or “potting mixes”) are used when growing container plants. Most soilless potting mixes are free of insects, diseases, and weeds and are ready to use immediately. The most common ingredients are perlite, pine bark, sand, sphagnum peat moss, and vermiculite—or combinations of these components.
- Perlite is a white, heat-treated, expanded volcanic rock used to improve drainage. It has replaced pea-gravel because it is lighter, making it easier to move potted plants. A word of caution: Avoid breathing perlite dust. Wear a dust mask or wet the perlite down. Perlite contains some fluoride, so do not include it in the potting mix used to grow fluoride-sensitive species such as spider plants or dracaenas.
- Pine bark has large particles, making it good for aeration in a potting mix. It is difficult to re-wet, however, if allowed to dry out.
- Sand was once used extensively but is now often replaced with lighter-weight products, such as perlite. Sand has low water-holding capacity and provides little aeration, but is useful (in moderate percentages) in providing a counterweight to top-heavy plants, preventing them from tipping over. Do not use fine playground sand. Instead, use coarse builder’s sand, which is a nutrient-poor material that has a large particle size and heavy weight. The potting mix must be almost 50% sand by total volume to drain quickly.
- Sphagnum peat moss is the decaying matter in a peat bog. Peat increases the nutrient and water-holding capacity of media, but it is not a sustainable resource. Fortunately, there is current ongoing research at NC State’s Horticultural Science Substrate’s Lab looking into peat alternative materials. The researchers are looking for alternatives that are local, regional, environmentally friendly, and economical.
- Vermiculite is a heat-treated, expanded clay mineral that absorbs water and attracts nutrients when wet.
Potting mixes sometimes include other ingredients:
- Compost benefits include good water-holding capacity, disease suppression, and the addition of nutrients and organic matter. The nutritional value of compost varies, depending on the plant matter or animal waste that was used to make it. Because many types of compost have a pH over 7.0, it is best to limit the amount of compost to between 15% and 40% of the total container mix. Do not use composted grass clippings from lawns treated with herbicides as some of the chemicals can persist through composting cycles and affect plants.
- Pasteurized soil has been heated to 180°F for 30 minutes to kill most diseases, weed seeds, and insects. Be aware that when soil is heated in a home oven, it does emit an odor.
- Sedge peat is a granular material made of partially decomposed sedges. Avoid using this in containers as it compacts easily and drains poorly.
There are many combinations of soilless potting mix components that make great growing mixes. Common mixtures consist of these proportions:
- 50% peat and 50% perlite
- 60% peat, 20% perlite, and 20% vermiculite
- 60% pine bark, 20% peat, and 20% sand
Qualities of Good Growing Media
Because plants grown in containers are restricted to the limited amount of media available within each pot, high-quality potting mixes are essential to supply the roots with nutrients, air, and water. A potting mix, regardless of the components, should have these characteristics:
- High permeability to water and air: Larger particles and pore spaces allow rapid percolation of water and air.
- Water-holding capacity: Small particles and pore spaces and high quantities of organic matter increase water retention.
- Drainage: Large particles and pore spaces allow water to drain quickly, but a compacted growing medium does not.
- Aeration: Large particles and organic matter create air space, providing roots with access to the oxygen that is necessary for a plant to grow, take up nutrients, and absorb water.
- Light weight: The lighter a mix is, the easier it is to move the container. Likewise, a lighter mix has lower bulk density and more air space than a heavier mix.
- Fertility: A fertile mix is necessary for healthy growth. Plants need nutrients to thrive.
- Pasteurized: A mix that is mostly free of weed seeds, insects, and diseases.
Selecting Potting Mixes
There are many commercial soilless mixes developed through scientific research that provide optimum water and nutrient properties. Most commercial mixes combine finely textured and coarsely textured components to create a balance of water retention and drainage qualities. When considering commercial mixes, read each mixture’s label to identify and evaluate the components. It may be necessary to experiment with several mixes to find one that works in the desired setting.
Many high-quality commercial potting mixes have a small quantity of fertilizer mixed in to give newly potted plants a surge of nutrients to jump-start their growth. In most cases, these nutrients last only a couple of weeks and often do not supply the full spectrum of nutritional elements needed for long-term growth, so an on-going fertilizer regime is also necessary. Examine whether your container plant is foliage, flower, or fruit, and research its nutrient requirements appropriately.
In most situations, it is faster, easier, and more precise to purchase a commercial soilless mix than to make your own mix. Sometimes, however, specific needs occur that make a custom potting mix ideal, such as growing root-rot-sensitive plants that need a well-drained potting mix, growing high-water-using plants without an automatic irrigation system, or gardening on a windy rooftop (which makes a heavy mix ideal). Choose components based on the specific needs of each situation. For root-rot sensitive plants or plants that prefer dry conditions, such as succulents, cacti, and herbs, limit potting mix and sand to no more than a third of the total mixture and include perlite to achieve a blend with greater air space. For plants with a high water requirement, such as coleus or tomatoes, the mixture should include vermiculite and compost for a greater water-holding capacity. For a blend with greater bulk density to prevent container blow-down in windy conditions, increase sand (more than a third of the mixture should be soilless potting mix and sand) and limit perlite.
No single potting mix is ideal for all container-grown plants. Often a ready-made bag mix can be improved by adding components. A garden center or an Internet search can provide information regarding the best mixes in which to grow particular species.
Potting Plants
Potting media should be moist before potting. Moist media should be slightly damp to the touch but not wet, meaning no water is draining from the media. Pre-moistened potting mix makes watering-in newly potted plants more effective. Peat or pine bark that is excessively dry is very difficult to rehydrate.
When potting a plant, the crown of the plant must not be buried below nor exposed above the top of the media. This zone, where crown meets media, is called the “substrate-line.” Planting too deeply below the substrate-line can smother the plant’s growing point, which can kill the crown. Planting too shallowly exposes roots to the air’s drying effects, which can lead to root desiccation.
To allow for proper watering, sufficient space is needed between the top of the potting mix and the top of the pot. This space is known as the “reservoir” and provides space to apply water and soluble fertilizer. When watered, the various soilless potting mix components settle (or compact) differently. Therefore the reservoir depth is measured after the initial watering (Figure 18–9).
Experiment with your media to obtain the optimal reservoir depth. Approximately ¼-inch to 3 inches of reservoir space is needed, depending on the diameter of the pot; larger pots require deeper reservoirs.
To successfully pot your container plants, loosely fill the pot with media approximately a third full. Do not pack down the media. Center the plant in the pot, positioning its substrate-line slightly above the ideal reservoir depth. Fill media in around the roots, lining up the existing substrate-line with the new substrate-line. At this point, both the plant and the potting mix are positioned slightly above the desired reservoir depth. Shake the pot gently back and forth to evenly spread out the potting mix around the crown. Watering-in settles the plant and the new potting mix together to the correct reservoir depth.
Avoid pressing the media down around the crown or tamping the container, which cause compaction. If additional support is needed, consider staking the plant.
Water thoroughly. Occasionally water makes a channel through the container mix and leaves dry areas. Fill the channel with potting mix and water again. The potting mix moistens faster with warm water than with cold water. A drop of dishwashing soap in the water allows for more uniform wetting because it decreases the cohesive and adhesive properties of the water. Depending on the composition of the container mix, the amount of water needed to fully wet the media in a container is normally between 45% and 60% of the container volume. So for a 5-gallon container, that would be 2½ gallons to 3 gallons of water.
If planting seeds in the container, sow them after the potting mix has been added and thoroughly watered.
Repotting
Repotting (or transplanting) is the transfer of a plant from one container to another. Transplanting is necessary to increase the root system’s growing space, to replenish nutrients, improve aeration, and alleviate fertilizer salt buildup. Plants that are healthy and grown under optimal conditions should be repotted annually using fresh potting mix (Figure 18–10). Repotting is best done in the early spring, before plants start actively growing.
There are, however, various signs that repotting may be necessary at other times throughout the year.
- Stunting: Plants that are not growing during their active growth period may be outgrowing their pots. If the root system is constricted, roots do not have room to expand. An overabundance of roots quickly uses up the available water and nutrients in the potting mix.
- Wilting: When the leaves of a potted plant wilt frequently, yet rehydrate after watering, the roots are not getting enough water, often because the plant is in too small a pot (Figure 18–11). “Up-potting” the plant increases the amount of water available to the root system. If a plant’s leaves remain wilted after watering, most likely the roots are rotted. The continuous wilting means the roots are unable to absorb water. Reduce the amount of water given to the plant or “down-pot” (or do both) to balance the root size and potting mix volume ratio.
- Escaping: Plants that have roots pushing out of their pots should be repotted in a larger container (Figure 18–12).
- Surface exposure: When a plant’s crown or roots become exposed on the potting mix surface, it could indicate that the media has settled or been washed over to one side of the pot. In this case repotting may not be necessary. Top-dressing, applying additional potting mix to the media surface, may be all that is needed.
Repotting Techniques
Start repotting by removing the plant from its old pot. While securing the plant with one hand, turn the pot upside-down and gently tap the rim of the container on the edge of a table. If the plant does not slide out easily, its roots might be attached to the inside walls of the container. To detach, carefully run a straight knife between the root ball and container walls. Examine the root ball. A dense root ball is an indication that the plant needs to be potted up into a larger pot. Roots that are so intertwined they retain the shape of the old pot do not develop properly and hinder plant growth if left entangled. Break this encircling growth pattern by teasing the roots apart or by cutting the roots vertically along the side of the root ball.
The container selected for potting-up should be one size larger in diameter than the pot in which the plant is currently growing. For vigorously growing species, two pot sizes larger may be required. If down-potting is necessary, the container size should accommodate the size of the root system. At this stage it is crucial not to overwater nor let the few remaining roots dry out.
Whether potting or repotting, it is always important to use pots that are void of diseases, insects, weed seeds, or build-up of salts from fertilizers (Figure 18–13). Wash previously used pots in a solution of non-bleach household disinfectant. Rinse the solution off thoroughly prior to use. Scrub clay pots with water and a wire brush to remove salts.
Reusing Container Media
Container media can be reused as long as no soilborne disease problems have occurred, such as Verticillium or Fusarium wilt, in the previous season. If disease was present, the media needs to be discarded or added to an area in the yard or garden that has resistant plants—such as grasses, lilies, or ferns. When reusing container media from year to year, organic matter breaks down and decomposes, causing a decrease in the size of particles and pore space, resulting in reduced drainage and aeration. Emptying out the container mix, breaking up the material and any old roots, and re-blending keep the media from getting too compacted. Because many of the nutrients are used by plants or leached out during the previous growing season, add additional media, compost, and fertilizer.
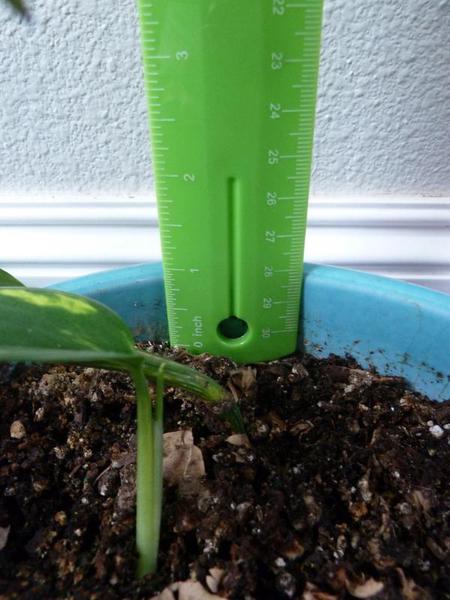
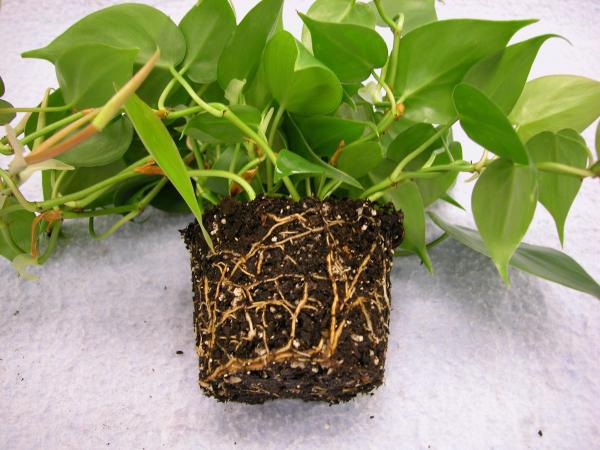
Figure 18–10. This pothos (Epipremnum aureum) is at the optimal stage for repotting.
Diane Mays CC BY 2.0
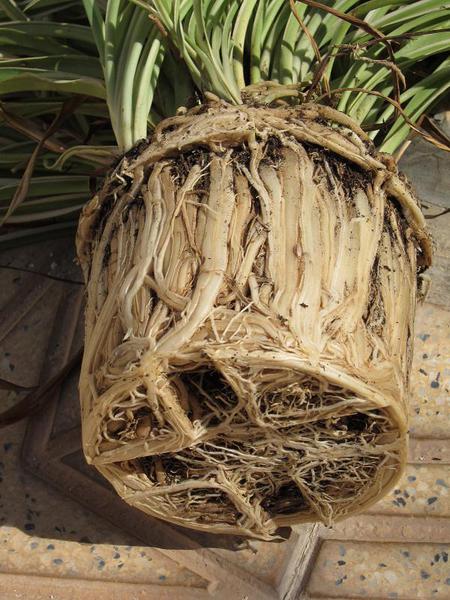
Figure 18–12. A spider plant (Chlorophytum comosum) with roots escaping the pot.
Keith Williamson, Flickr CC BY 2.0
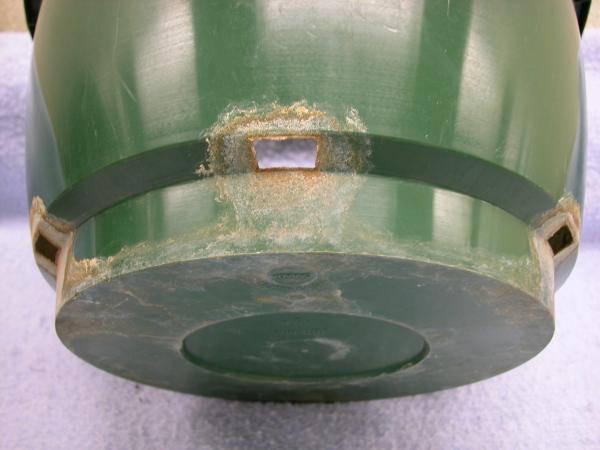
Figure 18–13. Soluble salts build up on containers. Wash them off before using the container again.
Diane Mays CC BY 2.0
Nutrient Management
A regular fertilization schedule must be followed to maintain healthy plants.
Fertilizer Types
Controlled-release, slow-release, or liquid fertilizers are the preferred ways to supply nitrogen, potassium, and phosphorous to container plants. These fertilizers can be used independently or in combination. Plants also require micronutrients such as copper, zinc, boron, manganese, and iron; these can be supplied with a micronutrient solution.
- Controlled-release: Controlled-release fertilizers are synthetic fertilizers that have been coated by materials to reduce their immediate solubility and availability to plants. Controlled-release fertilizers are expensive but offer several advantages: avoidance of high initial salt levels in the growing media, availability of nutrients for several months, and reduction of nutrient losses from the container by leaching and runoff. Higher summer temperatures and increased moisture in the growing media increase the rate of nutrient release. Top-dressing, rather than incorporating fertilizer, typically results in reduced nutrient losses, as the nutrients have to travel throughout the growing medium, which increases their chance of being absorbed by the plant. Intermittent drying of top-dressed fertilizer between watering may also slow down the leakage of nutrients through the fertilizer coating. If containers are subject to blow-over due to being placed in a windy area, however, the fertilizer should be mixed in prior to potting rather than applied to the surface.
- Slow-release: Slow-release fertilizers come in both organic and synthetic forms. Organic fertilizers have low water solubility, prolonged nutrient release rates (over years), and are less concentrated per unit weight than synthetic fertilizers. The main disadvantage to slow-release fertilizers is the release rate may be too slow for fast growing crops, and supplementation with liquid fertilizer may be needed. Three factors affecting the release of nutrients in slow-release fertilizers are particle size, media moisture content, and microorganisms present in the medium (organism numbers increase with warmer temperatures). The smaller the particle size is, the higher the moisture content. And the warmer the temperatures are, the faster the rate of nutrient release.
- Liquid: Liquid fertilizers are quick-release, water-soluble fertilizers. Water-soluble fertilizers are most desirable after plants are growing, and these fertilizers can quickly replace nutrients lost from the potting mix during a prolonged rainfall or period of rapid plant growth. They have minimal temperature dependence and are cheaper in cost per unit of nitrogen than slow-release fertilizers.
- Granular: Granular fertilizer that is not time-released is generally not recommended as a supplemental fertilizer for container gardening. It can be worked into the top few inches of potting mix around plants in containers, but the fertilizer can burn plant roots if it comes into contact with them.
- Foliar: Foliar fertilizer is the spraying of nutrients onto plant leaves and stems for subsequent nutrient absorption. The solutions are very dilute to avoid burning plant foliage. Absorption is increased when the sprays reach the leaf undersides where the stomata are located. Foliar fertilization can be used as a way to supplement nutrients but should not be a substitute for a potting mix fertility program.
Timing
There are no hard-and-fast rules for fertilizing container gardens. How much and how often to fertilize depend on such factors as the type of plants grown, each plant’s growth stage, the type of fertilizer used, and the irrigation method. Some basic principles, however, can be followed.
Pre-plant fertilization allows for a successful start to plant growth. If the fertilizer used before planting is a controlled-release fertilizer, additional fertilizer is needed in eight to 10 weeks. If the potting mixture is amended with slow-release fertilizer, transplants can be fertilized again three weeks after planting, seedlings three weeks after the plants have two sets of leaves, and fruit trees when new growth starts.
Nutrient levels usually drop because plants take up the nutrients and nutrients are leached from the potting mix. Additional time-release fertilizer can be applied, or liquid fertilizers can be used once a week at half strength or every two weeks at full strength. When using liquid fertilizers, salt accumulation can sometimes be a problem and is evident by a white crust on top of the potting mix. If salt accumulation is observed, the media should be leached to remove excess nutrients by slowly running water through the media for several minutes.
Fertilize indoor houseplants once a month from March to October. Do not fertilize from November to February unless deficiency symptoms appear.
Outdoor Container Gardening
Growing plants in outdoor containers provides color and interest in a landscape. Container gardens can produce food or herbs for cooking and make an ideal choice for those with limited space, soil problems, or woodland creatures that eat their plants. Containers can be placed on a rooftop, balcony, patio, deck, entrance area, or walkway (Figure 18–14). Containers are mobile and can be moved to a sunny spot if growing tomatoes or petunias, a partly shady area when growing lettuce or impatiens, or a protected microclimate during the winter for growing year-round rosemary. Container gardening offers more flexibility than traditional gardening and is great for people with physical limitations, children, renters, new gardeners, or even experienced gardeners wanting to downsize. Container gardening requires no digging or tilling, and it is virtually weed-free. Container gardening can also be a way of containing aggressive plants, such as mint, that may otherwise take over traditional garden spaces. Plants grown in containers, however, do require more care than plants grown in traditional garden beds in the ground. The medium in the containers drains easily, leaching nutrients, and it becomes warmer than soil in the ground—causing it to dry out faster and necessitating more frequent applications of fertilizer and water. These small hurdles can be overcome to allow the gardener to harvest fresh vegetables, herbs, and fruits practically year-round.
Plant Varieties
Outdoor plants grown in containers need to have a confined or compact growth habit. Most annual plants and flowers are suitable for growing in containers. Perennial varieties should be chosen that are labeled bush, dwarf, or miniature, or ones that have been especially bred or hybridized for container growing. Nearly all leafy green vegetables do well in containers, but corn and most large-fruited vining crops—such as full-sized pumpkin and watermelon—cannot be grown in containers. There are bush-type squash, cucumbers, and melons, however, that are ideal for small-space and container gardening. When growing fruit trees such as apples, peaches, and figs, the amount of fruit produced is proportional to the plant’s size, so large yields should not be expected. Fruit production is possible in containers but will not equal the quantity produced on trees planted in the ground.
Planting Calendar
See the container gardening planting calendar for vegetables, in Table 18–3, fruit in Table 18–4 and herbs in Table 18–5. See AG-748, Container Gardening Planting Calendar for Edibles in the NC Piedmont, for guidance in scheduling container plantings for optimal performance.
Table 18–3. Container garden planting calendar for vegetables.
| Vegetable | Days to Harvest | Jan | Feb | March | April | May | June | July | Aug | Sept | Oct | Nov | Dec | ||||||||||||
|---|---|---|---|---|---|---|---|---|---|---|---|---|---|---|---|---|---|---|---|---|---|---|---|---|---|
| 1 | 15 | 1 | 15 | 1 | 15 | 1 | 15 | 1 | 15 | 1 | 15 | 1 | 15 | 1 | 15 | 1 | 15 | 1 | 15 | 1 | 15 | 1 | 15 | ||
| Beans, lima (bush) | 65–80 | S | S | S | S | ||||||||||||||||||||
| Beans, lima (pole) | 75–95 | S | S | S | |||||||||||||||||||||
| Beans, snap (bush) | 50–55 | S | S | S | S | S | S | ||||||||||||||||||
| Beans, snap (pole) | 65–70 | S | S | S | S | S | |||||||||||||||||||
| Beets | 55–60 | S | S | S | S | S | |||||||||||||||||||
| Bok choy | 45–60 | T | T | T | T | ||||||||||||||||||||
| Carrots | 75–80 | S | S | S | S | ||||||||||||||||||||
| Collards | 90–120 | ST | ST | ||||||||||||||||||||||
| Cucumbers | 60–65 | ST | ST | ST | |||||||||||||||||||||
| Eggplant | 80–85 | T | T | T | T | ||||||||||||||||||||
| Endive | 80–90 | S | S | S | S | S | |||||||||||||||||||
| Green garlic | 30–35 | B | B | B | B | ||||||||||||||||||||
| Kale | 50–60 | ST | ST | ST | S | S | |||||||||||||||||||
| Leeks | 70–100 | T | T | T | T | ||||||||||||||||||||
| Lettuce, head | 75–85 | ST | ST | ST | ST | ||||||||||||||||||||
| Lettuce, leaf | 45–50 | ST | ST | ST | ST | ST | |||||||||||||||||||
| Mustard greens | 30–45 | ST | ST | ST | ST | S | S | S | |||||||||||||||||
| Peas, garden | 65–70 | S | S | ||||||||||||||||||||||
| Peas, snap | 65–70 | S | S | ||||||||||||||||||||||
| Peas, snow | 65–70 | S | S | ||||||||||||||||||||||
| Peppers | 75–80 | T | T | ||||||||||||||||||||||
| Potatoes | 100–120 | T | T | T | T | T | |||||||||||||||||||
| Radishes | 20–25 | S | S | S | ST | S | S | S | S | ||||||||||||||||
| Scallions | 60–80 | B | B | B | B | B | B | ||||||||||||||||||
| Spinach | 45–50 | S | S | S | S | S | |||||||||||||||||||
| Squash, summer | 50–60 | T | T | ||||||||||||||||||||||
| Squash, winter | 85–95 | S | S | S | |||||||||||||||||||||
| Swiss chard | 60–70 | ST | ST | ST | |||||||||||||||||||||
| Tomatoes | 75–85 | T | T | T | T | T | T | ||||||||||||||||||
| B = bulbs, S = seeds, T = transplants | |||||||||||||||||||||||||
Table 18–4. Container gardening planting calendar for fruits.
| Fruit | Pollination | Jan | Feb | March | April | May | June | July | Aug | Sept | Oct | Nov | Dec | ||||||||||||
|---|---|---|---|---|---|---|---|---|---|---|---|---|---|---|---|---|---|---|---|---|---|---|---|---|---|
| 1 | 15 | 1 | 15 | 1 | 15 | 1 | 15 | 1 | 15 | 1 | 15 | 1 | 15 | 1 | 15 | 1 | 15 | 1 | 15 | 1 | 15 | 1 | 15 | ||
| Apples | Cross-pollination needed | P | P | P | P | P | P | H | H | H | H | H | H | H | P | ||||||||||
| Blueberries | Partially self-fertilea | P | P | P | P | H | H | H | H | H | H | P | P | P | P | P | P | ||||||||
| Citrus | Self-fertile | P | P | P | H | H | H | H | H | H | H | H | H | ||||||||||||
| Figs | Self-fertile | P | P | P | P | P | P | H | H | H | H | H | H | H | H | P | P | ||||||||
| Grapes | Most varieties self-fertile | P | P | P | P | P | H | H | H | H | H | P | P | P | |||||||||||
| Peaches | Most varieties self-fertile | P | P | P | P | P | P | H | H | H | H | H | H | P | |||||||||||
| Strawberriesb | Self-fertile | P | P | H | H | H | P | P | |||||||||||||||||
| H = harvest, P = plant | |||||||||||||||||||||||||
| a Partially self-fertile means cross-pollination. It is not necessary but will result in increased yield and berry size. ↲ b Strawberries planted in late February or early March will produce a very limited crop in May or early June. Plant in late October or early November for a better yield. ↲ Note: blueberries, grapes and most fruit trees will take several years to bear full crops. |
|||||||||||||||||||||||||
Table 18–5. Container garden planting calendar for herbs.
| Herb | Harvest Season | Jan | Feb | March | April | May | June | July | Aug | Sept | Oct | Nov | Dec | ||||||||||||
|---|---|---|---|---|---|---|---|---|---|---|---|---|---|---|---|---|---|---|---|---|---|---|---|---|---|
| 1 | 15 | 1 | 15 | 1 | 15 | 1 | 15 | 1 | 15 | 1 | 15 | 1 | 15 | 1 | 15 | 1 | 15 | 1 | 15 | 1 | 15 | 1 | 15 | ||
| Basil | Summer | T | T | T | |||||||||||||||||||||
| Bay | Continuous | T | T | T | T | T | |||||||||||||||||||
| Borage | Spring to fall | S | S | ||||||||||||||||||||||
| Chamomile | Late summer to early fall | S | S | ||||||||||||||||||||||
| Chervil | Late summer into winter | S | S | S | S | S | |||||||||||||||||||
| Chives | Spring to fall | T | T | T | |||||||||||||||||||||
| Cilantro | Early summer | S | S | S | |||||||||||||||||||||
| Dill | Summer to fall | S | S | S | S | ||||||||||||||||||||
| Fennel | Late summer | S | S | ||||||||||||||||||||||
| Feverfew | Summer | ST | ST | ||||||||||||||||||||||
| Lavender | Summer | T | T | T | |||||||||||||||||||||
| Lemongrass | Late summer | T | T | ||||||||||||||||||||||
| Lemon verbena | Summer | T | T | ||||||||||||||||||||||
| Marjoram | Summer | ST | ST | ||||||||||||||||||||||
| Mint | Spring to fall | T | T | T | |||||||||||||||||||||
| Monardaa | Summer to fall | T | T | ||||||||||||||||||||||
| Oregano | Summer to fall | T | T | T | |||||||||||||||||||||
| Parsley | Summer to fall | T | T | T | T | T | |||||||||||||||||||
| Rosemary | Continuous | T | T | T | |||||||||||||||||||||
| Saffron crocus | Fall | B | B | ||||||||||||||||||||||
| Sage | Summer to fall | T | T | ||||||||||||||||||||||
| Salad burnet | Spring to early summer | ST | ST | ||||||||||||||||||||||
| Scented geranium | Spring to fall | T | T | ||||||||||||||||||||||
| Stevia | Continuous | T | T | ||||||||||||||||||||||
| Tarragon | Spring to fall | T | T | ||||||||||||||||||||||
| Thyme | Summer | ST | ST | ST | ST | ||||||||||||||||||||
| B = bulbs, S = seeds, T = transplants a Also known as bergamot, because the fragrance resembles the bergamot orange. |
|||||||||||||||||||||||||
Combinations that Work
A container can hold more than one type of plant if all the plants have similar requirements for light, water, and nutrients (Tables 18–6, 18–7, and 18–8). For example, lavender (Lavandula angustifolia), thyme (Thymus vulgaris), and oregano (Origanum vulgare) require a loose growing medium, dry conditions, and very little fertilization. They can be planted together in a porous clay pot or in a semi-porous or nonporous container with some perlite added to the potting mix. Growing requirements are not the only consideration. Plants can also be combined in containers based on harvesting time, form, size, texture, color, or ingredients for favorite recipes to create a themed garden. Place the tallest plant either in the center of the container or toward the back if it will be up against a wall. Plants that cascade should be placed closest to the edge of a container, whereas medium height plants can go in the middle. Depending on the size and shape of the container, consider planting odd numbers, with one tall plant, three medium, and five smaller.
- For a spring vegetable garden, choose an 18-inch diameter container and place a trellis in the center. Direct sow bush peas in the center and ‘Black-Seeded Simpson’ and ‘Red Deer Tongue’ lettuce around the edges.
- Create a hummingbird garden using a hanging basket. Plant the basket with flowers that have staggered bloom times to extend nectar availability. A red-colored pentas (Pentas lanceolata) works well as a center plant. Cascading plants like lantana (Lantana sp.), verbena (Verbena × hybrida), and trailing petunias (Petunia × hybrida) are particularly attractive in hanging baskets and give birds easy access to blooms.
- A full-sun container garden may need additional insulation in the pot to protect the roots from getting too hot. Setting browallia (Browallia speciosa) in the center of the pot works well because of its upright growth habit. Add some cape daisies (Arctotis stoechadifolias) that bloom into the fall for long-lasting color, and plant a coordinating color of million bells (Calibrachoa × hybrida) around the outer edge to cascade down the container.
- Another full-sun option is placing the upright striking copper plant 'Margarita' (Acalpha wilkesiana ) in the center, angel wing begonias (Begonia 'Argenteo-guttata') and weeping sedge (Carex oshemensis) fill out the middle, and sweet potato vines in green and black (Ipomoea batatas) and blue scavola (Scalova aemula ''Blue Fan') cascading down the sides ( Figure 18–15).
- A container in the shade needs plants that can tolerate low light levels and still produce beautiful foliage and blooms. Give some height to the container with the arrow-shaped leaves of a caladium(Caladium bicolor) or porcupine grass (Miscanthus sinensis ‘Strictus’). Add some contrast with the grassy golden leaves of (Hakanechola macra ‘Aureola’) and fill in with some cascading bacopa (Chaenostoma cordatum).
- For a pink-colored garden in the summer, place ‘Marshall’s Delight’ monarda (Monarda didyma) in the center of a large container surrounded by ‘Ruby’ Swiss chard alternating with ‘Forescate’ chives (Allium schoenoprasum). On the outer edge of the container, mix in tricolor sage (Salvia officinalis 'Tricolor') and scented geraniums (Pelargonium spp.).
- An Italian-themed garden needs a container at least 2 feet in diameter. At the three corners of a triangle, plant a plum tomato and two ‘Giant Marconi’ roasting red peppers. The tomato needs to be trellised, and the peppers may also benefit from some support. Marjoram (Origanum majorana), parsley (Petroselinum crispum), and basil (Ocimum basilicum) can be planted to fill in the spaces around the three main plants.
Planting
With some plants, seeds are placed directly in the container, and with others, like annual flowers, transplants are usually used. When using seeds, always plant more than needed because there is seldom 100% germination and emergence. After the seeds have sprouted, seedlings can be thinned to the desired number. For example, beets, carrots, and radishes can be thinned to 2 inches apart (Figure 18–16), but Swiss chard and lettuce should be thinned to 4 inches to 6 inches apart (Table 18–1). When thinning, cut or pinch off the unwanted seedlings near the base rather than pulling them out, as the roots may be intertwined with neighboring seedlings and the other plants can be damaged. With transplants, the potting mix should be broken up around the root ball and the roots loosened before the plant is put into the new container. The plant should be positioned at the same depth as in its original container, planted in a large enough container so that there is at least 3 inches of potting mix under the root ball for further root growth, and watered in thoroughly. A support or trellis is required for vines or vining vegetables (such as beans, cucumbers, eggplant, peas, peppers, tomatoes). The support should be put in place at the same time as seeding or transplanting to minimize disturbance to the plant roots. When planting blueberries, grapes, and most fruit trees, be aware that it will be several years before they bear full crops.
Table 18–6. Light, water, and nutrient requirements for vegetables.
| Vegetable | Light | Water | Nutrients | ||||||
|---|---|---|---|---|---|---|---|---|---|
| Full Sun | Tolerates Partial Shade | Partial Shade | Moist | Slightly Dry | Dry | Lighta | Mediumb | Heavyc | |
| Beans | X | X | X | ||||||
| Beets | X | X | X | ||||||
| Carrots | X | X | X | ||||||
| Cucumbers | X | X | X | ||||||
| Eggplant | X | X | X | ||||||
| Green garlic | X | X | X | ||||||
| Kale | X | X | X | ||||||
| Leeks | X | X | X | ||||||
| Lettuce | X | X | X | ||||||
| Peas | X | X | X | ||||||
| Peppers | X | X | X | ||||||
| Potatoes | X | X | X | ||||||
| Radishes | X | X | X | ||||||
| Scallions | X | X | X | ||||||
| Spinach | X | X | X | ||||||
| Squash, summer | X | X | X | ||||||
| Squash, winter | X | X | X | ||||||
| Swiss chard | X | X | X | ||||||
| Tomatoes | X | X | X | ||||||
| a Fertilize at planting or for established plants fertilize once early in the growing season. b Fertilize monthly with a liquid fertilizer or every 12 weeks with a timed-release fertilizer. c Fertilize every 2 weeks with a liquid fertilizer and every 8-10 weeks with a timed-release fertilizer. |
|||||||||
Table 18–7. Light, water, and nutrient requirements for fruits.
| Fruit | Light | Water | Nutrients | ||||||
|---|---|---|---|---|---|---|---|---|---|
| Full Sun | Tolerates Partial Shade | Partial Shade | Moist | Slightly Dry | Dry | Lighta | Mediumb | Heavyc | |
| Apples | X | X | X | ||||||
| Blueberries | X | X | X | ||||||
| Citrus | X | X | X | ||||||
| Figs | X | X | X | ||||||
| Grapes | X | X | X | ||||||
| Peaches | X | X | X | ||||||
| Strawberries | X | X | X | ||||||
| a Fertilize at planting or for established plants fertilize once early in the growing season. b Fertilize monthly with a liquid fertilizer or every 12 weeks with a timed-release fertilizer. c Fertilize every 2 weeks with a liquid fertilizer and every 8-10 weeks with a timed-release fertilizer. |
|||||||||
Table 18–8. Light, water, and nutrient requirements for herbs.
| Herb | Light | Water | Nutrients | ||||||
|---|---|---|---|---|---|---|---|---|---|
| Full Sun | Tolerates Partial Shade | Partial Shade | Moist | Slightly Dry | Dry | Lighta | Mediumb | Heavyc | |
| Basil | X | X | X | ||||||
| Bay | X | X | X | ||||||
| Borage | X | X | X | ||||||
| Chamomile | X | X | X | ||||||
| Chervil | X | X | X | ||||||
| Chives | X | X | X | ||||||
| Cilantro | X | X | X | ||||||
| Dill | X | X | X | ||||||
| Fennel | X | X | X | ||||||
| Feverfew | X | X | X | ||||||
| Lavender | X | X | X | ||||||
| Lemongrass | X | X | X | ||||||
| Lemon verbena | X | X | X | ||||||
| Marjoram | X | X | X | ||||||
| Mint | X | X | X | X | X | ||||
| Monarda | X | X | X | ||||||
| Oregano | X | X | X | ||||||
| Parsley | X | X | X | ||||||
| Rosemary | X | X | X | ||||||
| Sage | X | X | X | ||||||
| Salad burnet | X | X | X | ||||||
| Scented geranium | X | X | X | ||||||
| Stevia | X | X | X | ||||||
| Tarragon | X | X | X | ||||||
| Thyme | X | X | X | ||||||
| a Fertilize at planting or for established plants fertilize once early in the growing season. b Fertilize monthly with a liquid fertilizer or every 12 weeks with a timed-release fertilizer. c Fertilize every 2 weeks with a liquid fertilizer and every 8-10 weeks with a timed-release fertilizer. |
|||||||||
Container Location
Most flowers, vegetables, and fruits do best in full sun—in locations that get at least 6 to 8 hours of sunlight a day (Tables 18–6 and 18–7). Most herbs and cool-season vegetables—such as beets, carrots, kale, lettuce, radish, and spinach—tolerate partial shade and need only 3 to 5 hours of direct sun a day (Tables 18–6 and 18–8). Containers allow a gardener to take advantage of microclimates, such as an area cooled by shading from an overhang, or an area warmed by a building’s reflective surface or by heat held in brick or concrete. Southern and western exposures are the sunniest and warmest, while northern and eastern exposures are shadier and cooler.
Irrigation
Plants in containers can readily receive water from several sources, but the method of irrigation significantly affects the leaching of nutrients. Watering requirements can vary considerably and are affected by several variables, including wind, light (full sun versus cloudy conditions), temperature, humidity, container size and type, the composition of the media, the amount of media in a pot compared to the amount of roots, the type of plant, and the stage of plant growth (seedling versus mature plant producing fruit). A top dressing of mulch over the potting mix surface significantly reduces moisture loss.
Methods
Water can be supplied to containerized plants with a watering can, a garden hose, a series of drip emitters on a timer, or by using self-watering containers. Each method has benefits and drawbacks, and the choice of which method to use should be made based on the situation (Table 18–9).
Table 18–9. Container watering methods and their pros and cons.
| Watering Type | Pro | Con |
|---|---|---|
| Watering Can | Least expensive. Can use water from rain barrels. | If watered too heavily, soil nutrients are washed out the bottom of the container. If the foliage gets wet, it is more susceptible to sunscald as well as to disease. |
| Garden Hose | Lightweight compared to carrying a watering can. One hose will likely reach all containers on a patio. | If hose sits in the sun, water may be hot and can stunt root development. Sunscald and powdery mildew can occur after inadvertently wetting foliage. |
| Drip Irrigation System | Convenient and timesaving. Ensures the plants get watered in a timely manner. Decreased water volume per irrigation cycle results in less nutrient runoff. Can purchase a timer with a rain delay so that the system can be turned off when it rains. | Initial cost of purchasing the system and the time to install it. Requires routine maintenance to be sure all parts remain in good working order. |
| Self-Watering Containers | Draws water from a bottom reservoir into the soil by capillary action through small soil columns or rope wicks without causing the soil to become too wet. Useful for people maintaining weekend cottages, doing balcony gardening where draining water would be a problem, or taking summer vacations. | Purchasing multiple containers at one time can be expensive. Containers are heavy when filled. |
Frequency
The amount of water a containerized plant requires increases if the weather is hot and windy or if the pot is small, dark-colored, or placed in full sun. Easy access to water is crucial because most containers will need to be watered at least once a day when plants are mature. Containers should never be allowed to dry out completely between watering as doing so damages feeder roots and leads to flower and fruit drop. When the plant finally receives water, its energy goes toward growing new feeder roots, resulting in a slowing down of overall plant growth. To avoid drought stress and wilting, stick a finger 2 inches to 3 inches into the potting mix, and if the mix is dry, the plant should be watered. At the other extreme, avoid overwatering, as the water fills all of the pore space in the potting mix and the roots are unable to get enough oxygen. Water only when needed, and water pots until the water starts to come out the bottom of the container. If there is a saucer under the pot, remove the water from the saucer after watering the plant. This prevents root rot, prevents a buildup of salts that would occur if the water evaporated and left the salts in the saucer, and prevents mosquitoes from breeding there.
Moisture Retention
To retain moisture in the potting mix, place mulch on the media’s surface. After planting, 1 inch of mulch can be added to the surface of the potting mix of each container. The mulch should be pulled back about 1 inch from the base of the plant to prevent moisture from building up next to the stem and causing disease. Water-holding polymers (Polyacrylamide hydrogels) are not recommended, as they have not proven to be effective tools for water management.
Nutrient Management
The frequent watering required by container gardening flushes out nutrients from the potting mix. For example, nitrogen is water-soluble and is easily lost in the water that drains from the bottom of the container. As plants set fruit, their demand for nutrients increases, and nitrogen is pulled out of the leaf tissue for this purpose. Fish emulsion or compost may be used, but fish emulsion does have a strong odor and may attract cats, dogs, raccoons, and other pests to the containers. Apply foliar fertilizer during the early morning hours when the plant stomata are open. The temperature should be under 80°F, the wind minimal, and the air humid. The main concern with continuous use of liquid fertilizer in containers is nutrient runoff. To limit the environmental impact of runoff, always follow the label’s recommended rate. Too much fertilizer promotes vegetative growth at the expense of flowering and fruit production. Overapplication not only increases nutrient runoff but can greatly increase the amount of money spent on fertilizer. Overapplication also can be harmful to the plant by damaging roots through excess salt accumulation and promoting too much vegetative growth.
Overwintering
The weight of an empty plastic container gives the impression that it can be easily moved, but a 20-inch diameter container filled with potting mix and plants can weigh 100 pounds. Place container gardens on a rolling platform to be more easily moved indoors (Figure 18–17). If a container garden contains cold-hardy plants, overwinter them outside in the pot or in a cold frame.
Inside
Bring tender plants inside for the winter once nighttime temperatures drop to 55°F and well before the heat in the house is turned on. Plants need to adapt to the indoor conditions of reduced light and humidity. Over the period of a week, gradually reduce light levels by moving the container from sun to light shade to heavy shade, and finally indoors. If a porch or shed is available, move the plants there for a week before moving them inside. Once indoors, place the containers away from cold drafts caused by outside doors and the drying air of heating ducts. In the spring, once daytime temperatures are around 65°F and nighttime temperatures above 50°F, move plants outdoors again. Gradually expose them to sunlight by placing them in a shaded area for a few days and then gradually moving them into brighter sunlight. Do not leave them outside if the forecast calls for nighttime temperatures below 50°F.
Outside
Many hardy perennials, vegetables such as collards or kale, and some herbs such as bay and rosemary tolerate cold weather. If possible, move these plants close to the house or to a sheltered area. These containers, along with pots containing fruit trees or bushes that remain outside during winter, may need insulation to protect the root balls from freezing. (Refer to the recommendations for success with fruits in the NC State Extension publication AG-748, Container Gardening Planting Calendar for Edibles in the NC Piedmont.) Root damage can occur because the root system is not as well-insulated from cold in a container as it would be in the ground. The container can be loosely wrapped with chicken wire and the area between the pot and the wire filled with inches of leaves or straw for insulation. Alternatively, several materials are available that can be used to directly wrap the pots. These include a frost blanket, bubble wrap, closed cell foam (1-inch thick), quilt batting, household insulation, or a blanket (Figure 18–18). If using quilt batting or household insulation, cover with a layer of plastic to keep it from getting soaked during wet weather. When overwintering plants, the moisture in the potting mix should be periodically checked and dry containers watered if the temperatures are going to be above freezing. Keeping the plants watered can help protect them from frost damage.


Figure 18–16. Thinned carrots.
Renee Lampila
Indoor Containers—Houseplants
People are spending more time indoors than ever before. It is estimated that many of us spend as much as 90% of our time inside. Even so, we have an innate need to be intimately connected with the outdoor world. Decorating our interior living and work spaces with live plants gives us an instant connection with nature.
Benefits of Houseplants
Plants make almost any interior more pleasant and attractive. Homes, offices, banks, commercial buildings, shopping malls, and restaurants are so much more inviting when living plants are part of the setting. Plants add warmth, color, texture, scent, and beauty to cold, uninviting indoor spaces.
Their beauty and warmth is not the only reason to grow plants indoors. Indoor air pollution, a particular problem in sealed-off, energy-efficient buildings, consists of particles and gases trapped in building air that are not circulated or filtered properly. Research by the National Aeronautics and Space Administration (NASA) has proven that houseplants have the ability to improve indoor air quality by reducing air pollution from chemicals such as formaldehyde and benzene. Further research is under way to determine the efficiency of indoor plants in reducing common indoor air pollutants such as asbestos, pesticides, carbon dioxide, carbon monoxide, and chemicals released from detergents, solvents, cleaning fluids, clothing, furniture, carpets, and insulation.
Growing houseplants is a great way to bring our outdoor gardens indoors, enabling us to garden year-round. In addition, work environments that incorporate interior plants into the décor have increased employee productivity. When surrounded by plants, workers tend to be more relaxed and their mental and physical well-being enhanced. Houseplants beautify our interior spaces, improve indoor air quality, and give us an energy boost.
Challenges of Growing Plants Indoors
Most species that are sold as houseplants are native to the many tropical regions of the world. The tropics are warm all year with average temperatures between 65°F to 80°F, with no threat of freezes. Plants that originate from tropical rainforests are accustomed to high humidity, filtered light, ambient temperatures, and evenly moist potting mixes.
Our temperature preferences are very similar to those of tropical plants so it is logical that we have chosen these plants to share our indoor spaces. Even though we find the same temperatures agreeable, the available light intensities and humidity in our indoor spaces are often too low for most tropical plant species. Plants are adaptable to a degree, but the closer the indoor environment is to their native habitat, the more they flourish. The key then is to choose plants that match the environmental conditions already available and learn the possibilities and limitations of altering the environment to suit each plant’s needs.
Acclimatizing Houseplants
Most foliage plants available for sale in North Carolina are grown in production nurseries in other states, such as Florida. They are grown under optimal production conditions that are quite different than conditions in the typical home or office. To produce a quick crop, nursery workers maintain a production environment with high light, high humidity, frequent watering, and high fertilizer rates. This push for quick growth creates a lush yet tender plant. Newly purchased plants need a period of time to adjust to the drastic environmental differences between a production nursery and the average indoor setting. To help reduce shock, gradually reduce a plant’s light, humidity, growing media moisture, and fertilizer levels. This process of adaptation is called “acclimatization,” and it provides time for plants to modify their leaf cellular structure to better adapt to the light, humidity, and fertilizer in their new environment. If plants produced under high light are not properly acclimatized to low light conditions, the plants begin to starve and gradually decline. A newly purchased plant may have food reserves built up, so its decline may take a few months. But it eventually shows stress symptoms due to the abrupt decrease in light intensity. Acclimatization is also required when potted plants are moved from the outside to the inside and vice versa. When moving plants inside, place them in an indoor area of the highest light intensity and humidity. Gradually move them to their winter location over a period of four to eight weeks. Place plants in the shade and move them into higher light (if needed) gradually.
As mentioned earlier, all plants need the same, basic environmental conditions to survive. Light, water, temperature, air movement, humidity, fertilization, and proper growing medium are the key factors that affect plant growth. When growing tropical foliage plants indoors, gardeners find that light is often the most limited interior resource of all the factors that affect plant growth.
Light
Light is necessary for plants to manufacture their own food. Three specific aspects of light affect plant growth: light intensity (the amount of brightness plants receive), light quality (the colors in the light stream or “spectral distribution”), and light duration (how long plants are exposed to that intensity and quality). Optimal levels of all three aspects ensure healthy, beautiful houseplants.
Light Intensity
Light intensity is the amount of light given off at a certain brightness or strength. The higher the light level is surrounding a plant, the greater the supply of food. So the quantity of light a plant receives greatly affects its growth and overall health. The amount of light emitted indoors can vary drastically from room to room (as well as in different areas of the same room), so it is essential to determine the light intensity for each interior space. Our eyes are not good indicators of light intensity because they automatically adjust to differing light levels. Light intensity is measured in foot-candles (fc). One foot-candle is the amount of light cast by a candle on a flat surface at a distance of 1 foot. Various hand-held, simple-to-use, light meters are sold at reasonable costs by horticultural supply companies. Light meter “apps” are also available for smart phones, some of which are free. Once light levels are measured, select plants that thrive in those levels.
Not all houseplants require the same light intensity. In fact, an intensity range that is ideal for one species may damage another. Plants are typically categorized by the number of foot-candles required, grouped as low, medium, or high light-requiring. The foot-candle values for each range are defined in Table 18–10.
Table 18–10. Foot-candle values for light intensities.
|
Light Intensity |
Foot-Candles to Maintain Growth |
Foot-Candles to Promote Growth |
|---|---|---|
|
Low light |
25 – 74 |
75 – 300 |
|
Medium light |
75 – 149 |
150 – 1,500 |
|
High light |
150 – 999 |
1,000 – 3,000+ |
The lower ranges in each category are needed to maintain plant growth. The higher ranges are suggested to increase plant growth. Use these ranges as general guidelines. A healthy, growing plant is the best indicator that the environmental conditions are agreeable.
The light requirements for many houseplants have been researched and conveniently categorized for us. After light intensity values are obtained (Table 18–11), it is easy to find those plants that require the light intensities a particular interior space has to offer. This ensures the greatest growing success.
Table 18–11. Light intensity requirements for select houseplants.
| Common Name | Scientific Name | Light Intensity | Temperature | Comments |
|---|---|---|---|---|
|
African violet hybrids & cultivars |
Streptocarpus spp., hybrids and cultivars | High to medium | Warma | High humidity |
| Aloe vera | Aloe barbadensis | High | Averageb | |
| Aluminum plant | Pilea cadierei | High to medium | Warm | |
| Anthurium | Anthurium spp. | Medium | Warm | Keep moist |
| Aralia Balfour | Polyscias balfouriana 'Aralia Balfour' | High to medium | Warm | High humidity |
| Aralia, False | Plerandra elegantissima | High | Average | High humidity, keep moist |
| Aralia, Ming | Polyscias fruiticosa | High | Warm | High humidity |
| Arrowhead vine | Syngonium podophyllum | High | Average | Keep moist |
| Begonia, Rex | Begonia rex hybrids | High | Average | High humidity, keep warm |
| Bloodleaf | Iresine herbstii | High | Average | Keep moist |
| Botanical wonder | x Fatshedera lizei | High to medium | Average | |
| Bougainvillea | Bougainvillea glabra | High | Warm | |
| Burro's tail | Sedum morganianum | High | Average | |
| Caladium | Caladium × hortulanum | High | Warm | High humidity |
| Calathea | Calathea picturata | Medium | Average | |
| Cast iron plant | Aspidistra elatior | Medium to low | Average | |
| Chenille plant | Acalypha hispida | High | Warm | High humidity |
| Chinese evergreen | Aglaonema commutatum | Medium to low | Average | High humidity, keep moist |
| Coffee plant | Coffea arabica | High | Average | High humidity |
| Coleus | Coleus blumei | High | Average | |
| Corn plant | Dracaena fragrans | High to medium | Average | |
| Croton | Codiaeum variegatum var. pictum | High | Warm | High humidity, keep moist |
| Cyclamen | Cyclamen persicum | High | Coolc | |
| Dieffenbachia, Gold | Dieffenbachia maculata 'Rudolph Roehrs' | Medium | Average to warm | |
| Dracaena, Gold dust | Dracaena surculosa | High to medium | Average | |
| Dracaena, striped | Dracaena deremensis | High to medium | Average | High humidity |
| Dragon tree | Dracaena marginata | High to medium | Average | |
| Dumbcane, giant | Dieffenbachia amoena | High to medium | Average | |
| Dumbcane, spotted | Dieffenbachia maculata | High to medium | Average | |
| Fatsia, Japanese | Fatsia japonica | High | Cool | |
| Fern, asparagus | Asparagus plumosus | High to medium | Average | |
| Fern, bird's nest | Asplenium nidus | Medium | Average | High humidity, keep moist |
| Fern, Boston | Nephrolepis exaltata 'Bostoniensis' | High to medium | Average | Keep moist |
| Fern, rabbit's foot; Golden polypody | Polypodium aureum | Medium | Average | Keep moist |
| Fern, Southern maidenhair | Adiantum capillus-veneris | High to medium | Average | High humidity, keep moist |
| Fern, staghorn | Platycerium bifurcatum | High | Average | High humidity |
| Fig, creeping | Ficus pumila | Medium to low | Average | High humidity |
| Fig, fiddle-leaf | Ficus lyrata | High to medium | Average | |
| Fig, weeping | Ficus benjamina | High to medium | Average | |
| Firecracker flower | Crossandra infundibuliformis | High | Warm | High humidity |
| Flame violet | Episcia cupreata | High | Warm | High humidity, keep moist |
| Friendship plant | Pilea involucrata | High | Warm | High humidity |
| Fuchsia | Fuchsia × hybrida | High | Cool | High humidity |
| Gloxinia | Sinningia speciosa | High | Warm | |
| Gold dust plant | Aucuba japonica 'Variegata' | High to medium | Average to cool | |
| Grape ivy | Cissus rhombifolia | High to medium | Average to cool | |
| Hibiscus, Chinese | Hibiscus rosa-sinensis | High | Average | |
| Ivy, English | Hedera helix | High to medium | Average to cool | |
| Jacob's coat | Acalypha wilkesiana | High | Warm | High humidity |
| Jade plant | Crassula argentea | High | Average to cool | |
| Joseph's coat | Alternanthera ficoidea | High | Average | |
| Kaffir lily | Clivia miniata | High | Average to cool | |
| Kangaroo vine | Cissus antarctica | High to low | Warm to cool | |
| Lipstick plant | Aeschynanthus radicans | High | Warm | High humidity, keep moist |
| Mandevilla | Dipladenia sanderi | High | Average | High humidity |
| Mosaic plant | Fittonia verschaffeltii | High to medium | Average to cool | High humidity |
| Moses-in-the-Cradle, Oyster plant | Rhoeo spathacea | High | Average | |
| Norfolk Island pine | Araucaria heterophylla | High to medium | Average | High humidity |
| Palm, Areca | Dypsis lutescens | High | Warm to average | High humidity |
| Palm, Bamboo | Chamaedorea erumpens | High to low | Average | |
| Palm, Fishtail | Caryota mitis | High to medium | Average | |
| Palm, Kentia | Howea forsteriana | High to medium | Average | |
| Palm, Parlor | Chamaedorea elegans | High to medium | Average | Low to high humidity, keep moist |
| Palm, Ponytail | Beaucarnea recurvata | High | Average | |
| Peace lily | Spathiphyllum spp. | High to medium | Average | Keep moist |
| Peacock plant | Calathea makoyana | Medium | Average | High humidity, keep moist |
| Peperomia, Watermelon | Peperomia argyreia | High to medium | Average | |
| Peperomia, Emerald ripple | Peperomia caperata | High to medium | Average | |
| Peperomia, oval-leaf; Baby rubber plant | Peperomia obtusifolia | Medium | Average | |
| Philodendron | Philodendron selloum | High to medium | Cool | |
| Philodendron, Heart leaf | Philodendron scandens | High to medium | Average | |
| Philodendron, Split-leaf | Monstera deliciosa | Medium to low | Average | |
| Piggyback plant | Tolmiea menziesii | High to medium | Average to cool | Keep moist |
| Podocarpus | Podocarpus macrophyllus | High | Average to cool | |
| Polka dot plant | Hypoestes phyllostachya | High | Average | |
| Pothos | Epipremnum aureum | High to low | Average | |
| Prayer plant | Maranta leuconeura | High | Average | High humidity |
| Purple heart | Setcreasea pallida | High | Cool | |
| Purple velvet plant | Gynura aurantiaca | High to medium | Average | Keep moist |
| Ribbon plant | Dracaena sanderiana | High to medium | Average | |
| Rubber plant | Ficus elastica | Medium | Average | |
| Schefflera | Schefflera actinophylla | High | Average | High humidity |
| Schefflera, dwarf | Heptapleurum arboricola | High | Average | High humidity |
| Screw pine | Pandanus tectorus 'Veitchii' | High | Warm | High humidity |
| Shrimp plant | Justicia guttata | High | Average to warm | |
| Snake plant | Sansevieria trifasciata | High to medium | Average | |
| Spider plant | Chlorophytum comosum | High to medium | Average | |
| Sprengeri asparagus fern | Asparagus densiflorus 'Sprengeri' | Medium | Average | |
| Strawberry geranium | Saxifraga stolonifera | High | Cool | Keep moist |
| Ti plant | Cordyline terminalis | High | Warm | |
| Umbrella palm | Cyperus alternifolius | Medium | Average | |
| Wandering Jew, Inch plant | Tradescantia zebrina | High to medium | Average | Keep moist |
| Wandering Jew, Small-leaf spiderwort | Tradescantia subaspera | High | Average | Keep moist |
| Wax plant | Hoya carnosa | High | Average | High humidity |
| Zebra plant | Aphelandra squarrosa | High | Average to warm | High humidity, keep moist |
| a Warm-temperature plants grow best at 70°F – 80°F during the day and 64°F – 70°F at night. | ||||
| b Average-temperature plants grow best at 60°F – 65°F during the day and 55°F – 60°F at night. | ||||
| c Cool-temperature plants grow best at 50°F – 60°F during the day and 45°F – 55°F at night. | ||||
Plant food production (photosynthesis) is governed by light intensity and light duration. If the rate at which a plant produces food is equal to the rate at which it consumes its food (respiration), the plant simply maintains its relative size. This means that new plant tissue is produced at the same rate as old tissue dies. For a plant to grow, it must manufacture more food than it consumes, meaning there is more tissue being generated than there is tissue dying. For some species, longer day-length can make up for low-light intensity. Research has shown that the average houseplant needs approximately 85 fc for 12 hours a day to maintain its original quality for a year. Table 18–12 quantifies the survival expectancy of certain houseplant species under differing light conditions.
Table 18–12. Number of months plants remain attractive under various light levels.
| Plant | 15 to 20 fca | 25 to 50 fc | 50 to 75 fc | 75 to 100 fc |
|---|---|---|---|---|
| Aucuba | 12 | 24 | 36 | 38 |
| Begonia | ··· | 12 | ··· | ··· |
| Bromeliad | ··· | 12 | ··· | ··· |
| Cast iron plant | 12 | 24 | 36 | 38 |
| Chinese evergreen | 12 | 36 | 36 | ··· |
| Dieffenbachia | 12 | 12 | 12 | ··· |
| Dracaena | 30 | 36 | 36 | 38 |
| Peace lily | ··· | ··· | ··· | 12 |
| Peperomia | ··· | 12 | ··· | ··· |
| Philodendron | 12 | 30 | 36 | 36 |
| Pothos | ··· | ··· | 30 | 36 |
| Rubber plant | ··· | ··· | ··· | 12 |
| Snake plant | 12 | ··· | ··· | ··· |
| Syngonium | 12 | ··· | ··· | ··· |
| a fc = foot-candle | ||||
If a light meter is not available and sunlight is the primary light source, the following descriptions help determine the light in the space:
- Low light: Areas more than 8 feet away from a window; dimly lit corners; the center areas of rooms, hallways, or rooms facing north. In addition, spaces that receive only artificial light are usually low-light situations.
- Medium light: Indoor spaces that are 4 feet to 8 feet away from south and west windows and west windows that do not receive any direct sun.
- High light: Areas within 4 feet of large windows that face south, east, or west.
But what light intensity levels can we expect indoors? For reference, Table 18–13 lists light levels for various indoor and outdoor environments.
Table 18–13. Average light intensities for various indoor and outdoor environments.
| Environment | Foot-candle levels |
|---|---|
| Library, classroom | 20 |
| Office | 50 |
| Supermarket | 100 |
| Light shining into a window | 100-5,000 |
| Outdoors - overcast | 1,000 |
| Outdoors - full sun | 10,000 |
Factors Influencing Light Intensity
The amount of light a plant receives indoors is influenced by various factors. The dimensions of windows and doors, as well as the direction these openings face, affect the amount of light that enters a room. As seasons change, so does the angle of the sun. At midday in the summer, the sun’s light energy hits the earth at a 90° angle, spreading the sun’s energy out over a localized area. In the wintertime the angle of the sun is lower and hits the earth at a lower angle, spreading the sun’s energy out over a larger area and making the light less intense at any given point.
During these seasonal changes, plants may need to be moved to lower or higher light intensities to provide them with the correct amount of light. Windows that face south, east, and west allow more light indoors than windows that face north. Draperies, shades, and sheers can reduce the amount of natural light that can enter. Keeping windows clean and removing window screens can increase light penetration by as much as 30%. Plant placement in relation to doors and windows also affects the light levels plants receive (Figure 18–19).
Less obvious factors such as wall and floor colors can lighten or darken a room. Mirrors reflect sunlight back into a room, as do pools, natural bodies of water, and even nearby buildings. Roof overhangs, outside awnings, buildings, trees, and other outdoor structures can shade or block incoming light.
Symptoms of Inadequate Light Intensity
If a plant is not thriving, inadequate light intensity could be the problem. Plants that are grown under optimal light intensities generate new growth and have a compact, bushy habit. Overall leaf color is vibrant, leaves are normal size, stems are turgid, and flowering is promoted.
- Too Low: Plants grown under light intensities below optimum have leaves that do not expand to their full potential size. Leaf color is pale, and internodes are long (the stems are essentially stretching to reach higher light). This results in a spindly, leggy appearance. Leaves may detach from the stems because there is little stored energy to support them. The plant may cease flowering to conserve energy.
- Too High: In their native habitats, many tropical houseplants grow as understory plants beneath the forest canopy. Trees overhead diffuse direct sun, letting in only dappled, filtered light. When plants are grown in light intensities above optimum, chlorophyll can be destroyed, resulting in yellow leaves. Plants produce smaller leaves, reducing leaf surface area in an effort to minimize the amount of sunlight absorbed and the amount of water lost through transpiration. If the intensity is severe, leaves detach from the plant to save energy for new growth and to reduce water loss. Large brown patches of dead tissue may develop. This phenomenon is called “leaf scorch.”
Strategies for Increasing Light Intensity
Because low light intensities are more likely to be a problem than high light levels, use the following techniques to increase light levels indoors:
- Rotate plants monthly between higher and lower light areas to give plants with low food reserves the chance to build up enough energy to survive when placed back into lower light conditions.
- Move plants closer to a light source.
- Install artificial lights, which can also serve to extend the day-length (see light duration) and can increase light intensity.
If increasing the light intensity is not an option, incorporate these cultural practices to extend the life of the plants:
- Do not overwater; provide just enough to keep plants from wilting.
- Reduce the amount and frequency of fertilization.
- Lower the air temperature a few degrees by adjusting your home’s thermostat.
Light Quality
In addition to light intensity, plant growth is influenced by the quality of light received. Light is a blend of different colors, measured in wavelengths, as seen when light passes through a prism. The distribution of these colors is known as light quality (Figure 18–20) .
Different wavelengths affect plant growth in different ways. Plants use the blue and red portions of the light spectrum to manufacture their own food (photosynthesis). Plants grown strictly under blue light are compact, thick stemmed, have dark green leaves, and few flowers. The red and far-red wavelengths encourage flowering, stem elongation, and expansion of plant parts. The green and yellow portions of the spectrum are used in only small quantities, thus these are the colors we see reflected back from the leaves and stems.
Light sources
The light sources available to houseplants are natural sunlight, artificial lights, or a combination of both. Natural sunlight is ideal because it supplies all of the colors of the light spectrum that plants need to develop properly. If natural sunlight levels are inadequate, artificial lights can be an acceptable complement. In addition to increasing light intensity, artificial lights also make it possible to manipulate day-length. Plants need a dark period to develop properly and so should not be grown under light for 24 hours a day. Unfortunately, with artificial lights, the light intensity decreases dramatically as the plant is moved away from the light source. Figure 18–21 shows the light intensity is significantly greater for a plant placed 1 foot away from an artificial light source than 10 feet away. With natural sunlight, the difference in light intensity within a span of 10 feet is very slight—unless the illumination path is blocked.
The most common types of artificial lighting are incandescent, fluorescent, and LED. Incandescent lights, although suitable for human purposes, are not ideal for growing houseplants. They generate mostly red light waves and some infrared light but are very low in the blue range. In addition, incandescent lights produce a great deal of heat, so plants must be placed at a safe distance to reduce the risk of burning foliage. Incandescent lights are approximately three times less energy-efficient than fluorescent lights, and their bulb life is much shorter. Finally, the decrease in light intensity as distance increases is greater for incandescent lights than for any other light source.
Fluorescent lights are the most economical and commonly used lighting in offices, banks, stores, and malls. Generic fluorescent lights produce mostly blue light, and are low in red light. Foliage plants grow well under these fluorescent lights, but blooming plants require extra infrared, which can be supplied by incandescent lights or special horticultural fluorescent lights. These “full-spectrum” lights emit all wavelengths and are quite effective if artificial lights are the only source of light for growing plants. Fluorescent lights are very energy-efficient and give off little heat. Plants can be placed close to these lights without the risk of burning the plant. Typically, a fluorescent light fixture is positioned approximately 12 inches above the plants. As with other artificial light sources, the light intensity levels decrease as the distance between the plant and the light source increases. A 40-watt fluorescent tube produces 120 foot-candles at a distance of 1 foot, but only 75 foot-candles at a distance of 2 feet. Ceiling fluorescent lights provide limited benefit for plants on the floor. As fluorescent tubes or bulbs age, their brightness decreases. When replacing fluorescent lights, remember to acclimatize plants to the new, brighter bulbs to prevent light shock to plants that have become accustomed to the older, dimmer bulbs.
LEDs (light-emitting diodes) are low-heat artificial lighting fixtures (when cooled properly) that are gaining in popularity. Horticultural LED grow-lights are available that emit only the wavelengths used by plants and last much longer than conventional lights, making them very energy-efficient and economical.
Natural Sunlight and the Seasons
As with light intensity, seasonal changes also regulate the light duration of natural sunlight. In summer the sun’s path is higher above the horizon, the day-length is longer, and natural sunlight is more intense than in other seasons. For many plants this is their peak growing period. In winter the sun’s path is lower in the sky and farther to the south, the day-length is shorter, and the sun’s intensity is weaker than in other seasons, so plants receive fewer hours of less intense sunlight due to the sun’s southern angle (Figure 18–22). Because the amount of light plants receive in winter is both less intense and shorter in duration, plant growth decreases or stops during the winter. Therefore plants need less watering and fertilization at this time of the year.
Light Duration
The third aspect of light that effects plant growth is light duration (also called “day-length”). The length of time that plants are exposed to a light source, within a 24-hour period, can trigger physiological responses such as dormancy and flowering. This phenomenon is called photoperiodism. To be more exact, it is the amount of darkness that plants receive that brings about these responses.
Plants are categorized by their photoperiodic sensitivity. Plants that require long hours of darkness in their daily cycle to trigger these responses are called “short-day” plants. Plants that need short periods of darkness are called “long-day” plants (Figure 18–23). The number of hours needed is species-specific. Plant species in which physiological activity is not governed by photoperiod are called "day-neutral" plants.
Light and Temperature
Light and temperature are two closely interwoven aspects of plant growth. Photosynthesis (food production) is regulated by light intensity and light duration, while respiration (food consumption) is regulated by temperature.
Higher temperatures speed up the respiration process, and when air temperatures rise, so does a plant’s demand for food. Many interiorscapes maintain low light intensities and high temperatures, which results in small amounts of food produced, yet large amounts of food consumed. Therefore, if low light is all that is available, maintaining a lower temperature (within a suitable range) will lower plant respiration and prolong life.
Temperature
The tropics have relatively consistent temperatures throughout the year, making tropical species ill-equipped to handle abrupt temperature changes. Most houseplants can tolerate normal, gradual temperature fluctuations, but sudden drops or rises can be detrimental. Houseplants cannot survive outdoors during North Carolina’s winters. Many species experience chilling injury at temperatures below 55°F, while others can withstand temperatures as low as 45°F. Most houseplants grow best in day temperatures around 70°F and night temperatures around 60°F.
Detecting damage in plants exposed to a slight decrease or increase in temperature can be difficult. In many cases, the symptoms do not become apparent until weeks after exposure. Plants exposed to abrupt, significant temperature changes, however, develop symptoms very quickly. Severely cold-damaged leaves and stems appear “water-soaked” due to a breakdown of the plant’s cellular structure. Excessively low or high temperatures can hinder plant growth, cause leaf and flower drop, yellowing, necrosis,wilting, an increased susceptibility to diseases, and ultimately death. The lower the temperature is and the longer the exposure, the greater the damage.
When growing flowering houseplants, decreasing nighttime temperatures intensifies flower color, prolongs flower life, and decreases water loss. To produce these effects, adjust the thermostat to 55°F to 60°F at night.
Indoor Temperature Microclimates
Temperatures can differ from room to room, as well as in different areas of the same room, creating indoor microclimates. Consider these temperature variations when placing plants. Problems arise when temperature differences are undetected or not understood. A minimum/maximum thermometer helps pinpoint such differences.
Although the window sill is a popular place to grow houseplants, sunlight shining directly through a window can result in temperatures high enough to damage tender plant tissue. Conversely, energy-inefficient windows can allow temperatures to drop too low for tropical plants. Moving plants in toward the room and 6 inches away from a window is usually enough distance to protect plants from excessive heat or intense cold.
Plants are subject to blasts of hot or cold air when placed near exterior doors. In addition, the extra air movement at building entrances can increase plant transpiration, requiring an increase in watering and possibly resulting in tissue damage. Dramatic, eye-catching planters are often positioned at business entrances or in home foyers as showcase pieces. Tropical plants, however, can suffer chilling injury if exposed to cold air. Place planters far enough away from outside doors to prevent cold damage. Use temperate plants where cold-temperature blasts are possible.
Temperatures in unheated sunrooms can fluctuate so drastically within a 24-hour period that houseplants do not have time to adjust. If the outdoor daytime temperatures are suitable, it may be necessary to bring plants into heated areas at night. Fireplaces, radiators, appliances, and electronics make risky display areas due to the generated heat. The potting mix in a plant container placed on a warm refrigerator or television can dry out quickly, making more frequent watering necessary. Root tissue may even experience burns if the heat given off is too high.
Do not place plants on or near heat registers, radiators, or air conditioners. The air emitted from these devices is too extreme for plants.
Temperature Acclimatization
When moving tropical plants outdoors for the summer, wait until the nighttime temperatures are consistently above 60°F and protect plants from cold winds. In the winter, bring plants inside before the nighttime temperatures drop below 60°F. Move plants to an indoor area where the temperature and light exposure are similar to that of the outdoor location. Then ease the plants slowly into the new environment.
Not all houseplants have the same temperature requirements. Temperature preferences for houseplants are categorized as follows:
Warm: Day temperatures 70°F to 80°F, night temperatures 64°F to 70°F
Moderate: Day temperatures 60°F to 65°F, night temperatures 55°F to 60°F
Cool: Day temperatures 50°F to 60°F, night temperatures 45°F to 55°F
Relative Humidity
As with light (intensity, quality, and duration) and temperature, houseplants require certain humidity levels in the surrounding air to flourish. Relative humidity is the amount of water vapor (moisture) in the air, expressed as a percentage, compared to the maximum amount of moisture the air can hold at that temperature.
Foliage plants native to tropical rainforests are accustomed to average relative humidity levels of 60% to 90%, and levels during nursery production are often kept as high as 85% to 95%. Many houseplants can grow well in relative humidity levels of 40% to 60%. In our buildings and homes, however, we maintain average relative humidity levels of only 10% to 15%. This is due to the increased drying effects of heating and air-conditioning systems.
The rate of plant transpiration (water lost from plant surfaces) is influenced by both relative humidity and the temperature in the surrounding air. Low relative humidity and high temperatures increase the rate of transpiration. Increased transpiration increases a plant’s need for water, so high temperature and low humidity conditions require more frequent watering.
Conversely, the cooler the air is, the higher the relative humidity is and the lower the transpiration rate. So care should be taken not to overwater in these conditions. Providing an environment with moderate temperatures and high relative humidity slows transpiration, helping to maintain overall plant hydration.
Low relative humidity can affect both humans and plants adversely. To minimize human health problems caused by poor indoor air quality, the Occupational Safety and Health Administration, OSHA, recommends that buildings be maintained at a relative humidity of 30% to 60%. Plants grown in low relative humidity conditions exhibit such stress symptoms as leaf yellowing, curling, drop and marginal necrosis, dead spots or dead tips on leaves, flower bud death, and flower drop.
Although indoor humidity levels are often too low for most houseplants, there are various ways to increase indoor humidity levels around plants:
- Humidifiers: The most effective way is to place a humidifier in the immediate growing area. In tightly closed buildings, keep humidity from rising above 60% to prevent mold or mildew growth.
- Pots of water: Place a nonflammable container full of water on a hot radiator or a wood stove. The heat evaporates the water, adding moisture to the air.
- Grouping: Grouping plants closely together forms a canopy of leaves. The leaves transpire and create moisture but also trap moisture from the air, creating a humid microclimate around the plants (Figure 18–24). Maintain air circulation around the group to reduce the possibility of foliar diseases.
- Pebbles in a saucer filled with water: Fill the saucer with water just below the surface of the pebble layer (Figure 18–25). As the water in the saucer evaporates, the humidity in the air increases. Do not allow the plant container to contact the water in the saucer. Fertilizer that is flushed out of the pot becomes concentrated as leachate in the saucer. If the pot contacts the leachate, it can be absorbed back into the potting mix and may burn the roots. In addition, the pot can become waterlogged, causing the plant to develop root rot.
Misting plants with a spray bottle is not useful as it raises the relative humidity for only a short time. If mist is necessary, spray plants early in the morning so that there is enough radiant heat during the rest of the day to dry the foliage. Water remaining on foliage, accompanied by cool, damp night conditions, creates an ideal environment for disease development. Also, rooms such as kitchens, bathrooms, and laundry rooms are often touted as providing higher humidity than other rooms in the home. This may be true for short spurts of time, but foliage plants require consistent humidity levels as opposed to levels that fluctuate. Oscillating humidity levels impart as much damage as constantly inadequate levels.
Lastly, there are many species grown as houseplants that prefer low humidity. Plants such as cacti, succulents, and bromeliads grow well in low relative humidity. These plants have thick, fleshy, waxy, or hairy leaves that are adapted for maintaining plant hydration. This is typical of species native to climates that are consistently dry or exhibit long periods of drought.
Air Circulation
Outdoor plants are intermittently exposed to winds and breezes that help reduce diseases, encourage insects to relocate, build strong roots for anchorage, blow dead leaves and branches out of plant canopies, and dry out moist potting mixes.
Houseplants can also benefit from air circulation. Provide supplemental air movement via a ceiling, floor, or table fan to maintain constant temperatures throughout a room, disperse drafts, lower disease potential, and vent gases that develop from heating systems. Avoid aiming fans directly at plants, as this will dry them out. Instead, maintain a low volume of constant, indirect air flow, which will provide enough ventilation for houseplants.
Grooming
Grooming (cleaning and pruning) houseplants periodically is necessary to remove dust, keep them attractive and in desirable shape, and rid them of pests. This entails washing dust-coated dirty leaves, removing dead plant tissue, shaping up unruly growth habits, and watching for insects and diseases.
Leaves of indoor plants can become coated with a heavy layer of dust in a surprisingly short amount of time. Indoor dust and grime that accumulate on leaf surfaces will clog stomates, reducing transpiration and restricting gas exchange. Dust buildup also blocks sunlight, reducing photosynthesis, and is very unattractive.
Wash leaves every two or three months to keep houseplants beautiful and healthy. To clean glabrous leaves, wash upper and lower leaf surfaces with a soft, moistened cloth. Use a make-up or soft painters brush to clean dust from pubescent leaves. Place plants in the shower to wash away dust. Or, in warm weather, rinse them outside with a garden hose. Use warm water between 60°F to 75°F to prevent damaging the plant with excessively hot or cold temperatures. Avoid using leaf-shine products to clean foliage because these products attract dust, clog stomata, and slow growth.
To protect plant health, remove dead, damaged, or diseased leaves, stems, and flowers as quickly as they appear.
Pruning can also restore a plant’s initial growth habit, reduce plant size, thin-out overgrowth, or artistically shape plants into desired forms. Always use sharp, sanitized pruners so as not to fray plant tissue when cutting and to prevent the spread of diseases by contaminated pruner blades.
Whether pruning to promote health or beauty, always cut stems just above a node (Figure 18–26) or where they attach to a larger branch. Remove undesired leaves where they attach to the stem. If less than a third of a leaf is damaged, trim off all but a slight amount of the dead leaf-tips. This will prevent the leaf from continuing to die back from the tip (Figure 18–27).
It is normal for aging leaves and flowers to abscise, or detach, when they are old. Dead plant tissue that falls onto the potting mix, however, is fodder for diseases. Dispose of all detached plant tissue promptly to decrease disease development.
Plants that receive light predominantly from one direction often lean toward the light source to maximize light absorption. This is called phototropism To encourage uniform growth, rotate plants by turning the container clockwise about 90 degrees (a ¼ turn) every three months.
Lastly, look for signs of insect and disease problems when grooming. Such signs include sticky leaves (“honeydew”), white cottony masses (scale or mealy bugs), brown bumps on stems (armored scale), and gray fuzzy growth on leaves (gray mold or powdery mildew). Eradicate infestations using methods described in the “Pest Management” section of this chapter.
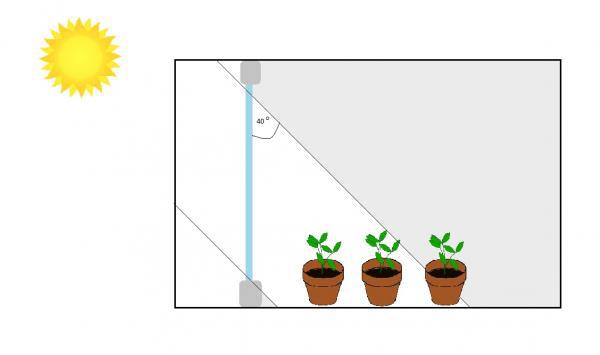
Figure 18–19. Plant placement in relation to a window influences light intensity levels.
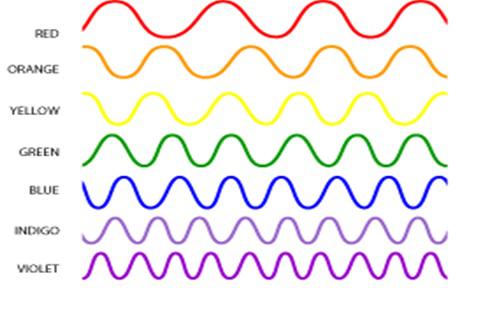
Figure 18–20. Light is a blend of different colors measured in wavelengths. The distribution of these colors is called light quality.
NASA CC0
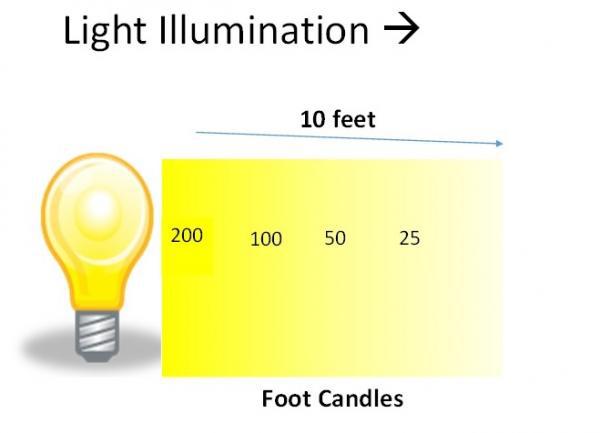
Figure 18–21. Light intensity from an artificial light source rapidly decreases as distance increases.
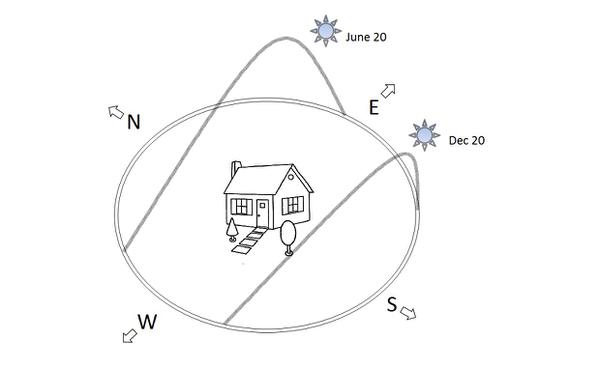
Figure 18–22. The sun's path in the summer is higher than in the winter.
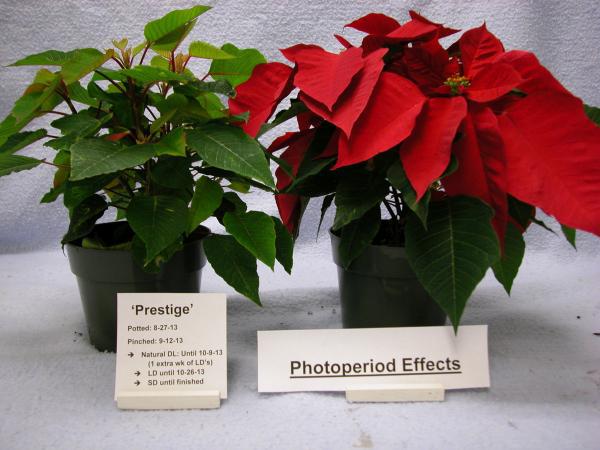
Figure 18–23. Photoperiod demonstration on Poinsettia 'Prestige Red'. Short Day exposure (right): More than 12 hours of darkness in a 24-hour period. Long Day exposure (left): Less than 8 hours of darkness in a 24-hour period2.
Diane Mays CC BY 2.0
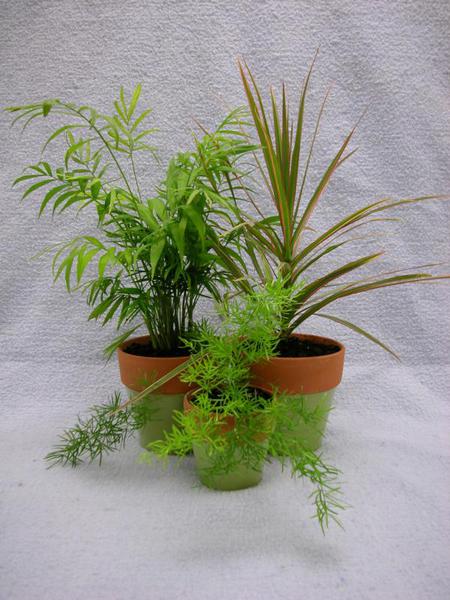
Figure 18–26. Prune stems above a node to a branch to which they are attached to prevent disease from entering extraneous internode tissue.
Kathleen Moore CC BY 2.0
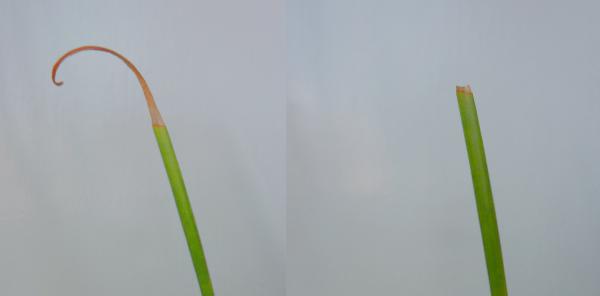
Figure 18–27. Prune off at leaf tip leaving a small margin of dead tissue to prevent the leaf from continuing to die back.
Kathleen Moore CC BY 2.0
Integrated Pest Management
Insects
For insect management, the best defense is to scout often and take immediate action to eradicate if pests are found. Most insects harbor in inconspicuous areas of the plant to hide from predators. Because of this, insects are often overlooked until the plant shows a decline in health. Each insect species prefers to feed on and live in a particular plant part or parts. Learning an insect’s favored locations greatly increases the ability to control the population.
Aphids are soft-bodied, piercing-sucking insects commonly found in clusters along stems, on tender growing tips, and on the undersides of leaves (Figure 18–28). Aphids come in an array of colors—peach, green, and black are the most common. Often the cast-off skins (seen as white flecks) and excreted honeydew (sticky, clear mucilage) are more noticeable than the aphids themselves. Aphids are often difficult to manage because they can wedge deeply into developing, unfurling growing tips and are thus protected. Their soft bodies, however, make them somewhat easier to manage than other pests . Spray plants outside with a strong stream of water or use a soapy water spray. Be sure to cover undersides of leaves. Insecticides are rarely warranted.
Scales cover themselves with coating materials for protection. Two common types are found on houseplants. Soft scales are covered by a waxy secretion, and armored scales develop dark-brown shell-like coverings. Soft scales are round, flat, light brown or cream-colored insects that feed on the undersides of leaves and along stems (Figure 18–29). They produce chlorotic spots on leaf surfaces and along stems as chlorophyll is sucked from the plant. The adult armored scales are oval insects, covered with a dark-brown shell, resembling a humped horseshoe crab (Figure 18–30). They are usually found in a procession on plant stems. Scales do not have wings and move by crawling. Therefore, distancing plants from each other prevents crawlers from easily moving from plant to plant. Control can be accomplished by blasting the scales with a fine, pressurized (but gentle) stream of water. Although laborious, removing the insects by hand is one eradication technique. But hand removal is effective only when the population is small. Brushing the insects with a soft toothbrush dipped in isopropyl alcohol can be effective. A heavy infestation is best eradicated by spraying with horticultural soap or oil as per label instructions. Scales can require repeated treatments, so be thorough and persistent.
Mealybugs are oval-shaped, peach-colored insects often concealed under a soft, cottony covering that gives them a mealy appearance (Figure 18–31). The covering can protect both adults and eggs from pesticides. Mealybugs wedge themselves into crevices on the plant—such as leaf axils and the undersides of leaves. If the population is small, mealybugs can be removed by dabbing each insect with a cotton swab dipped in isopropyl alcohol. Mealybugs can also be blasted off outside with a hose. Set the stream of water to a gentle pressure, and aim directly at the insects, being careful not to damage plant tissue. As with scale, persistence and regular treatments are necessary to eradicate mealybugs.
Thrips are very small, slender, brown insects that burrow into immature growing tips and flower buds, feeding on the tender tissue, pollen, and petals (Figure 18–32). Damage includes brown, distorted, unattractive flower petals, distorted leaf growth, and chlorotic hash marks on leaf surfaces. Although thrips mostly prefer to feed on flowers, occasionally they infest the foliage of houseplants and bedding plants, resulting in necrotic leaf tissue and holes in leaves. To manage, remove all infected flowers, buds, and plant debris and discard. Use a sticky card to trap adults. Severe infestation may warrant a registered bacterial insecticide.
Spider mites are not insects but relatives of spiders. They suck chlorophyll out of plant cells from the underside of the leaf, causing tiny spots to appear on the upper leaf surface (Figure 18–33). If the population is abundant, spider mites feed on the upper leaf surfaces and growing tips. It is at this time that small, thin webs are seen at the growing points. Spider mites prefer a dry environment and can be prompted to move along by misting infested plants regularly. Perform misting outside so mites do not relocate to a different indoor houseplant. If plants become heavily infested and washing mites off is not working, discard plants.
Fungus gnats are black insects, approximately 1/8-inch long. The adult fungus gnat looks like a miniature mosquito with dark wings, long legs, and antennae (Figure 18-34). The maggots produced by fungus gnats have these characteristics: a round, shiny-black head and a white body. Fungus gnats inhabit moist, shady areas and prefer a soil that includes peat as a component. They lay their eggs on the surface of moist potting mix, where the maggots, when hatched, feed on young roots and stems. Prevention is key and can be accomplished by using a potting mix composed primarily of bark and allowing it to dry between watering. Avoid the use of compost on affected plants, and use a sticky trap to capture adult gnats. Sanitize all gardening tools and containers to prevent infestation. A registered insecticide is rarely needed but can be used to kill the adults.
Shore flies are often found on overwatered plants. Shore flies prefer warm, wet conditions and breed in algae growing on potting mix surfaces. The adult shore fly looks like a miniature house fly and is slightly larger than the adult fungus gnat (Figure 18-35). Unlike fungus gnats, neither the adult nor larvae harm plants. However, shore flies relieve themselves on foliage, leaving behind unattractive specks of black droppings. Apply the same management practices as for fungus gnat infestations: Allow media to dry out as much as possible without harming the plant, avoid the use of compost on affected plants, and use a sticky trap to catch adult flies.
Diseases
Many houseplant diseases are caused by bacteria and fungi. Often the primary cause is plant stress due to unfavorable growing conditions. The best management methods are proper watering, sanitation, and prevention. Clean and sanitize pots, pruners, trowels, and other garden tools with a non-bleach household disinfectant product.
Fungal leaf spots first appear as small yellow spots. The spots enlarge, and the center turns light-tan to dark-brown (Figure 18-36). The diseased areas may run together. Sometimes, fungal, threadlike strands may appear in the affected area. Avoid wetting or misting the foliage. Isolate the plant, and remove the diseased leaves with a pair of scissors. Clean the blades between each cut by dipping them into a freshly made solution of a non-bleach household disinfectant product and then wiping off any excess with a clean cloth. This avoids spreading the disease.
Fungal root rots favor cool, wet potting mixes. These fungi enter the plant by attacking small roots, and can spread through most of the root system in a few days. Symptoms produced by infected plants include little or no new top growth, a change in color from green to yellow, and sometimes spotting and drying of the foliage (Figure 18-37). Prevention is the best control method; control after the fact is nearly impossible. Discard infected plants as they are unlikely to recover.
Bacterial foliar diseases can occur with high humidity, high temperatures, and plants crowded closely together, reducing air circulation. Misting the foliage is a major cause. Foliar symptoms include tip burn, leaf spots, leaf blight, rot, or collapse of plant tissue. Leaf spots are often angular lesions bordered by leaf veins (Figure 18-38). Spots are often light-green, translucent, and/or water-soaked with a yellow halo. As the disease spreads, the centers of the spots turn light-brown to dark-brown. Infected plants do not recover and should be discarded.
Sooty mold is a grey-black mold usually found on the leaves of plants that are infested with honeydew-excreting insects. The spores of the sooty mold germinate in the sweet, excreted droppings of the insects, often covering the leaf surface (Figure 18-39). Sooty mold is not directly harmful to plants. In fact, it can prove to be a helpful indicator of a honeydew-secreting-insect infestation. The detriment comes when the sooty mold is so thick that it interrupts the leaf’s photosynthetic process. Clean sooty mold off with a sponge and warm water, and manage the honeydew excreting insects.
Plant Problems and Possible Causes
Rapid leaf drop:
- Extreme temperature or light changes
- Root loss from transplanting
- Overwatering
- Underwatering
Gradual leaf drop:
- Insufficient light
- Insufficient fertilizer
- Overwatering
- Underwatering
Wilting of the entire plant:
- Exposure to cold
- Excess fertilizer
- Overwatering
- Underwatering
Loss of leaf color:
- Excess light
- Insufficient light
- Insuff icient fertilizer
- Overwatering
- Underwatering
- Spider mite damage
Spotted leaves:
- Leaf scorch
- Sunburn
- Cold water on leaves (particularly African violets)
- Bacterial or fungal disease
- Air pollution
- Overwatering
- Spider mite damage
Leaf tips turning brown:
- Low humidity
- Incorrect potting mix pH
- Air pollution
- Poor water quality (fluoride, sodium)
- Excess fertilizer
- Overwatering
- Underwatering
Stunted plants:
- Excess fertilizer
- Overwatering
- Underwatering
- Root-bound
- Insufficient light intensity
- Insufficient fertilizer
Leaf droop or curl:
- Air pollution
- Underwatering
- Aphids
Pale and spindly new growth:
- Insufficient fertilizer
- Insufficient light
- Underwatering
Wilted or blackened new growth:
- Cold or hot drafts
- Sunburn
- Temperature too warm
- Temperature too cold
- Excess fertilizer
- Underwatering
White spots on leaves:
- Spider mites
Cottony masses on stems:
- Mealybugs and some scale species
Dark bumps on leaves or stems:
- Armored scales
Sticky spots under the leaves:
- Honeydew excreted by aphids, mealy bugs, scale, or white flies
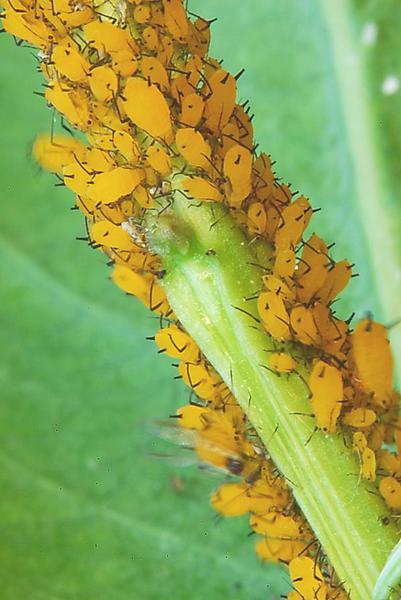
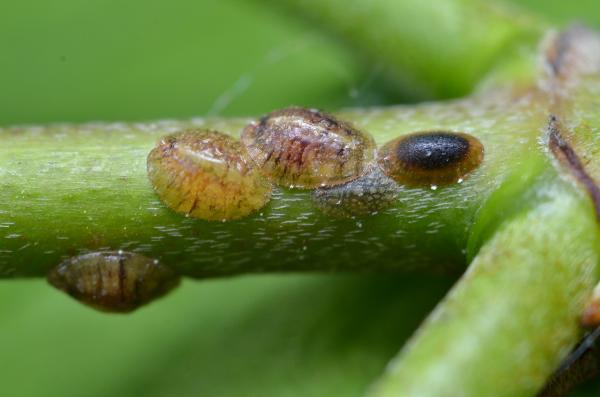
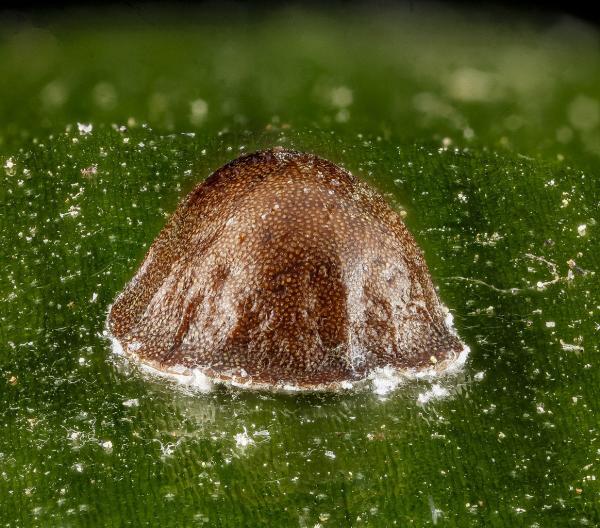
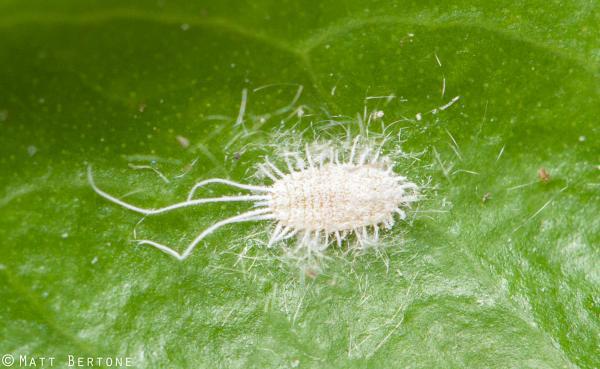
Figure 18–31. A mealybug.
Matt Bertone

Figure 18–32. Thrips.
Matt Bertone
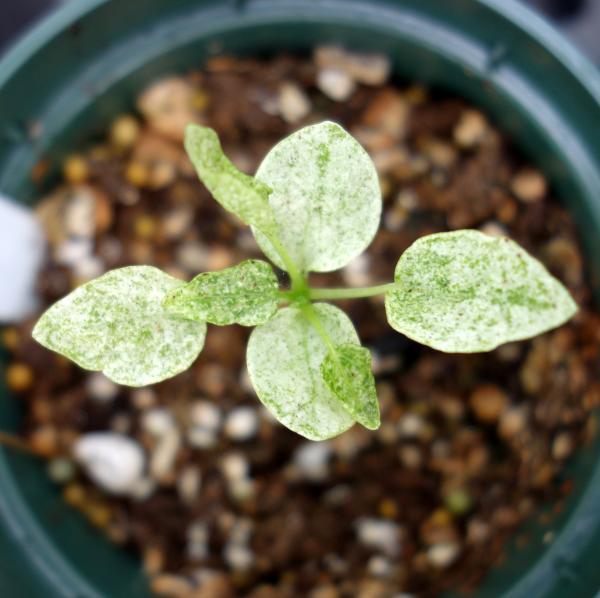
Figure 18–34. A fungus gnat.
Matt Bertone
Figure 18–35. Shore fly.
Matt Bertone
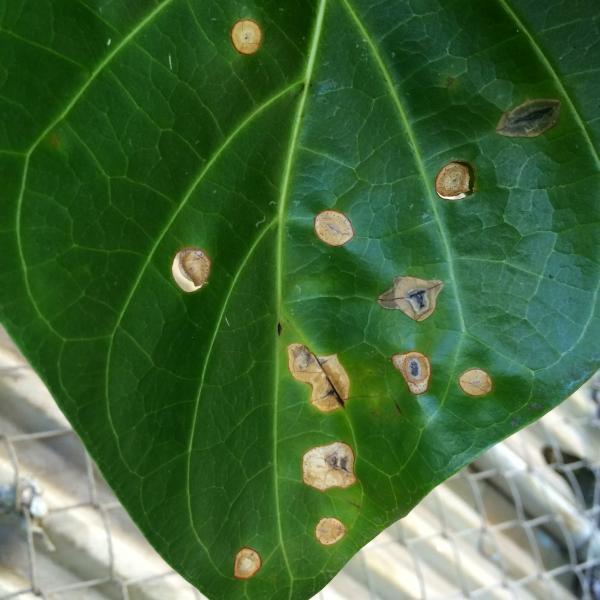
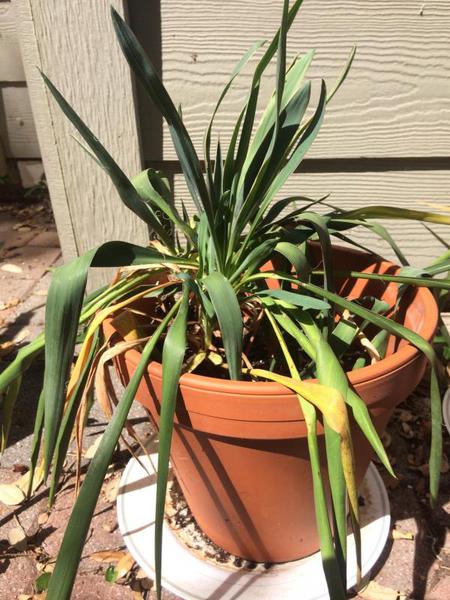
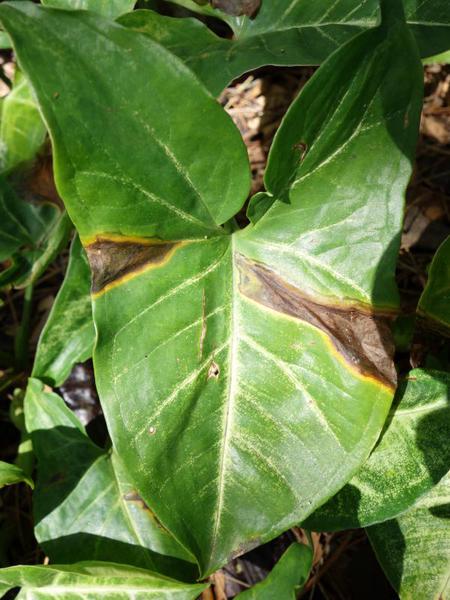
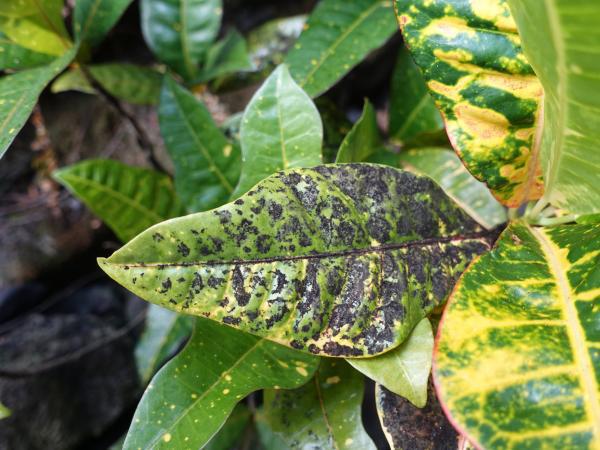
Record Keeping
As with other hobbies and important tasks, keeping a journal or record of what was done and how it worked is helpful. The information can be reviewed later and assist in assessing future strategies. Records can be kept in a notebook or on a garden calendar. Items that can be included are container size and description, plant varieties, dates of planting, how many species were planted and how many survived, descriptions of diseases or pests with any actions taken and their effects, dates of harvest, amount of rain, amount and type of fertilizer used, evaluation of overall results, ideas for next year, and photographs of plants. See Appendix A, “Garden Journaling,” for more information on recordkeeping.
Frequently Asked Questions
Outdoor Containers
1. How can I grow vegetables if I live in an apartment (or if I am short on space)?
Read the "Outdoor Containers" section of this chapter, and also refer to the following NC State Extension publications:
AG-753, How to Create a Container Garden for Edibles in the North Carolina Piedmont. This publication provides good information regarding container selection; planting media; plant selection; designing a vegetable container garden; and light, water, and nutrient requirements for vegetables, herbs, and fruits.
AG-748, Container Garden Planting Calendar for Edibles in the Piedmont. This publication provides a calendar with the time of year for planting different types of vegetables, herbs, and fruits.
2. I just found a beautiful ceramic pot, but there are no drainage holes in the bottom. Can I still use it?
The best thing to do would be to drill a hole (or holes) in the bottom of the pot. If that is not possible, you still may be able to use it if you find a smaller pot that has holes in the bottom and will fit inside the decorative pot. Remove the small pot containing the plant when you want to water, and put it back in the decorative pot after the water drains away.
Indoor Containers
1. My houseplant is dying! Am I overwatering or underwatering it? What can I do to save it?
How much and how often are you watering the plant? Thoroughly wet the potting mix when you water, and then allow the potting mix to dry out before watering again. To check for underwatering or overwatering, remove the plant from the pot and examine the roots. An underwatered plant’s roots are white and the potting mix will be very dry. Fully soak the root ball in water and repot. Be sure the plant is not root bound. It may need to be in a larger pot. If the plant is being overwatered, the roots will be brown and soft and may have an odor if they are beginning to rot. It may or may not be possible to save the plant. Trim off the brown roots and repot the plant, possibly putting it in a smaller container. Make sure any pot used has drainage holes.
2. I have very little light in my home; which houseplants would you recommend?
Try cast iron plants (Aspidistra elatior), pothos (Epipremnum aureum), Chinese evergreen (Aglaonema modestum), or Algerian ivy (Hedera canariensis).
3. I moved my weeping fig (Ficus benjamina) to another room, and now it is dropping leaves. What is wrong?
You moved it! All plants tend to drop a few leaves when they are moved to a new environment. Ficus benjamina has a reputation for dropping leaves even if the environment is the same. As long as the light conditions in the location are the same and you are continuing your same watering and fertilizing schedule, the leaf drop should stop within a few weeks. After a few weeks if you are still noticing leaf drop, be sure to check that there are no drafts or other environmental changes in the new location that could be negatively affecting the plant.
4. Why are there never any flowers on my African violet?
There could be many reasons why your African violet is not blooming, but the most common reason is not enough light. Try moving it to a brighter location. Not enough humidity can cause flower buds to drop off before they bloom. Overfertilizing and underfertilizing can also affect flowering. It can be difficult to know the triggers for making a houseplant flower. Mimicking conditions in the plant’s natural habitat, potting mix moisture fluctuations, and temperature fluctuations may be necessary to get a plant to flower.
5. There are little black bugs flying around my plant near the surface of the potting mix. What causes the bugs, and how can I rid myself of the problem without harming the plants?
Those bugs are probably fungus gnats. Frequent or excessive watering encourages their development. You can usually get rid of them by reducing the frequency of watering and allowing the potting mix to dry more between watering. They are not very harmful to plants; they are mostly a nuisance to people.
6. How can I get my poinsettia (or Christmas cactus) to bloom again?
Both of these species are short-day plants, meaning they need short days and long nights to trigger flowering. You can recreate these short days by putting a box over your plant or putting it in a closet for part of the day. Both plants need to be in good strong light during the part of the day when they are not covered. Poinsettias (Euphorbia pulcherrima) need 11 hours or less of light for 10 weeks to initiate flowering. Christmas cactus plants (Schlumbergera spp.) need days of 11 hours of light or less for six weeks and require temperatures between 65°F to 70°F. Christmas cactus are quite sensitive to temperature. Several weeks at 55°F initiates flowering no matter the day length. If temperatures are above 70°F, flowers will never form.
Further Reading
Creasy, Rosalind. Edible Landscaping. 2nd ed. San Francisco, California: Sierra Club Books, 2010. Print.
Dewolf, Gordon P. Taylor's Guide to Houseplants. New York: Houghton Mifflin Company, 1987. Print.
Dole, John M., and Harold F. Wilkins. Floriculture: Principles and Species. 2nd ed. Upper Saddle River, New Jersey: Prentice Hall, Inc., 2004. Print.
Hastings, Don. Month-By-Month Gardening in the South: What to Do and When to Do It. 2nd ed. Atlanta, Georgia: Longstreet Press, 1999. Print.
Hessayon, D. G. The House Plant Expert. London: Expert Books, 1993. Print.
Hessayon, D. G. The House Plant Expert Book Two. London: Expert Books, 2005. Print.
McGee, Rose Marie Nichols, and Maggie Stuckey. McGee & Stuckey's Bountiful Container: Create Container Gardens of Vegetables, Herbs, Fruits, and Edible Flowers. New York: Workman Publishing Company, Inc., 2002. Print.
Miracle-Gro Complete Guide to Houseplants. Hoboken, New Jersey: John Wiley & Sons Inc., 2008. Print.
Ortho All about Houseplants. Hoboken, New Jersey: John Wiley & Sons Inc., 2007. Print.
Pleasant, Barbara. The Complete Houseplant Survival Manual: Essential Know-How for Keeping (Not Killing) More than 160 Indoor Plants. North Adams, Massachusetts: Storey Publishing, 2005. Print.
Reich, Lee. Landscaping with Fruit. North Adams, Massachusetts: Storey Publishing, 2009. Print.
Schuler, Stanley, ed. Simon & Schuster's Guide to House Plants. New York: Simon & Schuster Inc., 1986. Print.
Wolverton, Dr. B. C. How to Grow Fresh Air: 50 House Plants That Purify Your Home or Office. New York: Penguin Books, 1997. Print.
Chapter Text Hyperlinks
Container Garden Planting Calendar for Edibles in the N.C. Piedmont, AG-748
A greenhouse experiment finds water-sorbing polymers do not conserve water, University of California
How to Create a Container Garden for Edibles in the North Carolina Piedmont, AG-753
Container Vegetable Gardening, HIL-8105
For More Information
NC State Resources
- Container Garden Planting Calendar for Edibles in the N.C. Piedmont, AG-748
- How to Create a Container Garden for Edibles in the North Carolina Piedmont, AG-753
- Mini-Gardening, HIL-8102
More NC State Resources
Other Resources
- A greenhouse experiment finds water-sorbing polymers do not conserve water, University of California
- Growing Plants in Containers, by Oregon State University
- Indoor Air Quality Investigation, OSHA Technical Manual, Section III: Chapter 2
- Top 10 Vegetables for Containers, by Missouri Botanical Garden
Contributors
Authors:
Diane B. Mays, Department of Horticultural Science
Kim Richter, Department of Horticultural Science
Lucy Bradley, Assistant Professor and Extension Specialist Department of Horticultural Science
Julie Sherk, Assistant Professor Department of Horticultural Science
Mark Kistler, Assistant Professor Department of Agriculture and Human Sciences
Joe Neal, Professor and Extension Specialist Department of Horticultural Science
Artwork: Mary Archer, Department of Horticultural Science, Renee Lampilla Extension Master Gardener Volunteer
Contributions by Extension Agents: Donna Teasley, Michelle Wallace, Paige Patterson, Randy Fulk, Thomas Glasgow, Ben Grandon
Contributions by Extension Master Gardener Volunteers: Jackie Weedon, Karen Damari, Connie Schultz, Edna Burger, Kim Curlee
Content Editors: Lucy Bradley, Associate Professor and Extension Specialist, Urban Horticulture, NC State University; Director, NC State Extension Master Gardener program;
Kathleen Moore, Urban Horticulturist
Copy Editor: Barbara Scott, Debbi Braswell
How to cite this chapter:
Mays, D., K. Richter, L.K. Bradley, J. Sherk, M. Kistler, and J. Neal. 2022. Plants Grown in Containers, Chapter 18. In: Moore, K.A., and L.K. Bradley (eds). North Carolina Extension Gardener Handbook, 2nd ed. NC State Extension, Raleigh, NC. <http://content.ces.ncsu.edu/18-plants-grown-in-containers>
Publication date: Feb. 1, 2022
AG-831
Other Publications in North Carolina Extension Gardener Handbook
- 1. Soils & Plant Nutrients
- 2. Composting
- 3. Botany
- 4. Insects
- 5. Diseases and Disorders
- 6. Weeds
- 7. Diagnostics
- 8. Integrated Pest Management (IPM)
- 9. Lawns
- 10. Herbaceous Ornamentals
- 11. Woody Ornamentals
- 12. Native Plants
- 13. Propagation
- 14. Small Fruits
- 15. Tree Fruit and Nuts
- 16. Vegetable Gardening
- 17. Organic Gardening
- 18. Plants Grown in Containers
- 19. Landscape Design
- 20. Wildlife
- 21. Youth, Community, and Therapeutic Gardening
- Appendix A. Garden Journaling
- Appendix B. Pesticides and Pesticide Safety
- Appendix C. Diagnostic Tables
- Appendix D. Garden Tools
- Appendix E. Season Extenders and Greenhouses
- Appendix F. History of Landscape Design
- Appendix G. Permaculture Design
- Appendix H. Community Gardening Resources
- Appendix I. More NC State Resources
- Glossary
N.C. Cooperative Extension prohibits discrimination and harassment regardless of age, color, disability, family and marital status, gender identity, national origin, political beliefs, race, religion, sex (including pregnancy), sexual orientation and veteran status.